Contents
0%Adding subtitles in DaVinci Resolve is quick once you stop fighting it. The trick most guides skip is that Resolve is a great subtitle editor and a mediocre subtitle transcriber. So the clean workflow is: bring in an accurate SRT that already has the right words on the right frames, then let Resolve do what it is good at, which is placing, styling, and exporting them.
This guide walks the whole SRT-first path: how to get a correct SRT first, File > Import > Subtitle, dragging it to the timeline, styling with the Inspector, fixing any timing offset, exporting burned-in versus soft captions, non-English subtitles, and the import errors that trip people up.
Here is the fast version, then the detail on each step.
Get an accurate SRT
Generate an SRT from your exact script or lyrics so every word and spelling is already correct before Resolve ever sees it.
Import it
In the Edit page, go to File > Import > Subtitle and pick your .srt file. It lands in the Media Pool.
Drag it to the timeline
Drop the subtitle clip onto your timeline. Resolve creates a subtitle track and lays every caption on the right frame.
Style, then export
Set the font, size, and position in the Inspector, then export burned-in or as a separate file on the Deliver page.
Get an Accurate SRT First (Why This Shots Retyping)
DaVinci Resolve does have its own transcription and "Create Subtitles from Audio" feature, but like every auto-caption tool it guesses the words from the audio. That is fine for clean English narration and painful for everything else: brand names, proper nouns, slang, sung word-endings, and any language other than English come back wrong. Then you are proofreading and retyping inside Resolve, one caption block at a time, which is the slowest possible place to fix text.
The better move is to arrive with an SRT that is already correct. If you already have the script, the voiceover copy, or the song lyrics, you own the exact words. The only thing you are missing is the timing, which is the one thing a machine is genuinely good at.
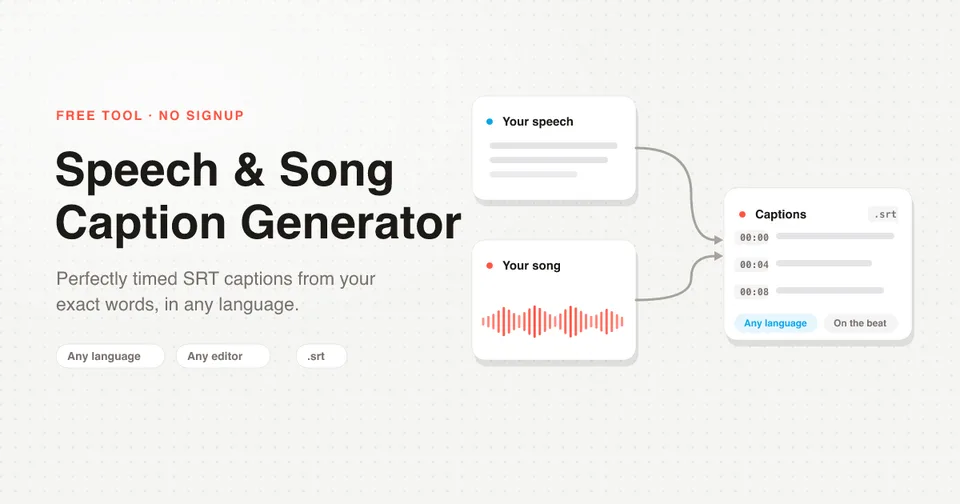
That is exactly what our free Speech & Song Caption Generator does. You upload your video or audio and paste your own exact script or lyrics. It transcribes the audio only to work out when each word is spoken or sung, then snaps your text onto that timing and hands you a downloadable SRT. Your words never change. Because you supplied them, nothing is ever misspelled and it works in any language: Spanish, Polish, Arabic, Hindi, Japanese, or anything else.
Get an accurate SRT (free)The output is a standard .srt, so once you have it you follow the exact steps below. No timestamps to type, no signup.
An SRT is a plain, portable subtitle file that any editor reads. Importing one keeps your words verbatim and lets you reuse the same file in CapCut, Premiere Pro, or Final Cut without redoing the work. Auto-transcribing inside Resolve locks the words to whatever the machine heard.
Step 1: Import Your SRT (File > Import > Subtitle)
Open your project and go to the Edit page (the filmstrip icon at the bottom). Then:
- From the top menu, choose
File > Import > Subtitle. - Select your
.srtfile and confirm.
The subtitle now appears in your Media Pool as a subtitle clip, sitting alongside your video and audio. Importing does not put it on the timeline yet. It only adds it to the project, which is the step people most often miss.
You can also drag the .srt file straight from your desktop into the Media Pool if you prefer, or right-click in the Media Pool and choose Import. Either way, the goal is the same: get the subtitle clip into the project so you can place it next.
Step 2: Drag the Subtitle Onto the Timeline
From the Media Pool, drag the subtitle clip up onto your timeline. Resolve automatically creates a dedicated subtitle track (marked with a small speech-bubble icon) at the top of the timeline and lays out every caption as its own block, each positioned on the frame its timecode specifies.
Because your SRT already carries real timecodes, the captions land in sync immediately. Play the timeline back and you should see each line appear right as it is spoken or sung.
Every subtitle line becomes an individual clip on the track. You can click any one of them to move it, trim its edges, or edit its text, without disturbing the others. This is why an accurate SRT is worth so much: you are adjusting, not authoring.
Step 3: Style Your Subtitles in the Inspector
Click a subtitle block on the timeline, then open the Inspector (top right). You will get a Caption panel with the controls that matter:
- Font family, size, and color for the text itself.
- Background, stroke, and drop shadow so captions stay readable over busy footage. A subtle box or outline is what keeps text legible on social video.
- Position and alignment to place the caption where you want it, for example lifted above a lower-third or clear of a platform's UI.
To avoid restyling every line by hand, set one caption the way you want it, then apply that look to the whole track. In recent Resolve versions you can use the Track Style controls, or right-click a styled caption and copy its style to the other subtitles. Do this once and all captions inherit the same font, size, and position.
For vertical formats like TikTok, Reels, and Shorts, keep captions clear of the bottom UI and the top. Turn on title-safe overlays in the viewer, and if you generated the SRT with our tool, use its vertical (9:16) mode so each line is short enough to fit the narrow frame instead of wrapping awkwardly.
How to Fix Subtitle Timing Offsets
With a correct SRT the timing is usually already right. When it is not, there are two kinds of fixes.
A single caption is slightly off. Grab the subtitle block and slide it left or right to reposition it, or drag its edge to trim when it appears and disappears. This is per-line manual timing, useful for one stubborn caption.
Everything is uniformly early or late. If the entire track is shifted by the same amount, select all the subtitle blocks (click the first, then shift-click the last) and drag them together so they move as one, restoring sync in a single action.
The captions drift more the longer the video plays. That is almost always a frame-rate mismatch: the SRT was built against one frame rate and your Resolve project is set to another, so the gap compounds over time. Match your project frame rate to the source, or regenerate the SRT against the actual video. Generating the SRT from the same file you are editing avoids this entirely.
Burned-In vs Soft Subtitles on Export
When you are happy, go to the Deliver page (the rocket icon). Scroll the render settings until you reach the Subtitle Settings section, tick Export Subtitle, and choose how the captions leave Resolve:
- Burn into video. The captions are rendered permanently onto the picture. Nobody can turn them off. This is what you want for TikTok, Reels, YouTube Shorts, and paid social, where most people watch muted and the captions must always show.
- As a separate file. Resolve writes a sidecar
.srtnext to your video. The captions stay toggleable and editable, which is handy if you want to keep iterating or hand the file off. - As embedded captions. The captions ride inside the exported file as a soft, switchable track (for example for a YouTube upload where the viewer can toggle them).
Short-form social and ads: burn them in so they always play. Long-form YouTube or anything that needs accessibility toggling or translation later: export a separate or embedded track so the captions stay flexible.
Adding Non-English Subtitles in DaVinci Resolve
This is where the SRT-first workflow really pays off. Resolve handles Unicode text, so an SRT in Spanish, French, Portuguese, Polish, Arabic, Hindi, Japanese, Korean, or any other language imports and displays correctly, with every accent and diacritic intact, as long as you do one thing: pick a font that actually contains those glyphs.
Some default fonts do not include Arabic, Devanagari, or CJK characters, so non-Latin text can show as boxes or blanks. Fix it in the Inspector by choosing a font with full support for that script, then apply it across the track.
The harder problem is usually getting the words right in the first place, because auto-caption tools mangle non-English audio. When you paste your own exact copy into our caption generator and let it handle only the timing, the SRT you import into Resolve is already correct in your language. You are never proofreading a machine's guess at a language it does not know.
Troubleshooting SRT Import Errors
A few issues cover almost every failed import:
- "Nothing appears after I import." The subtitle imported to the Media Pool but you have not placed it yet. Drag the subtitle clip from the Media Pool onto the timeline to create the track.
- Garbled or boxed characters. This is an encoding problem. Your SRT should be saved as UTF-8; a different encoding corrupts accented and non-Latin text. Re-save it as UTF-8 and re-import. Files from our tool are already UTF-8.
- Resolve refuses the file or imports only part of it. The SRT is likely malformed: wrong timestamp punctuation (SRT uses a comma before milliseconds,
00:00:01,500, not a period), missing blank lines between entries, or broken numbering. A properly formatted SRT avoids this, which is another reason to generate it rather than hand-build it. - The captions play, but they drift. Frame-rate mismatch. See the timing section above and match your project frame rate to the source.
- Wrong extension. Make sure the file ends in
.srtand is a real SubRip file, not a.txtyou renamed.
Nearly every error above (encoding, formatting, wrong words, wrong language) disappears when the SRT is generated correctly to begin with. Paste your exact script or lyrics, let the tool time it, download a clean UTF-8 SRT, and Resolve imports it without a fight.
Wrapping Up
Subtitles in DaVinci Resolve come down to one decision: whether you author the text inside Resolve or import it. Importing a correct SRT is faster, keeps every word and spelling exactly right, works in any language, and reuses the same file across CapCut, Premiere Pro, DaVinci Resolve, Final Cut Pro, VN, and InShot.
Start with the accurate SRT, and the rest of this guide takes about two minutes.
- Generate your SRT free. Upload your video or audio, paste your own script or lyrics, and download a perfectly timed subtitle file in any language. Open the Caption Generator.