Contents
0%Hey!
If you make a podcast, you almost always have the words written down somewhere already. So paying a transcription service, or waiting on an auto-caption tool to guess them, is wasted money and wasted time. Here is how to take the transcript you already own and turn it into a timed SRT subtitle file for your video clips, in any language, without touching a single timestamp.
Why podcasters already have the words
Before you reach for a "podcast subtitle generator" that transcribes from scratch, look at what is already sitting in your project folder. Most shows have the script in one form or another:
- A prepared script or outline you read from while recording.
- Show notes you write for the episode page, which are often a close paraphrase of what was said.
- A transcript you already paid for, because you use it for SEO on the episode page or for accessibility.
- Interview questions and talking points you sent the guest in advance.
The words exist. What you do not have is the one thing a caption file actually needs: the timing. An SRT file is just your lines plus the start and end time of each one, like this:
1
00:00:01,400 --> 00:00:04,120
Most founders quit right before it works.

2
00:00:04,300 --> 00:00:07,660
Nobody talks about that part.
Typing those timestamps by hand for a forty-minute episode is the actual work, and it is the part nobody wants to do. That is the exact gap this fills: you bring the words, the tool solves the timing.
Auto‑transcription vs. the transcript you already have
Every automatic caption tool, CapCut's included, does the same thing. It listens to your audio and guesses the words. That guess is where captions go wrong, and podcasts are full of the things it gets wrong: guest names, brand names, industry jargon, an accent it has not heard, a moment where two people talk over each other.
The tool I am about to walk you through flips the process around.
| Auto-caption tools | Your transcript + this tool | |
|---|---|---|
| Where the words come from | Guessed from the audio | The exact text you paste |
| Spelling of names and jargon | Frequently wrong | Always exactly what you typed |
| Non-English audio | Mishears or fails | Correct in any language |
| What you fix afterward | Re-read and re-type errors | Nothing |
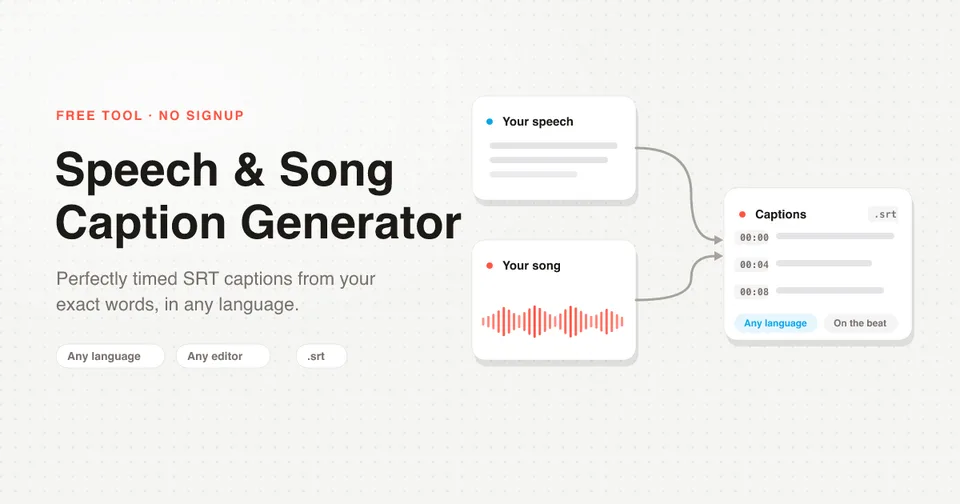
You paste your real words, and the tool transcribes the audio only to find out when each word is spoken. Then it snaps your text onto that timing. Your spelling, your punctuation, your guest's name, all of it stays exactly as you wrote it, because your text is the source of truth, not a machine's best guess.
The tool is not deciding what the words are. You already told it. It is only deciding when each word lands. So brand names, proper nouns, and accented characters come out perfect every time.
Step 1: Prep your transcript (speaker labels and line breaks)
A little cleanup here makes the difference between captions that read well and captions that feel off. Two things to check.
Strip the speaker labels. Transcripts usually look like HOST: and GUEST: at the start of each turn. Nobody actually says the word "host," so leave those prefixes in and they become caption text with no audio to sit on, which throws the alignment off. Delete the HOST: / GUEST: tags before you paste. (If you genuinely want a name shown on screen, add it as its own styled element in your editor later, not in the caption text.)
Break it into caption-length lines. Put one caption on each line, a single sentence or a short phrase, the way you want it to appear on screen. A wall of text pasted as one paragraph gives you one giant caption. A clean line break after each thought gives you clean, readable captions.
One honest caveat: if your show notes are heavily paraphrased, tighten them up so they roughly match what was actually said. The alignment is forgiving of small differences, an extra ad-lib here, a repeated word there, a dropped "um," but it works best when your text and your audio are telling the same story.
Step 2: Upload the audio and paste your transcript
Now the quick part. Open the free tool.
Open the Caption Generator (free)Upload the audio or the clip
Drop in the episode audio (MP3, WAV, or M4A up to 50 MB) or the video clip you are captioning (MP4 up to 200 MB). For a full episode, the raw audio file is usually smallest and fastest.
Paste your prepped transcript
Drop in the text from Step 1, one caption per line. No account, no signup, nothing to install.
Pick vertical or horizontal
Choose vertical (9:16) and each line is capped at 25 characters to fit a phone screen for TikTok, Reels, and Shorts. Choose horizontal (16:9) and lines cap at 42 characters for a YouTube or landscape video. You can switch between the two after generating with no re-processing.
Step 3: Generate and download the SRT
Hit generate, and the tool times your words to the audio and hands you a downloadable .srt file. That is the whole "transcript to SRT" step, done in seconds instead of an evening of scrubbing a timeline.
SRT is the universal subtitle format, so that one file drops straight into whatever you edit in:
- CapCut (import captions)
- Adobe Premiere Pro
- DaVinci Resolve
- Final Cut Pro
- VN, InShot, and Descript
No plugin, no conversion. Every line lands on the right frame, and then you style the font, size, and animation however you like inside your editor.
Step 4: Add captions to audiogram clips for Shorts, Reels, and TikTok
This is where podcast captions earn their keep. The clips you cut from an episode for TikTok, Reels, and Shorts almost always autoplay on mute, so the caption is the hook. No captions, no retention.
The workflow for a clip is the same, just scoped down:
- Cut your 30 to 60 second clip in your editor and export it, or export just that slice of audio.
- Copy the matching lines out of your full transcript. You already have them, so this is a copy and paste.
- Run that clip through the tool with the vertical (9:16) setting so the lines fit the frame.
- Import the SRT back over your clip and style it.
Because you are pulling from a transcript you already own, captioning a week's worth of clips becomes a few minutes of copy and paste rather than re-transcribing each one.
Generate or clean one transcript for the whole episode. Every short clip you cut for the rest of the month pulls its captions from that same text. Write once, caption everywhere.
How to upload the SRT to YouTube
If you publish the full episode as a video, you can add subtitles to the podcast on YouTube with the same file. YouTube's auto-captions have the exact same guessing problem, so uploading your own SRT gives you clean, correctly spelled closed captions.
- In YouTube Studio, open the video and go to Subtitles.
- Next to your language, choose Add, then Upload file.
- Select With timing (your SRT already has the timestamps) and pick the
.srtfile. - Review and Publish.
Correct captions also help the episode get found, because YouTube can read accurate text instead of a rough transcription of what it thinks you said.
Multi‑speaker and multilingual podcasts
Multi-speaker episodes. Because your pasted text is the source of truth, a two or three person conversation captions cleanly as long as you have the words in order. Keep the lines in the sequence they were spoken and let the tool anchor them to the audio. It tolerates the messy realities of a real conversation, cross-talk, an ad-lib, a repeated word, without falling apart.
Non-English podcasts. This is the differentiator that matters most. Auto-caption tools handle a handful of languages well and mishear the rest. Since you supply the actual words, this generator produces correct subtitles in Spanish, Portuguese, French, German, Polish, Arabic, Hindi, Japanese, Korean, or any other language, with every accent and diacritic exactly right. It only solves the timing, so the language of your audio never trips it up.
The point
You already did the hard part when you wrote the episode. Do not pay a service to re-transcribe your own words, and do not let an auto-caption tool misspell your guest's name. Bring the text you already have, let the tool handle the timing, and get a clean SRT you can drop into any editor.
- Caption your next clip free. Upload the audio, paste your transcript, download the timed SRT. Open the Caption Generator.
- Turn your podcast into ads in Starpop. Research, script, images, and video for your brand, all in one chat. Try Starpop.