Contents
0%Google's Veo model is one of the most capable AI video generators available right now, but getting started with it isn't exactly plug-and-play. The Google Veo documentation is spread across multiple sources, Gemini API references, Vertex AI guides, and model cards, which makes it frustrating to piece together a clear picture of what the model can do and how to actually use it. Whether you're building a custom integration or just trying to understand prompting requirements and output specs, this guide consolidates everything you need in one place.
We'll walk through the core API endpoints, authentication setup, parameter configurations, and practical prompting strategies that produce usable results. You'll also find details on resolution options, generation limits, and the differences between accessing Veo through the Gemini API versus Vertex AI.
At Starpop, we give our users direct access to Veo alongside other frontier models like Sora, Kling, and ElevenLabs, no API setup required. But if you're the type who wants to build on top of the raw model or understand exactly what's happening under the hood, this documentation breakdown is for you.
What Google Veo is and what it can do
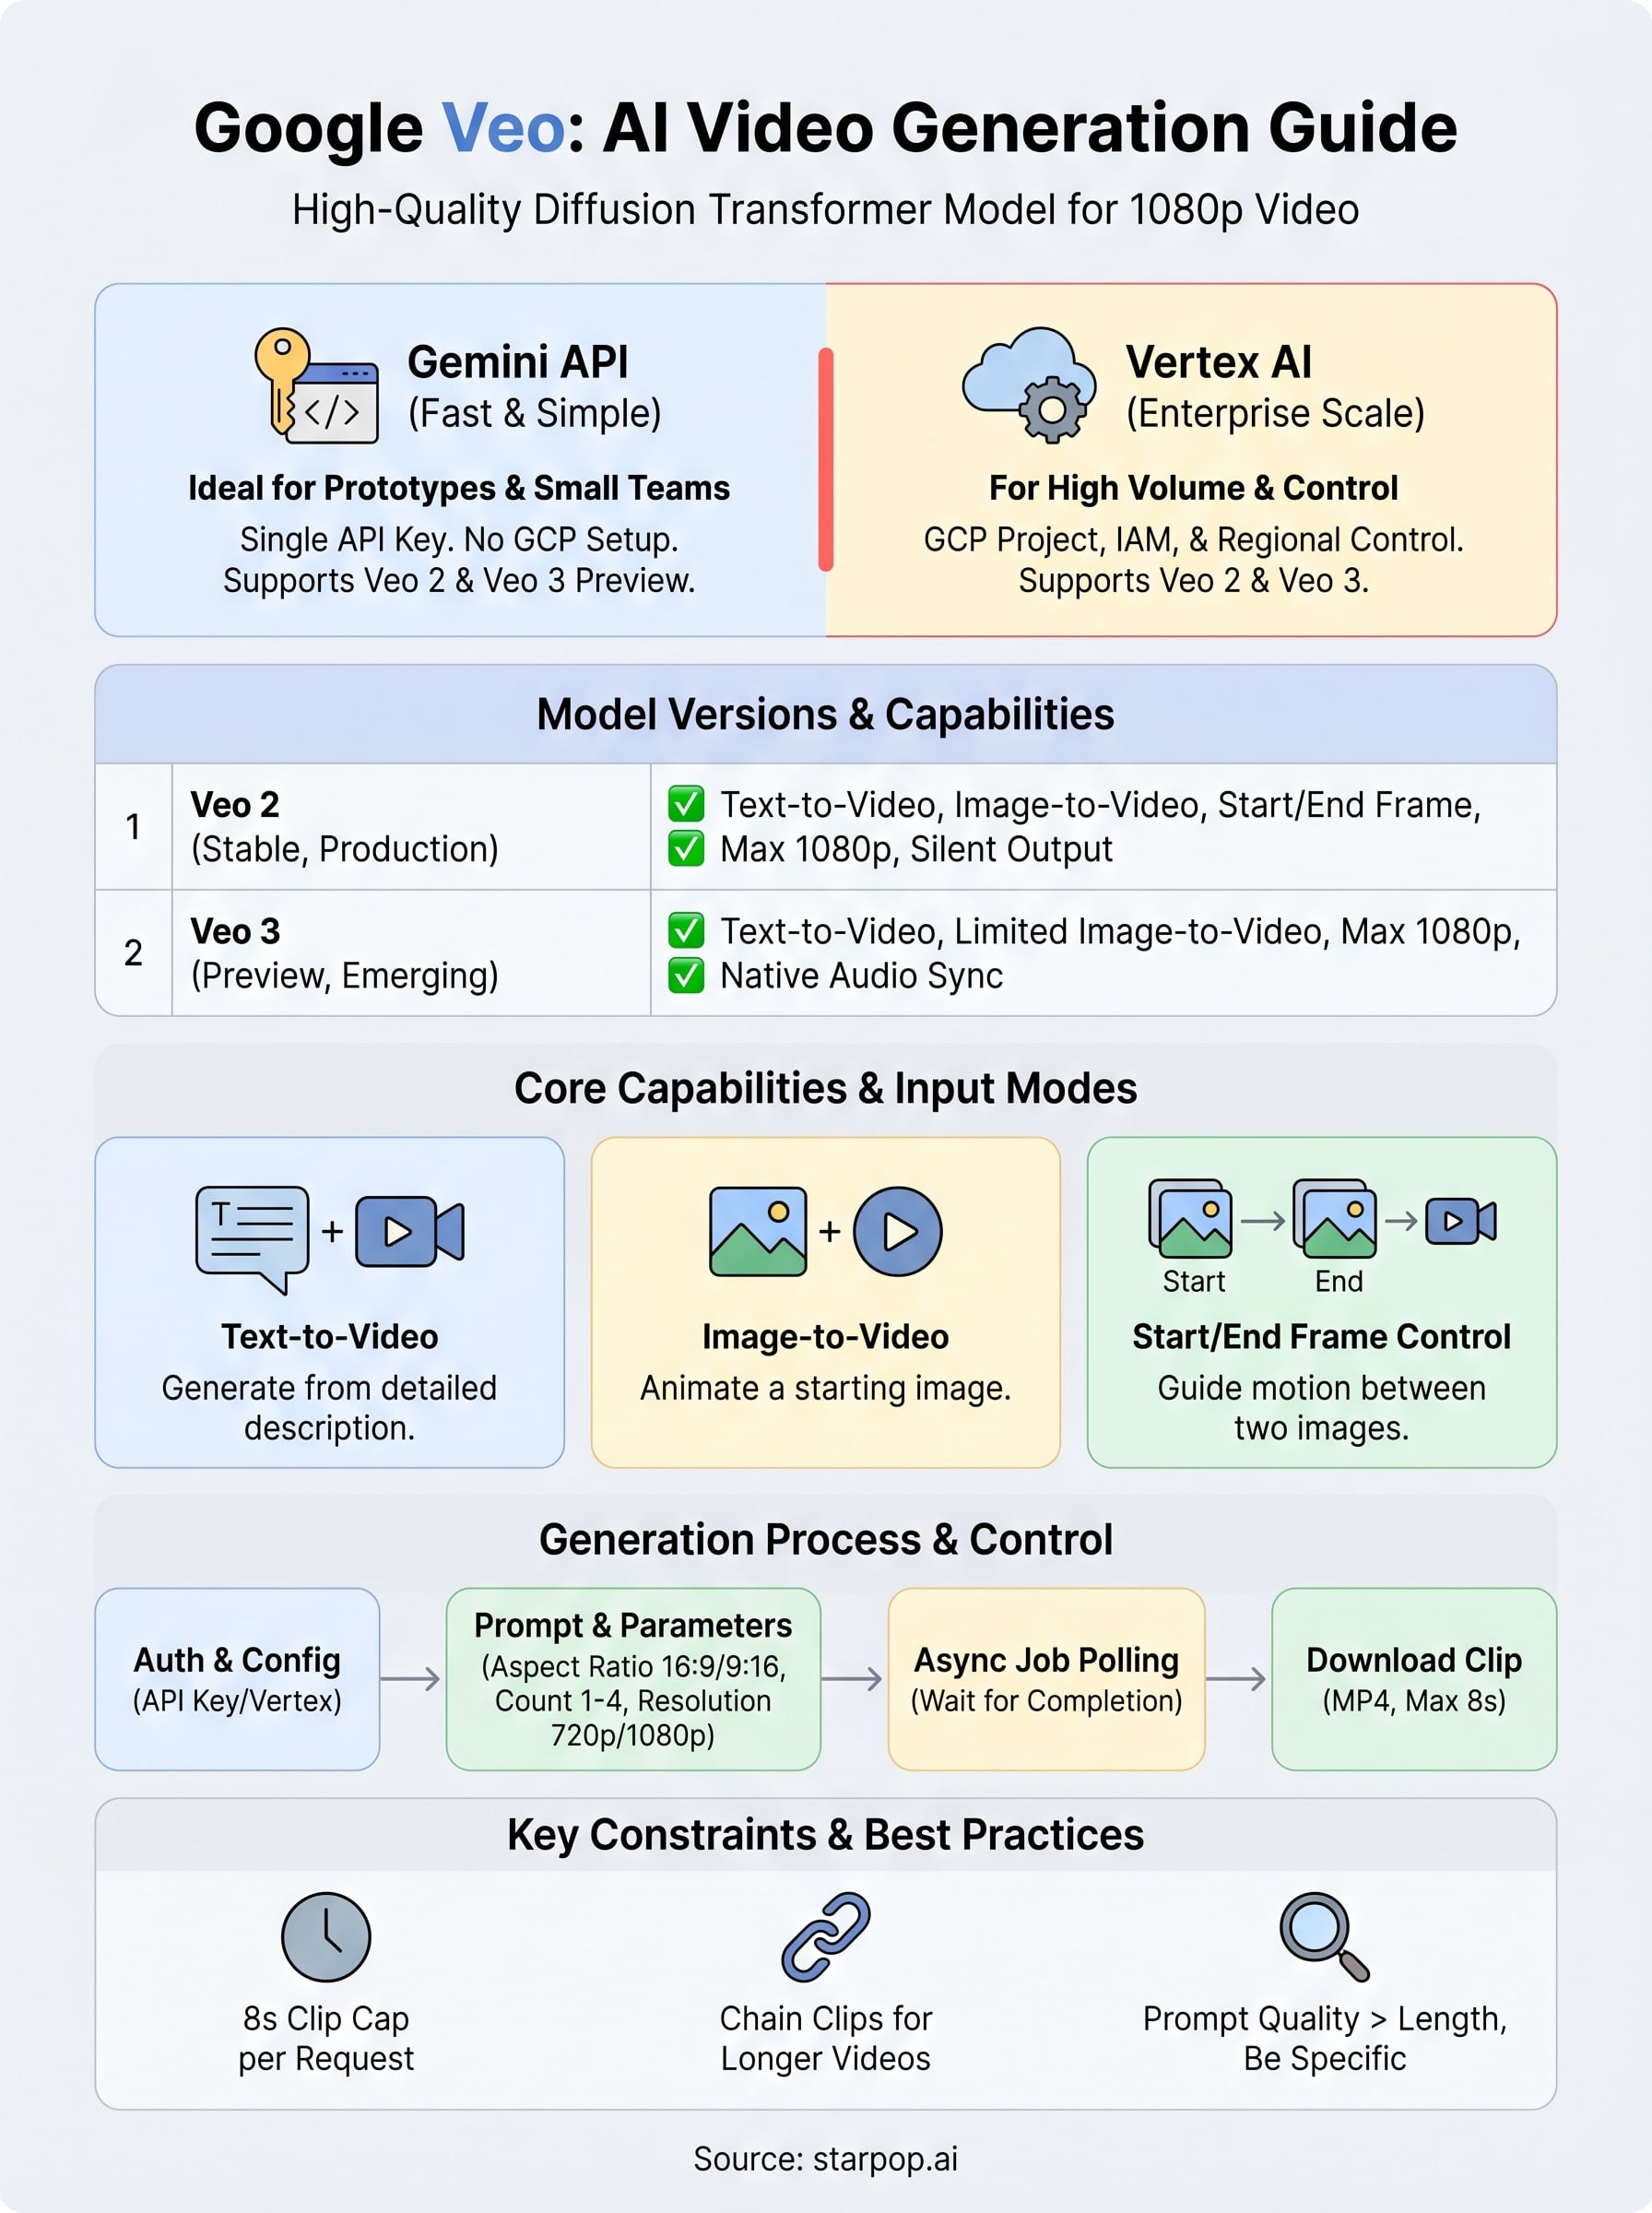
Google Veo is a generative video model built by Google DeepMind that converts text prompts and reference images into high-quality video clips. Unlike earlier video AI systems that produced blurry, low-resolution output, Veo generates footage at 1080p resolution with consistent motion, coherent scene structure, and fine-grained control over visual style. It's the model powering YouTube Shorts' "Dream Screen" feature and is available to developers through the Gemini API and Vertex AI.
The core technology behind Veo
Veo is built on a diffusion transformer architecture, which gives it a strong understanding of physical motion, lighting, and spatial relationships between objects in a scene. The model was trained on a large corpus of video data paired with text descriptions, so it learned to associate visual concepts with natural language rather than requiring specialized syntax or rigid formatting. When you write a prompt, Veo interprets the semantic meaning of your description and translates it into frame-by-frame motion, not just a single image extrapolated outward.
Veo's architecture is what separates it from simpler image-to-video tools: it models temporal coherence, meaning objects and camera movements stay consistent across frames rather than flickering or drifting.
One practical result of this design is that prompt quality matters a lot more than prompt length. A short, precise description of a scene often outperforms a long paragraph with vague or conflicting instructions. Knowing this before you dig into the google veo documentation will save you a significant amount of trial and error.
What Veo can generate
Veo handles a wide range of video formats and styles. Here's what you can produce with the model:
- Text-to-video: Generate a clip from a written description alone, specifying scene content, camera angle, lighting, and mood.
- Image-to-video: Provide a starting image and a text prompt to animate it into a short clip.
- Start and end frame control: Supply both a starting image and an ending image to guide the motion between them.
- Cinematic styles: Request specific looks like slow motion, time-lapse, aerial shots, or close-ups using natural language.
- Multi-shot sequences: Combine prompts to build longer sequences from individual clips with consistent visual identity.
Each of these generation modes operates through the same underlying API, but the required parameters differ depending on which mode you're using. The sections below cover the exact syntax for each.
Current limitations to know before you build
Before you write a single line of code, you need to understand what Veo currently will not do. The model refuses prompts that include real people by name, content that depicts minors in unsafe situations, graphic violence, or any material that violates Google's usage policies. These restrictions are enforced at the model level, not just in the API wrapper, so they cannot be bypassed with clever prompting.
On the technical side, clip length is capped at 8 seconds per generation request for most access tiers. If you need longer content, you'll stitch multiple clips together programmatically. Output resolution is fixed at 720p or 1080p depending on the model version you call, and you can generate between 1 and 4 video clips per request. Understanding these boundaries upfront will help you design your integration around what Veo actually supports rather than what you assume it can do.
Understand Veo model versions and capabilities
Google has released multiple versions of Veo, and picking the wrong one for your use case will waste your API quota and time. The google veo documentation currently covers two active versions: Veo 2 and Veo 3. Each targets a different set of needs, and their available features, output quality, and access restrictions differ enough that you need to know the distinction before writing a single line of code.
Veo 2 vs. Veo 3: what's different
Veo 2 is the stable, production-ready version. It generates silent video clips at up to 1080p resolution and supports text-to-video, image-to-video, and start/end frame workflows. The model string you'll pass in your API calls is veo-2.0-generate-001. This version is available through both the Gemini API and Vertex AI, and it's what most developers should use when building reliable, repeatable pipelines.
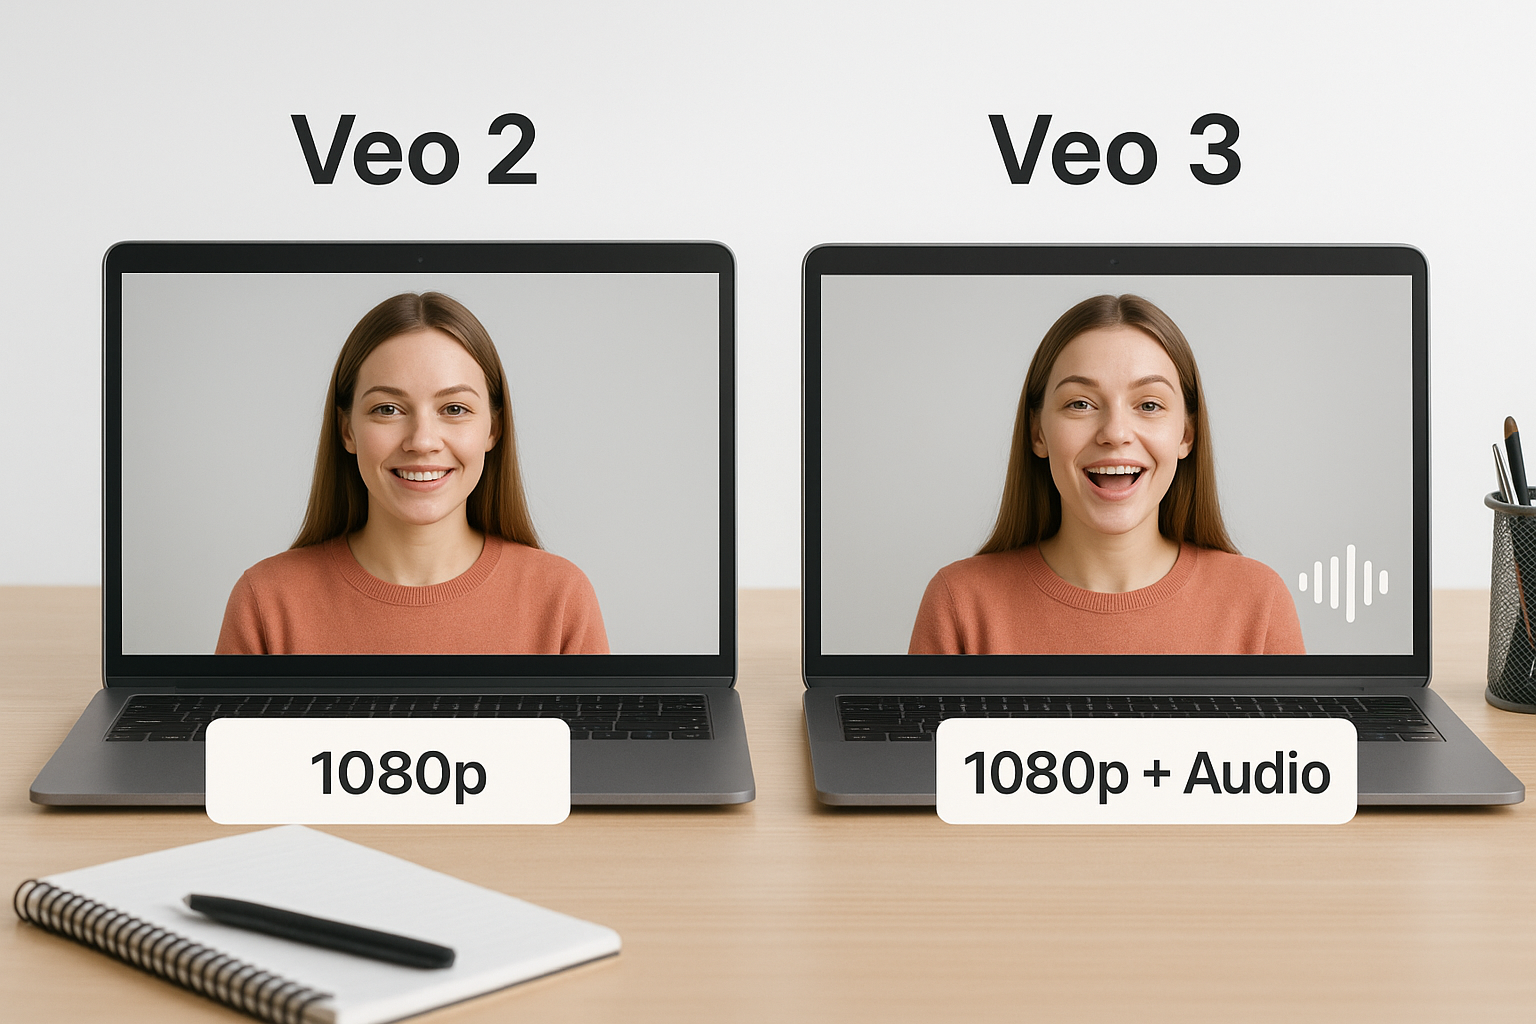
Veo 3 is a significant step forward because it generates video and audio together in a single request, meaning you get synchronized sound effects, ambient noise, and dialogue without a separate audio pipeline.
Veo 3 uses the model string veo-3.0-generate-preview and is currently in Preview access through the Gemini API. It produces native audio output alongside video, which eliminates the need to layer in sound post-generation. However, Preview access means the model is subject to change, rate limits are tighter, and not all features are stable yet.
Here's a quick comparison to help you decide which version fits your build:
| Feature | Veo 2 | Veo 3 |
|---|---|---|
| Model string | veo-2.0-generate-001 | veo-3.0-generate-preview |
| Audio output | No | Yes (native) |
| Max resolution | 1080p | 1080p |
| Access tier | GA | Preview |
| Image-to-video | Yes | Limited |
Which version to use for your project
If your goal is production stability and image-to-video generation, Veo 2 is the right call. The API behavior is documented, rate limits are published, and you can build against it without worrying about breaking changes mid-deployment.
Choose Veo 3 only if native audio in your generated clips is a hard requirement and you can tolerate Preview-tier instability. For marketing content or social ads where audio timing matters, the single-request audio-video output is genuinely useful, but test it thoroughly before committing your workflow to it.
Choose Gemini API or Vertex AI for Veo
Both access paths connect you to the same Veo model, but they serve different project requirements and organizational contexts. Choosing the wrong one creates unnecessary friction, whether that's hitting rate limits you can't adjust or paying for infrastructure you don't need. The decision comes down to your team size, the volume of requests you plan to run, and how much control you need over compute resources.
Gemini API: the faster path to video generation
The Gemini API is the right starting point for most developers. You authenticate with a single API key, call the endpoint directly, and start generating video in minutes. There's no cloud project configuration or service account setup beyond basic key management, which means your time goes into building rather than configuring.

The Gemini API is the access path referenced most often in the google veo documentation, and it supports both Veo 2 and the Veo 3 Preview.
Access tiers inside the Gemini API are straightforward. The free tier gives you limited requests per minute for testing, while paid tiers unlock higher throughput and access to Veo 3. If you're prototyping, running a small campaign pipeline, or building a solo project, the Gemini API covers your needs without adding infrastructure complexity.
Vertex AI: built for enterprise scale
Vertex AI is Google's managed ML platform, and it hosts Veo inside a fully configurable cloud environment. You connect through a Google Cloud project, authenticate with a service account, and route requests through regional endpoints. This setup requires more upfront work, but it gives you capabilities the Gemini API doesn't offer.
Specifically, Vertex AI lets you control compute regions, integrate Veo into larger ML pipelines, apply organization-level IAM policies, and access enterprise support SLAs. If you're managing multiple clients, processing high volumes of requests in parallel, or operating in a regulated industry where data residency matters, Vertex AI is the correct choice.
Here's a side-by-side comparison to clarify which path fits your situation:
| Factor | Gemini API | Vertex AI |
|---|---|---|
| Setup complexity | Low (API key only) | High (GCP project + IAM) |
| Best for | Prototypes, small teams | Enterprise, high-volume |
| Regional control | No | Yes |
| Veo 3 access | Yes (Preview) | Yes |
| Billing | Per request | GCP billing |
Start with the Gemini API unless your project already lives inside Google Cloud or your organization requires strict data governance controls.
Set up access, authentication, and permissions
Before you write a single API call, you need valid credentials configured for your chosen access path. The google veo documentation outlines two separate authentication flows, one for the Gemini API and one for Vertex AI, and mixing them up is the most common reason developers hit errors on their first request. Getting this right takes less than ten minutes, but skipping any step will block you from reaching the model entirely.
Get your Gemini API key
The Gemini API uses API key authentication, which makes the setup fast. Go to Google AI Studio, sign in with your Google account, and click "Get API key" to generate a new key. Copy it immediately and store it in an environment variable rather than hardcoding it into your source files.
Never commit your API key directly to a repository. Set it as an environment variable and reference it in code.
Set the key in your environment like this:
export GEMINI_API_KEY="your_api_key_here"
Then reference it in Python using the official SDK:
import google.generativeai as genai
import os

genai.configure(api_key=os.environ["GEMINI_API_KEY"])
Your SDK version matters here. Install or update the library with pip install -q -U google-generativeai before running anything to avoid compatibility issues with Veo endpoints.
Configure Vertex AI credentials
Vertex AI requires a Google Cloud project with the Vertex AI API enabled. Start by creating or selecting a project in the Google Cloud Console, then enable the Vertex AI API from the API Library. Once that's active, set up a service account with the Vertex AI User IAM role and download the JSON key file.
Authenticate your local environment by pointing the GOOGLE_APPLICATION_CREDENTIALS variable at your downloaded key:
export GOOGLE_APPLICATION_CREDENTIALS="/path/to/your/service-account-key.json"
export GOOGLE_CLOUD_PROJECT="your-project-id"
export GOOGLE_CLOUD_LOCATION="us-central1"
Install the Vertex AI SDK and initialize your client in Python:
import vertexai

vertexai.init(
    project=os.environ["GOOGLE_CLOUD_PROJECT"],
    location=os.environ["GOOGLE_CLOUD_LOCATION"]
)
Regional availability is a factor on Vertex AI. Veo is available in us-central1 by default, so use that region unless your data residency requirements force a different choice. Picking an unsupported region returns a model-not-found error that looks unrelated to geography, which wastes time debugging.
Generate your first text to video clip with Gemini API
With your credentials in place, you can generate your first video clip in a single Python script. Veo video generation runs as an asynchronous long-running operation, which means the API accepts your request, returns a job ID, and processes the clip in the background. Your code needs to poll that job until it completes rather than waiting for an immediate response. The google veo documentation refers to this pattern consistently across both Gemini API and Vertex AI, so understanding it now will carry over to every request you make.
Build a basic text-to-video request
The core request requires three things: your authenticated client, a model string pointing to Veo 2, and a text prompt describing the scene you want to generate. Keep your prompt concrete. Specify the subject, the camera framing, the lighting, and any motion you want to see. Vague prompts produce vague results.
Here is a working example that sends a generation request and returns the operation object:
import google.generativeai as genai
import os
import time

genai.configure(api_key=os.environ["GEMINI_API_KEY"])

operation = genai.generate_video(
    model="veo-2.0-generate-001",
    prompt="A close-up of a coffee cup on a wooden table, steam rising slowly, warm morning light, cinematic shallow depth of field",
    config=genai.GenerateVideoConfig(
        aspect_ratio="16:9",
        number_of_videos=1,
    )
)
The operation object holds the job reference you need to poll. Nothing downloads yet at this stage. The API accepts the prompt and queues the generation job, which typically takes between 60 and 180 seconds depending on load.
Handle the async response and download your clip
Once you have the operation object, you need to poll it at regular intervals until the job status changes to complete. Polling too frequently wastes API calls; polling every 10 to 15 seconds is a reasonable interval for most generation requests.
Saving the video bytes to a local file rather than holding them in memory protects your output if the script crashes or times out mid-download.
while not operation.done:
    time.sleep(15)
    operation = operation.update()

for i, video in enumerate(operation.response.generated_videos):
    video_data = video.video.video_bytes
    with open(f"output_clip_{i}.mp4", "wb") as f:
        f.write(video_data)
    print(f"Saved output_clip_{i}.mp4")
Your clip saves as a standard MP4 file you can preview immediately. From here, you can adjust parameters, swap the prompt, or chain multiple requests into a longer sequence.
Control outputs: aspect ratio, resolution, and count
The GenerateVideoConfig object is where you shape the physical characteristics of every clip Veo produces. The google veo documentation covers three output parameters you'll adjust most often: aspect ratio, resolution, and the number of clips generated per request. Getting these right before you run a full batch saves you quota and prevents you from producing assets in the wrong format for your target platform.
Set aspect ratio for your use case
Veo supports two aspect ratios, and the one you choose should match the platform where your content will run. Set aspect_ratio="16:9" for horizontal formats like YouTube, desktop landing pages, or any widescreen context. Set aspect_ratio="9:16" for vertical formats like TikTok, Instagram Reels, or YouTube Shorts. There is no post-generation crop option in the API, so picking the wrong ratio means regenerating the clip entirely.
Choosing the wrong aspect ratio wastes your generation quota because Veo composes the scene to fill the frame, so cropping the output after the fact will cut off subjects or motion that was placed at the edges.
Here is how both options look inside a config block:
# Horizontal (widescreen)
config=genai.GenerateVideoConfig(
    aspect_ratio="16:9",
    number_of_videos=1,
)

# Vertical (short-form social)
config=genai.GenerateVideoConfig(
    aspect_ratio="9:16",
    number_of_videos=1,
)
Control video count per request
The number_of_videos parameter accepts an integer between 1 and 4, and each value in that range generates a separate, independently sampled clip from the same prompt. Running multiple clips in one request is more efficient than sending four separate requests because your prompt only gets queued once, and the API processes the variations in parallel rather than sequentially.
Use this table to match your generation count to your workflow:
number_of_videos | Best for |
|---|---|
| 1 | Quick tests, single-use assets |
| 2 | A/B testing two visual interpretations |
| 4 | Creative exploration, maximum variation |
Set the count to 4 when you're testing a new prompt for the first time. You'll see the full range of how Veo interprets your description, which helps you spot which phrasing works and which needs adjustment. Once your prompt is locked in, drop back to 1 or 2 to conserve quota on production runs.
Use images, reference images, and start end frames
Veo supports three distinct input modes beyond pure text: image-to-video animation, reference image grounding, and start/end frame control. Each mode gives you a different type of influence over the generated clip, and understanding when to use each one is what separates generic output from precise, intentional video assets. The google veo documentation treats these as separate parameter configurations on the same request structure, so the code patterns stay consistent once you learn the base pattern.
Animate a static image with image-to-video
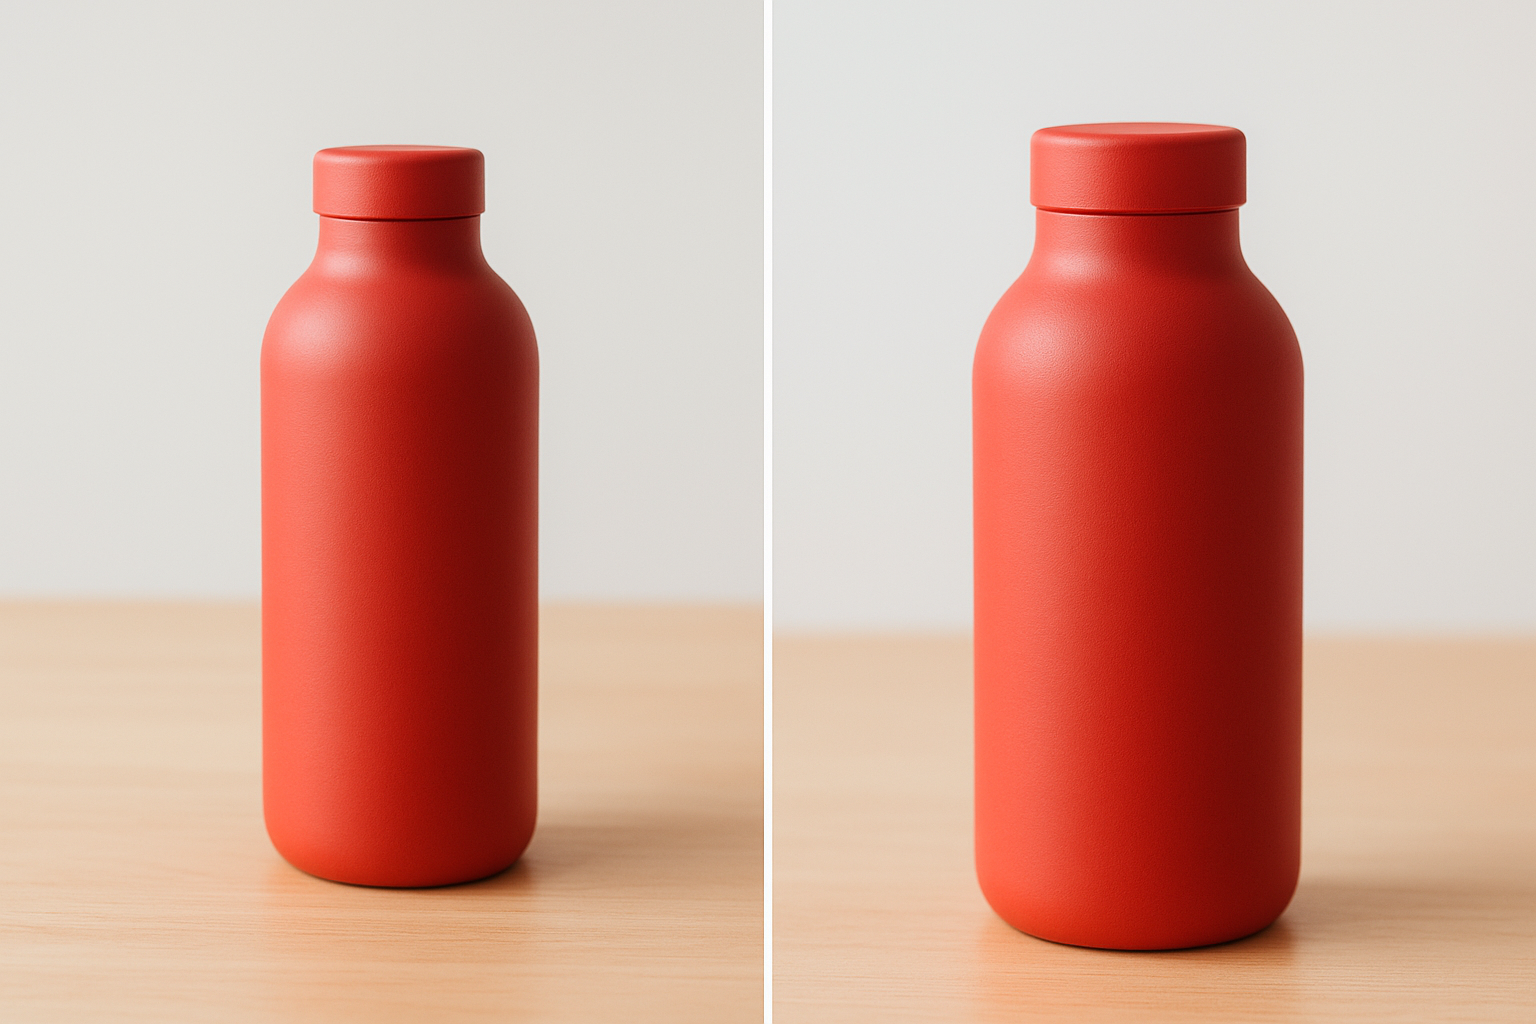
Image-to-video takes a single input image and a text prompt, then generates motion that extends naturally from the visual content of that image. This is useful when you already have a product photo, a branded still, or a rendered scene and you want to bring it to life without rebuilding it from text alone. The model reads the composition of your image and applies motion that fits the spatial layout and lighting already present.
Your input image should be high resolution and clearly composed, since Veo uses the image's visual structure to determine where and how motion occurs in the clip.
Pass your image as base64-encoded bytes inside a GenerateVideoConfig:
import base64

with open("product_shot.jpg", "rb") as f:
    image_bytes = base64.b64encode(f.read()).decode("utf-8")

operation = genai.generate_video(
    model="veo-2.0-generate-001",
    prompt="The product slowly rotates on the surface, soft studio lighting",
    image=genai.types.Image(
        image_bytes=image_bytes,
        mime_type="image/jpeg"
    ),
    config=genai.GenerateVideoConfig(
        aspect_ratio="16:9",
        number_of_videos=1,
    )
)
Guide motion with start and end frames
Start/end frame mode lets you supply two images, one for the opening frame and one for the closing frame, and Veo generates the transition between them. This gives you direct control over the arc of motion in your clip rather than letting the model decide how movement resolves. It works well for product reveals, scene transitions, and any situation where you know exactly what the first and last frames need to look like.
Provide both frames in your request using the last_frame parameter alongside your opening image:
with open("frame_start.jpg", "rb") as f:
    start_bytes = base64.b64encode(f.read()).decode("utf-8")

with open("frame_end.jpg", "rb") as f:
    end_bytes = base64.b64encode(f.read()).decode("utf-8")

operation = genai.generate_video(
    model="veo-2.0-generate-001",
    prompt="Smooth camera push forward, product comes into sharp focus",
    image=genai.types.Image(
        image_bytes=start_bytes,
        mime_type="image/jpeg"
    ),
    config=genai.GenerateVideoConfig(
        aspect_ratio="9:16",
        number_of_videos=1,
        last_frame=genai.types.Image(
            image_bytes=end_bytes,
            mime_type="image/jpeg"
        )
    )
)
Keep your start and end frames visually compatible in terms of lighting, color temperature, and subject scale. Large mismatches between the two images produce jarring transitions that the model cannot always reconcile cleanly.
Extend videos and manage long-running operations
Veo clips max out at 8 seconds per request, so producing anything longer requires you to chain multiple generation calls into a connected sequence. The google veo documentation handles this through standard long-running operation patterns that apply to every API call you make, whether you're generating a single clip or building a 60-second sequence from ten consecutive requests. Knowing how to manage these operations cleanly is what separates a reliable pipeline from one that silently drops clips under load.
Chain clips into longer sequences
Building a longer video means generating each 8-second segment as a separate request and then concatenating the output files programmatically. To keep your clips visually consistent across segments, use the last frame of one clip as the starting image for the next request. This carries the lighting, color, and spatial composition forward so your final cut doesn't jump between disconnected visual states.
Here is a pattern for chaining two clips:
# Generate clip 1
op1 = genai.generate_video(
    model="veo-2.0-generate-001",
    prompt="Product slides into frame from the left, white background",
    config=genai.GenerateVideoConfig(aspect_ratio="16:9", number_of_videos=1)
)
while not op1.done:
    time.sleep(15)
    op1 = op1.update()

clip1_bytes = op1.response.generated_videos[0].video.video_bytes
with open("clip1.mp4", "wb") as f:
    f.write(clip1_bytes)

# Extract last frame and pass as start image for clip 2

# (use opencv or moviepy to pull the final frame before encoding to base64)
After you extract the final frame from clip 1 and encode it to base64, pass it as the opening image in your next generate_video call following the image-to-video pattern covered in the previous section.
Handle timeouts and operation failures
Long-running operations fail silently if you don't build explicit error handling into your polling loop. A job can time out, hit a content policy refusal mid-generation, or return a partial result without throwing an obvious exception. Add a maximum retry count and a timeout threshold to every polling loop so your script doesn't hang indefinitely waiting for a job that will never complete.
max_wait = 300  # seconds
elapsed = 0

while not operation.done and elapsed < max_wait:
    time.sleep(15)
    elapsed += 15
    operation = operation.update()

if not operation.done:
    raise TimeoutError("Video generation exceeded maximum wait time")

if not operation.response.generated_videos:
    raise ValueError("Operation completed but returned no video output")
Wrapping every polling loop with a timeout guard prevents your pipeline from stalling on a failed job, which matters most when you're running batch requests across multiple clips in sequence.
Wrap up and keep building
You now have everything you need to move from reading the google veo documentation to running real generation jobs. This guide covered the model versions, access paths, authentication setup for both Gemini API and Vertex AI, output parameter control, image input modes, and long-running operation handling for chaining clips into full sequences.
The next step is running your own requests against actual prompts and tuning from there. Start with Veo 2 on the Gemini API, keep your prompts specific, and use number_of_videos=4 on your first pass to see the full range of what your description produces. Once you understand how the model responds to your input, cut down to production runs.
If you want to skip the API setup entirely and generate Veo clips through a ready-built interface alongside Sora, Kling, and ElevenLabs, try Starpop's AI video generation platform and start creating immediately.