Contents
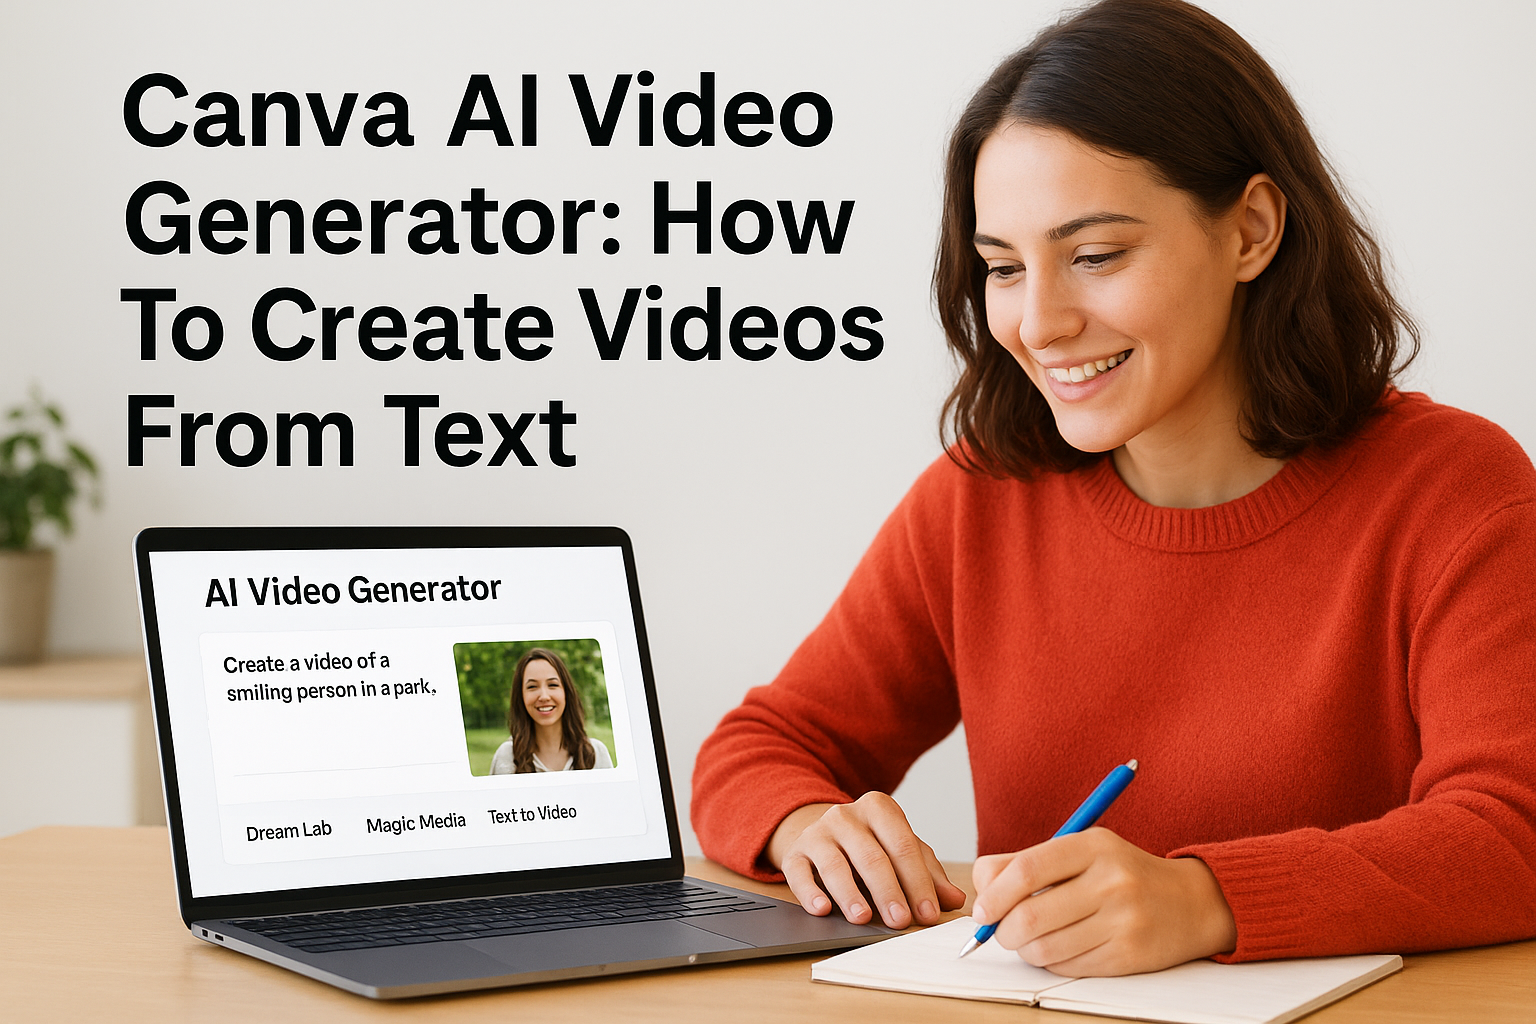
0%Canva has steadily added AI tools to its design suite, and its video features are no exception. The Canva AI video generator lets you turn text prompts, scripts, and static visuals into short video clips, all inside an editor most people already know how to use. For marketers and creators who need quick video content without a production budget, that's a genuinely useful starting point.
But knowing the tool exists and actually getting results from it are two different things. Canva's AI video features are spread across several menus, and the output quality depends heavily on how you structure your prompts and which features you combine. This guide walks you through the full process, from generating your first clip to editing and exporting a finished video.
We'll also be honest about where Canva's generator hits its limits, especially if you're producing ads or UGC-style content at scale. That's where a platform like Starpop fills the gap, giving you access to multiple frontier AI video models, marketing-specific templates, and batch processing in one place. But first, let's get you up and running with what Canva offers right now.
What Canva AI video generator can do for you
The Canva AI video generator gives you two core capabilities inside a single, browser-based editor: text-to-video generation and image animation. You don't need to install anything or manage API keys. If you have a Canva account, most of these tools are a few clicks away, though some features require a paid plan.
The fact that Canva bundles video generation with editing tools in one place removes a significant workflow bottleneck for solo creators and small teams.
Text-to-video and image-to-video generation
Canva's Dream Lab and its integrated AI tools let you type a prompt and generate a short video clip, typically between four and eight seconds long. You can also upload a static image and animate it into motion footage using the Magic Media feature. These clips work well as background visuals, intro sequences, or product showcase loops, but they won't replace a full-length scripted video on their own.
Here's a quick breakdown of what each core feature produces:
| Feature | Input | Output |
|---|---|---|
| Dream Lab (video mode) | Text prompt | 4-8 second AI video clip |
| Magic Media (animate) | Uploaded image | Animated video clip |
| Talking Presentations | Script + slides | Avatar-narrated video |
| Magic Write + Video | Script text | Draft video with stock clips |
Built-in editing and export
Once Canva generates your clip, you stay inside the same editor to trim footage, add text overlays, sync music, and apply transitions. You don't get a timeline as deep as a dedicated video editor, but for social-ready content, the tools cover the basics well. Most output formats support 1080p export, and you can publish directly to platforms or download an MP4 file.
Your finished video can also slot into a broader Canva presentation or social media template, which helps when you need a consistent visual identity across multiple formats without rebuilding assets from scratch.
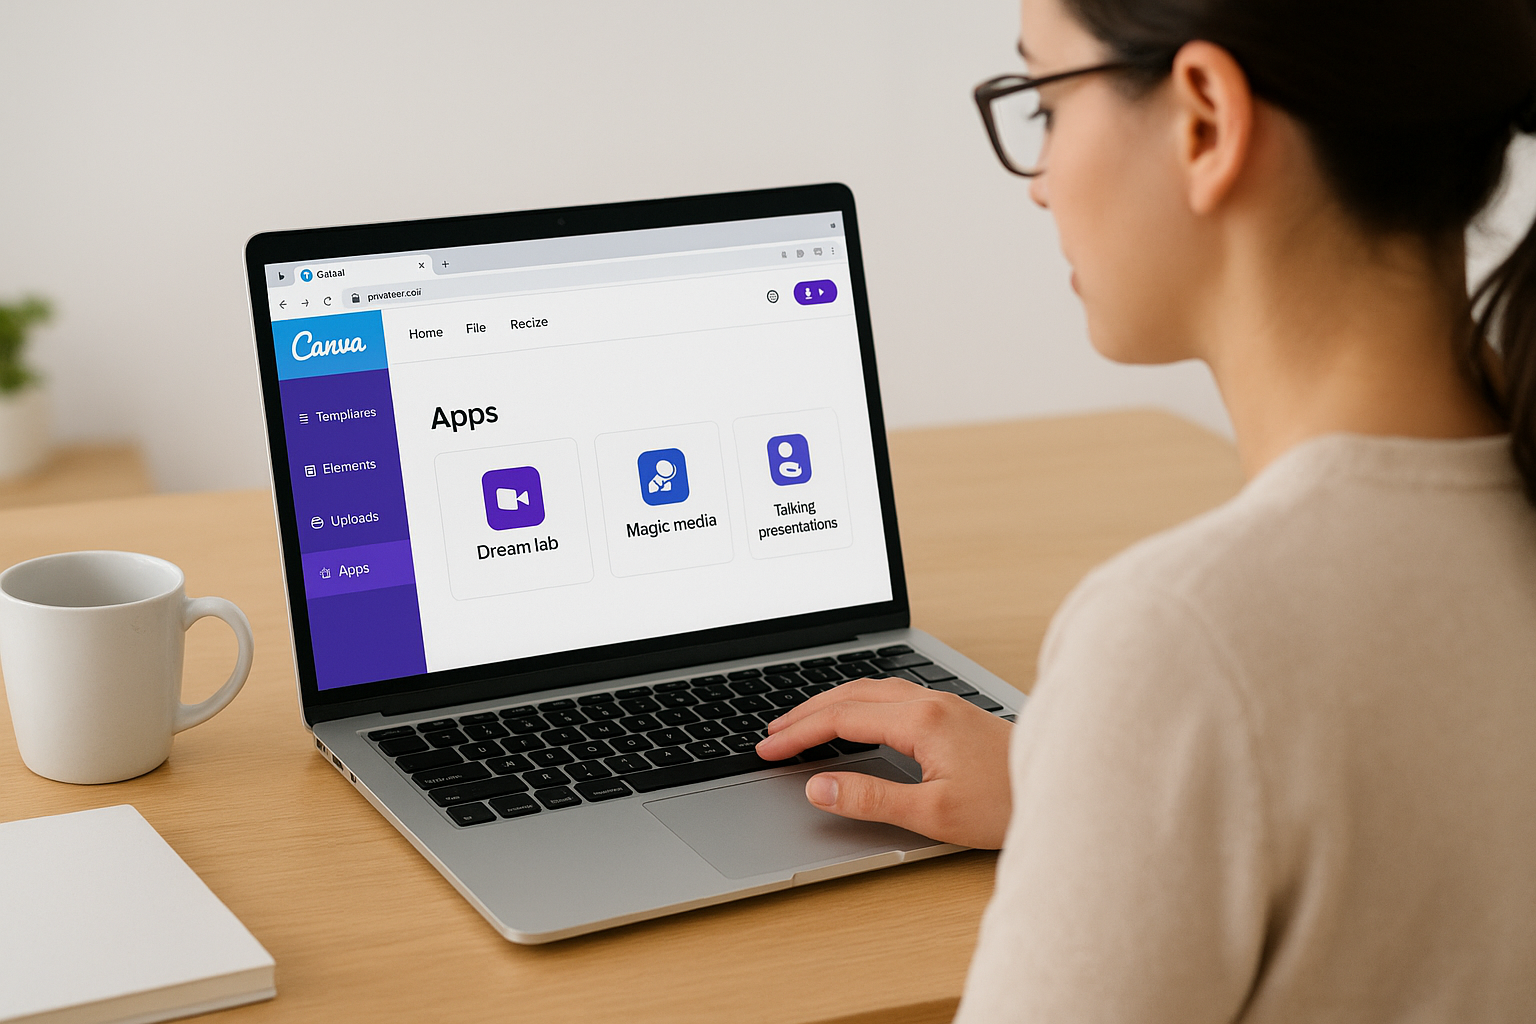
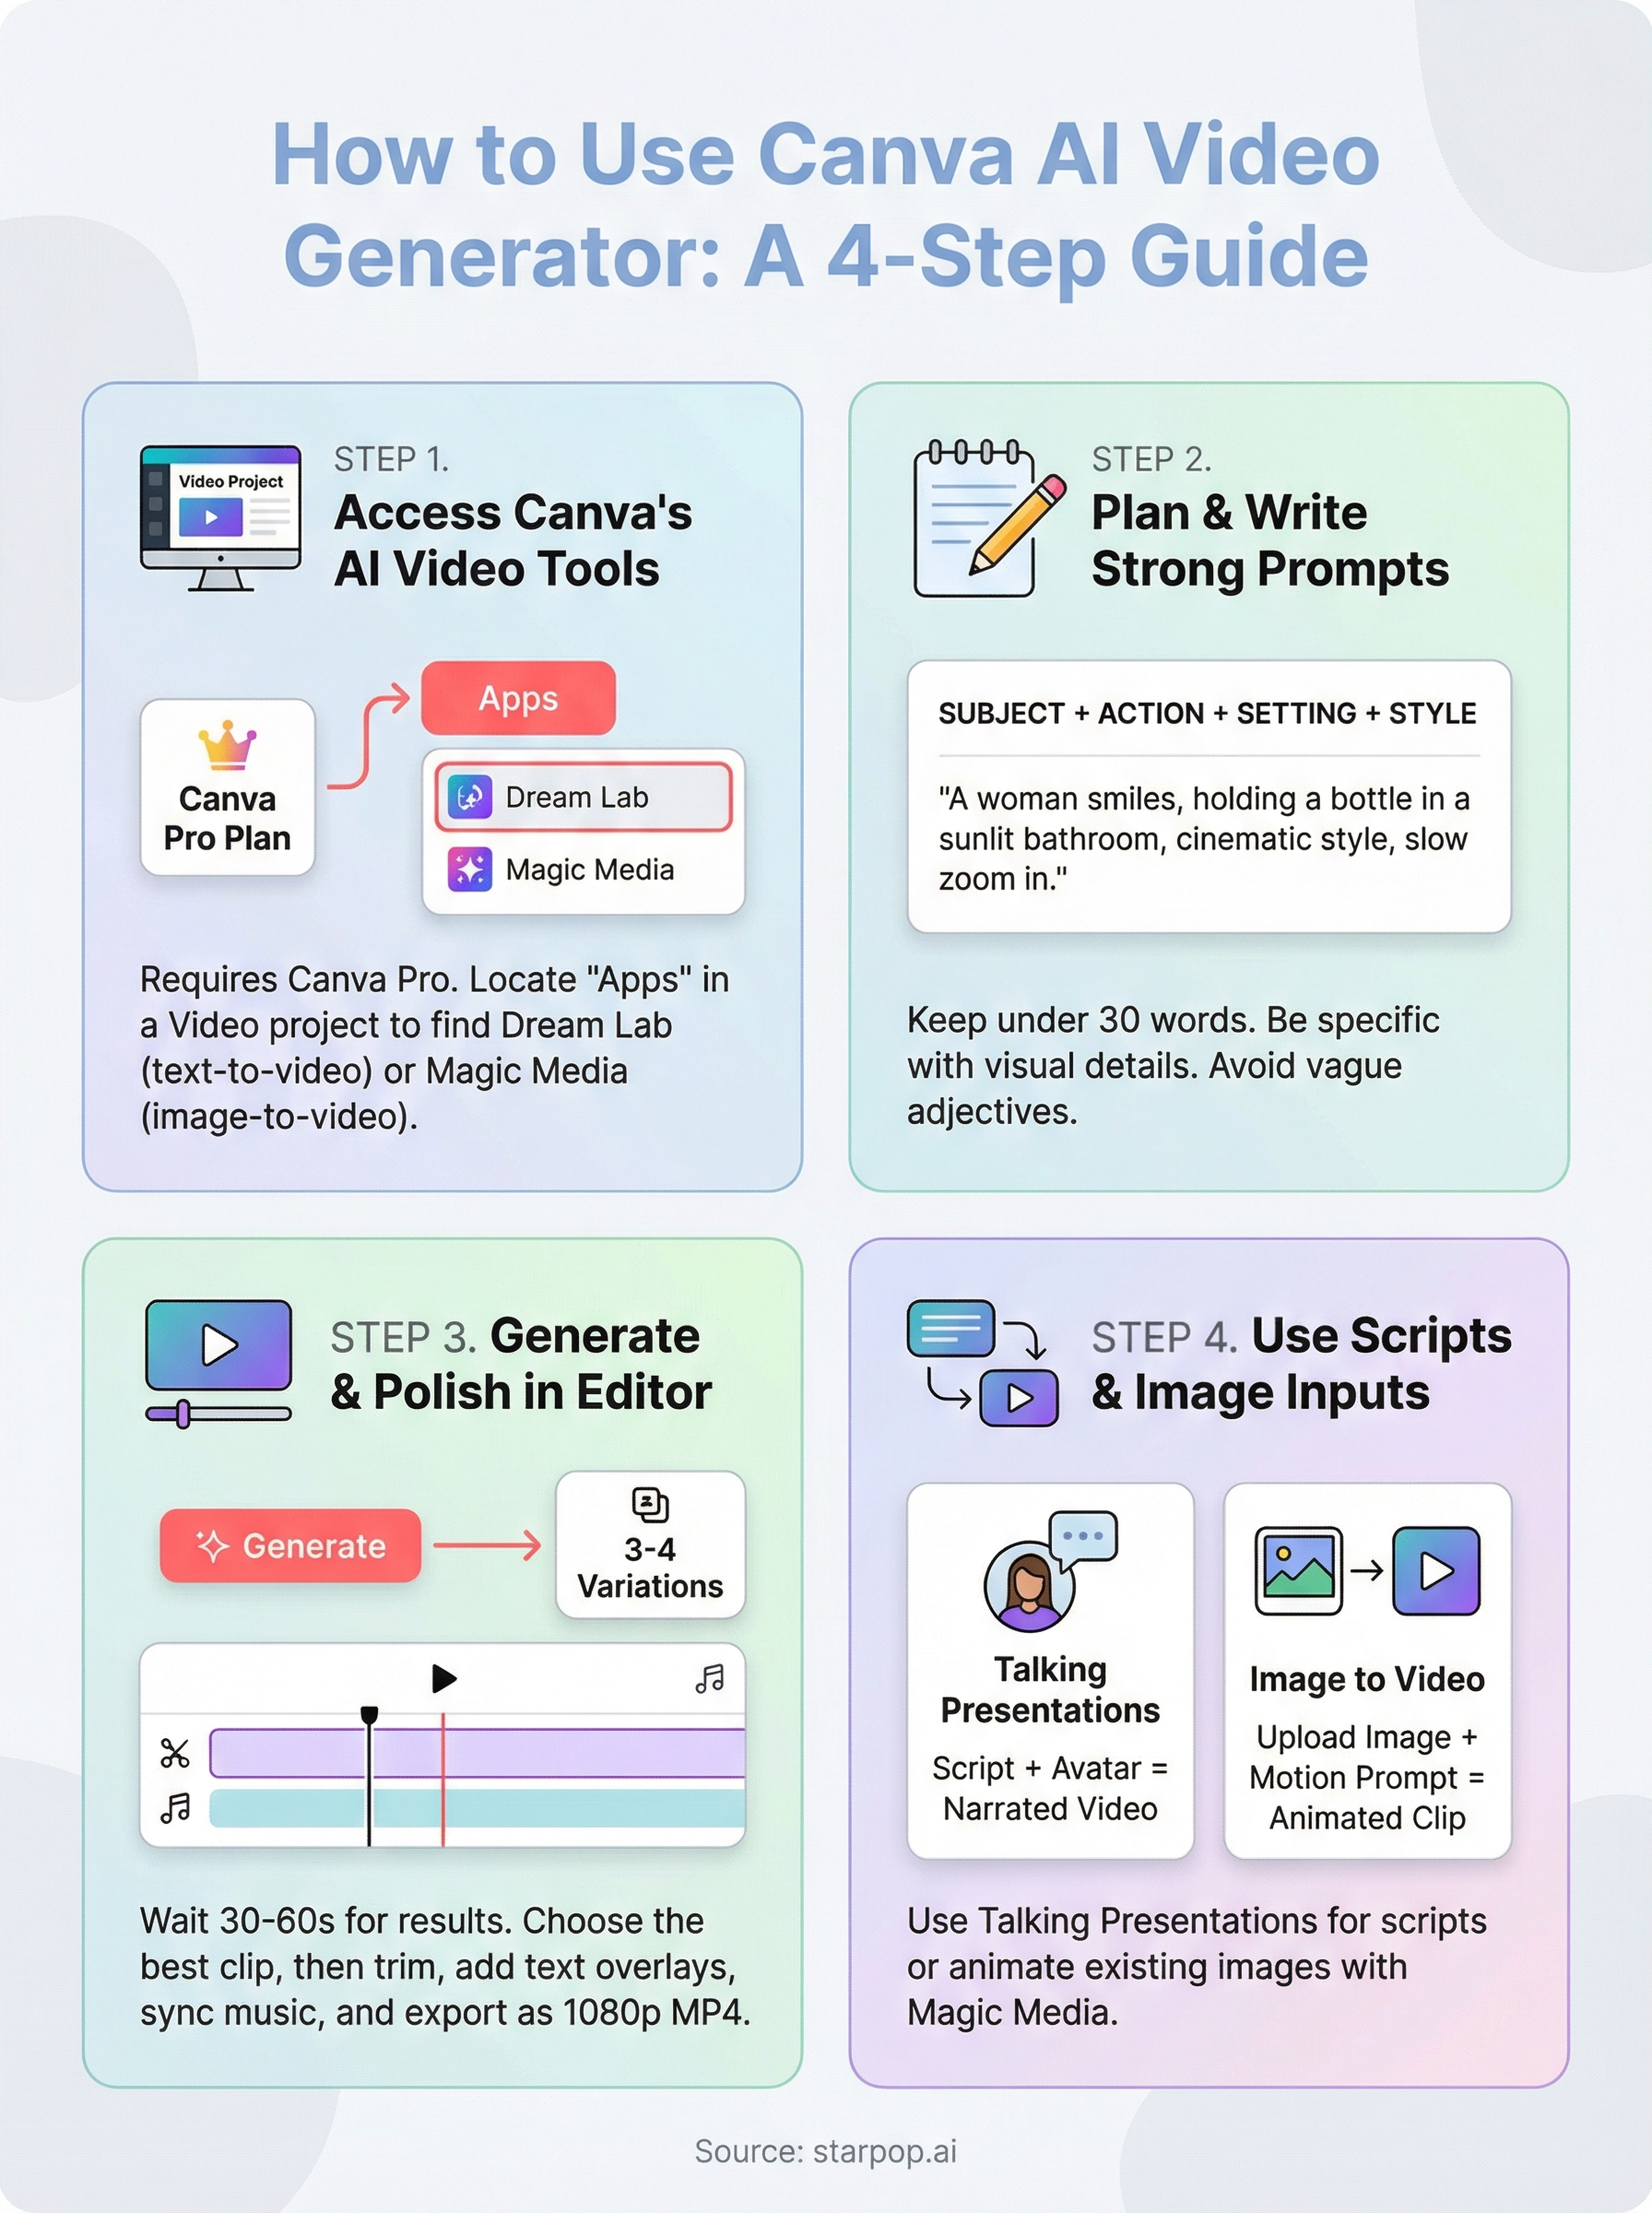
Step 1. Access Canva's AI video tools
To start using the Canva AI video generator, you need a Canva account. The free plan gives you limited access to AI tools, but most video generation features require a Canva Pro subscription (or a Teams plan if you're working with a group). Head to canva.com, sign in, and create a new Video project from the homepage.
Canva Pro unlocks the full AI generation feature set, including Dream Lab video mode and unlimited Magic Media uses, so check your plan before you start.
Where to find the AI video features
Canva keeps its AI tools in a few different spots, which makes them tricky to locate the first time. Your fastest route is to open any Video project, then click the "Apps" button in the left-side panel to browse available AI tools, including Magic Media and Dream Lab.
Here's exactly where each key feature lives:
| Feature | How to access |
|---|---|
| Dream Lab (video) | Apps panel > Dream Lab > switch to Video tab |
| Magic Media (animate image) | Apps panel > Magic Media > Image to Video |
| Talking Presentations | Create Presentation > Present > Talking Presentation |
| Magic Write + video draft | Apps panel > Magic Write > generate script |
Once you locate the Apps panel, pin your most-used tools to keep your workflow organized across multiple projects without hunting through menus each time.
Step 2. Plan your clip and write strong text prompts
Before you open the Canva AI video generator and start typing, spend two minutes planning what you actually want the clip to show. A clear plan saves you multiple regeneration attempts and gets you to a usable clip faster. Think about the subject, movement, setting, and mood of your video before you write a single word of your prompt.
A vague prompt like "product video" gives the AI nothing to work with. A specific prompt with concrete visual details produces results you can actually use.
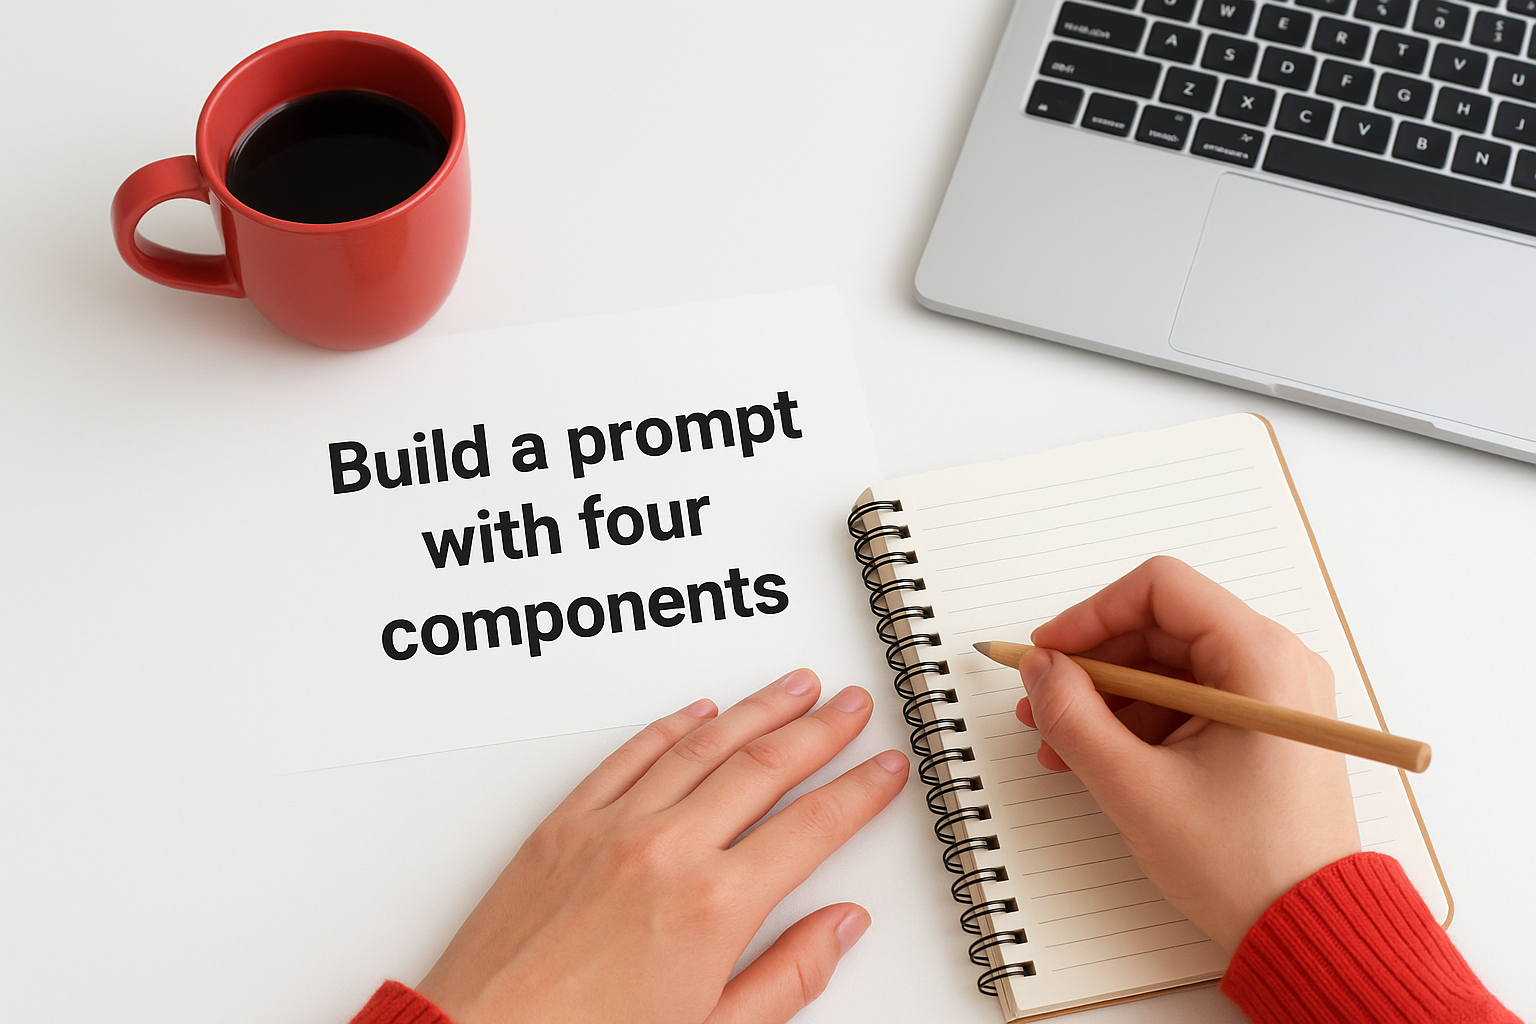
Build a prompt with four components
Strong prompts follow a simple structure: subject + action + setting + style. Each component gives the model a concrete visual direction. You don't need complex language, but you do need specific nouns and active verbs rather than abstract adjectives like "nice" or "good."
Here's a prompt template you can copy and adapt:
[Subject] [action verb] in a [specific setting], [lighting type] lighting, [visual style] style, [camera movement]
Example prompt:
A woman holding a skincare bottle smiles at the camera in a bright minimalist bathroom, soft natural lighting, cinematic style, slow zoom in
What to cut from your prompts
Keep your prompts under 30 words to avoid confusing the model with competing instructions. Drop emotional words like "beautiful" or "inspiring" in favor of tangible visual details the AI can actually render, such as specific colors, locations, and actions.
Step 3. Generate the video and polish it in Canva
After entering your prompt in the Canva AI video generator, click "Generate" and wait 30 to 60 seconds for the clip to render. Canva typically produces three to four variations from a single prompt, so review all of them before picking one. Choose the clip that best matches your planned subject, action, and camera movement, then drag it onto the canvas.
If none of the variations work, change one specific element of your prompt rather than rewriting it entirely. Swapping the setting or camera movement often produces a noticeably different result.
Polish the clip inside Canva's editor
Once your clip sits on the canvas, use the video timeline at the bottom of the screen to trim weak opening or closing frames. Most AI-generated clips run four to eight seconds, so cutting dead space keeps your content tight and watchable.
Follow these steps to finalize your clip before exporting:
- Trim the clip by dragging the handles on the timeline to cut weak frames
- Add text overlays using the Text panel on the left sidebar
- Sync background music by uploading an audio file or selecting a track from Canva's built-in library
- Apply a transition between clips if you are connecting multiple scenes in a sequence
- Export the finished video as an MP4 at 1080p using the Share button in the top-right corner
Step 4. Use scripts, avatars, and images when needed
Text-to-video clips work well for background footage, but the Canva AI video generator gives you two additional input methods that produce more structured results: scripts paired with AI avatars, and static images animated into motion clips. Knowing when to reach for each one saves you significant time when a plain generated clip won't carry the message on its own.
Turn a script into a narrated video
Canva's Talking Presentations feature converts a written script into a narrated video using an AI avatar, which makes it the right choice when your content needs a clear spoken explanation rather than abstract motion footage. Open a new Presentation, click "Present," then select "Talking Presentation" to choose your avatar and paste your script into the narration panel.
Write your script at a conversational pace, roughly 130 words per minute, so the avatar's speech stays natural and the timing matches your slide transitions.
Animate static images into video clips
If you already have a strong product photo or branded image, uploading it to Magic Media's Image to Video feature is faster than generating a clip from scratch. Select "Apps" in the left panel, open Magic Media, switch to the "Image to Video" tab, and upload your file. Add a short motion prompt like "slow zoom out with soft light" to guide how the animation moves, then generate and drag the result onto your timeline.
Next steps for your first AI video
You now have a complete workflow for using the Canva AI video generator, from finding the right tools to writing tight prompts and layering in narration or animated images. Your immediate next step is simple: open Canva, start a fresh Video project, and generate one clip using the four-component prompt structure from Step 2. One real attempt will teach you more than re-reading any guide.
Once you hit Canva's limits, particularly around marketing-specific formats like UGC ads, talking-head videos, or high-volume batch content, you'll need a platform built specifically for those outputs. Starpop gives you access to multiple frontier AI video models, over 225 marketing templates, and a Video Analyzer that reverse-engineers viral ads into reusable scene-by-scene prompts, all from one dashboard. Start with Canva to learn the basics, then move to a purpose-built tool when your ad volume demands it.