Contents
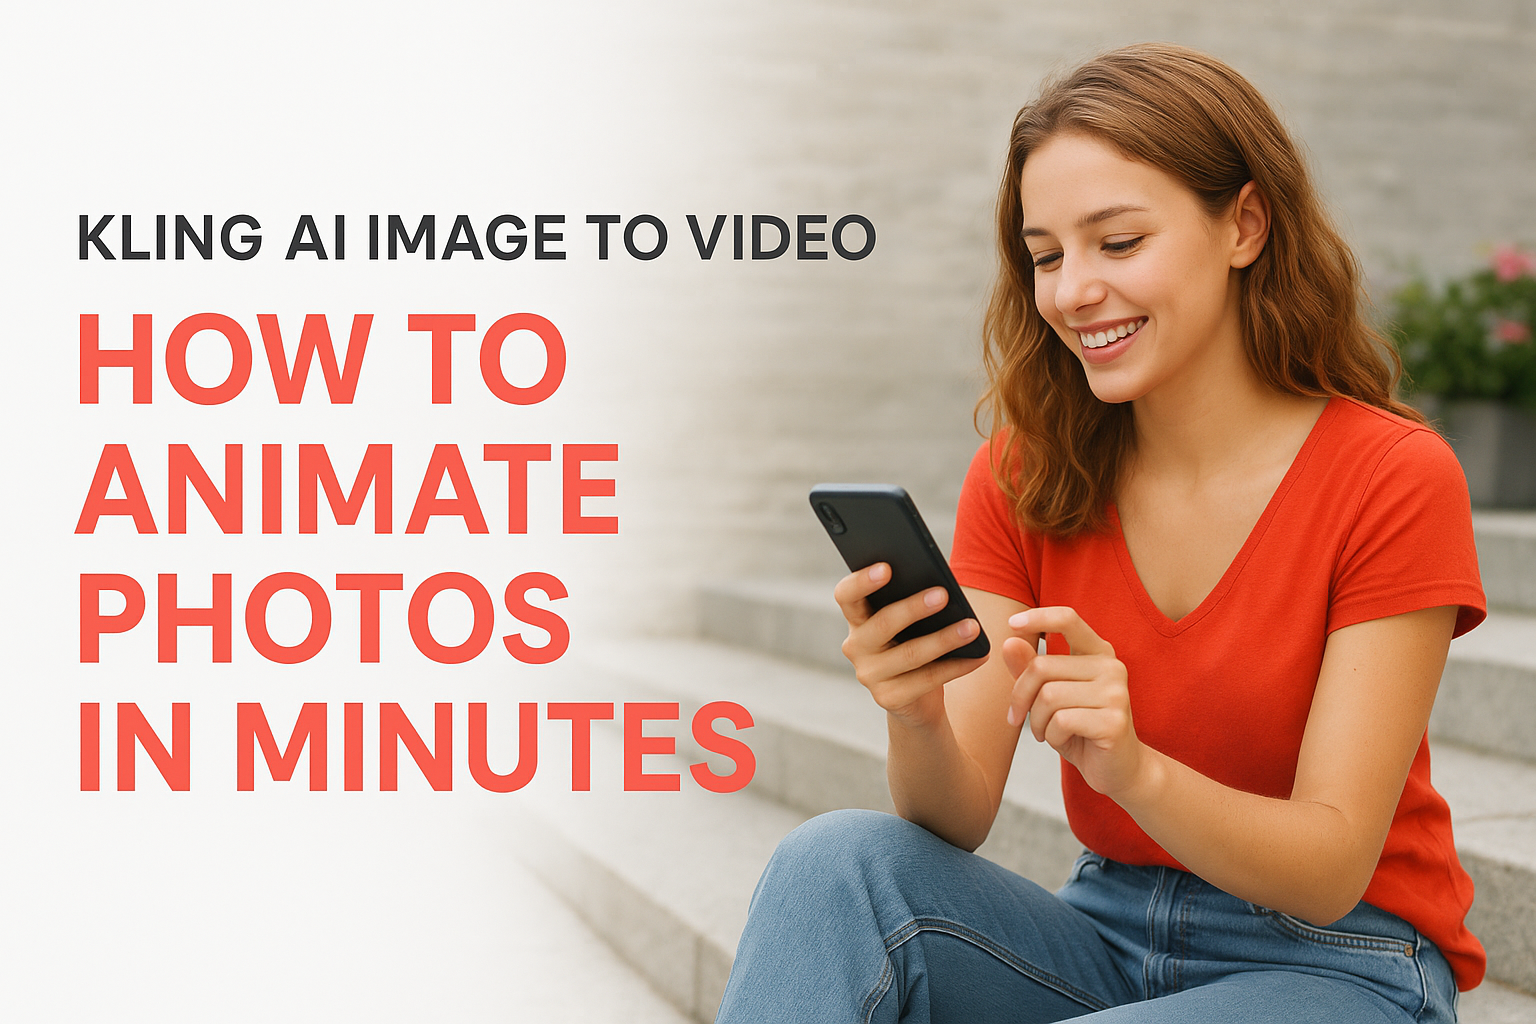
0%Static product photos don't grab attention the way they used to. Turning them into short, dynamic clips does, and Kling AI image to video is one of the fastest ways to make that happen. With just a single photo and a text prompt, you can generate realistic motion that looks like it came from an actual shoot. No camera crew, no editing software, no hours lost in post-production.
Whether you want to animate a lifestyle shot for a social ad or bring a flat product image to life for a landing page, Kling's image-to-video model handles it surprisingly well. Through Starpop, you can access Kling alongside other top-tier AI video models, all from one platform built for marketing teams that need to move fast.
This guide walks you through exactly how to use Kling AI's image-to-video feature step by step, including prompt tips that actually improve output quality and practical ways to fit the tool into your ad creation workflow. Let's get into it.
What you need before you start
Before you run your first Kling AI image to video generation, a few small decisions up front will save you from wasted credits and blurry outputs. Getting the right inputs ready is faster than re-running generations until something sticks.
Your source image: what works and what doesn't
Image quality matters more than anything else in this workflow. Kling's model reads pixel data to determine how objects should move, so a sharp, well-lit photo will always produce better motion than a low-resolution screenshot or a heavily compressed file.
Here's what to prepare:
- File format: JPEG or PNG, minimum 720p resolution (1080p or higher is ideal)
- Composition: One clear subject with enough negative space around it so the model has room to generate motion
- Lighting: Consistent, natural lighting with minimal harsh shadows
- Avoid: Text overlays, watermarks, or heavily filtered images that confuse the model's depth estimation
The cleaner your source image, the more control you'll have over the final motion. Blurry or cluttered inputs produce unpredictable results.
Your account and access method
You need an active account to generate videos. If you access Kling through Starpop, your account dashboard gives you Kling alongside other frontier video models like Google Veo and OpenAI Sora, all under one credit pool. That matters when you're testing multiple formats across a single campaign and don't want to juggle separate subscriptions.
Before your first generation, check two things: your remaining credit balance and your selected model version. Kling offers multiple model versions, and the latest one handles complex motion and edge cases noticeably better than older releases. Picking the right version before you start prevents surprises mid-batch.
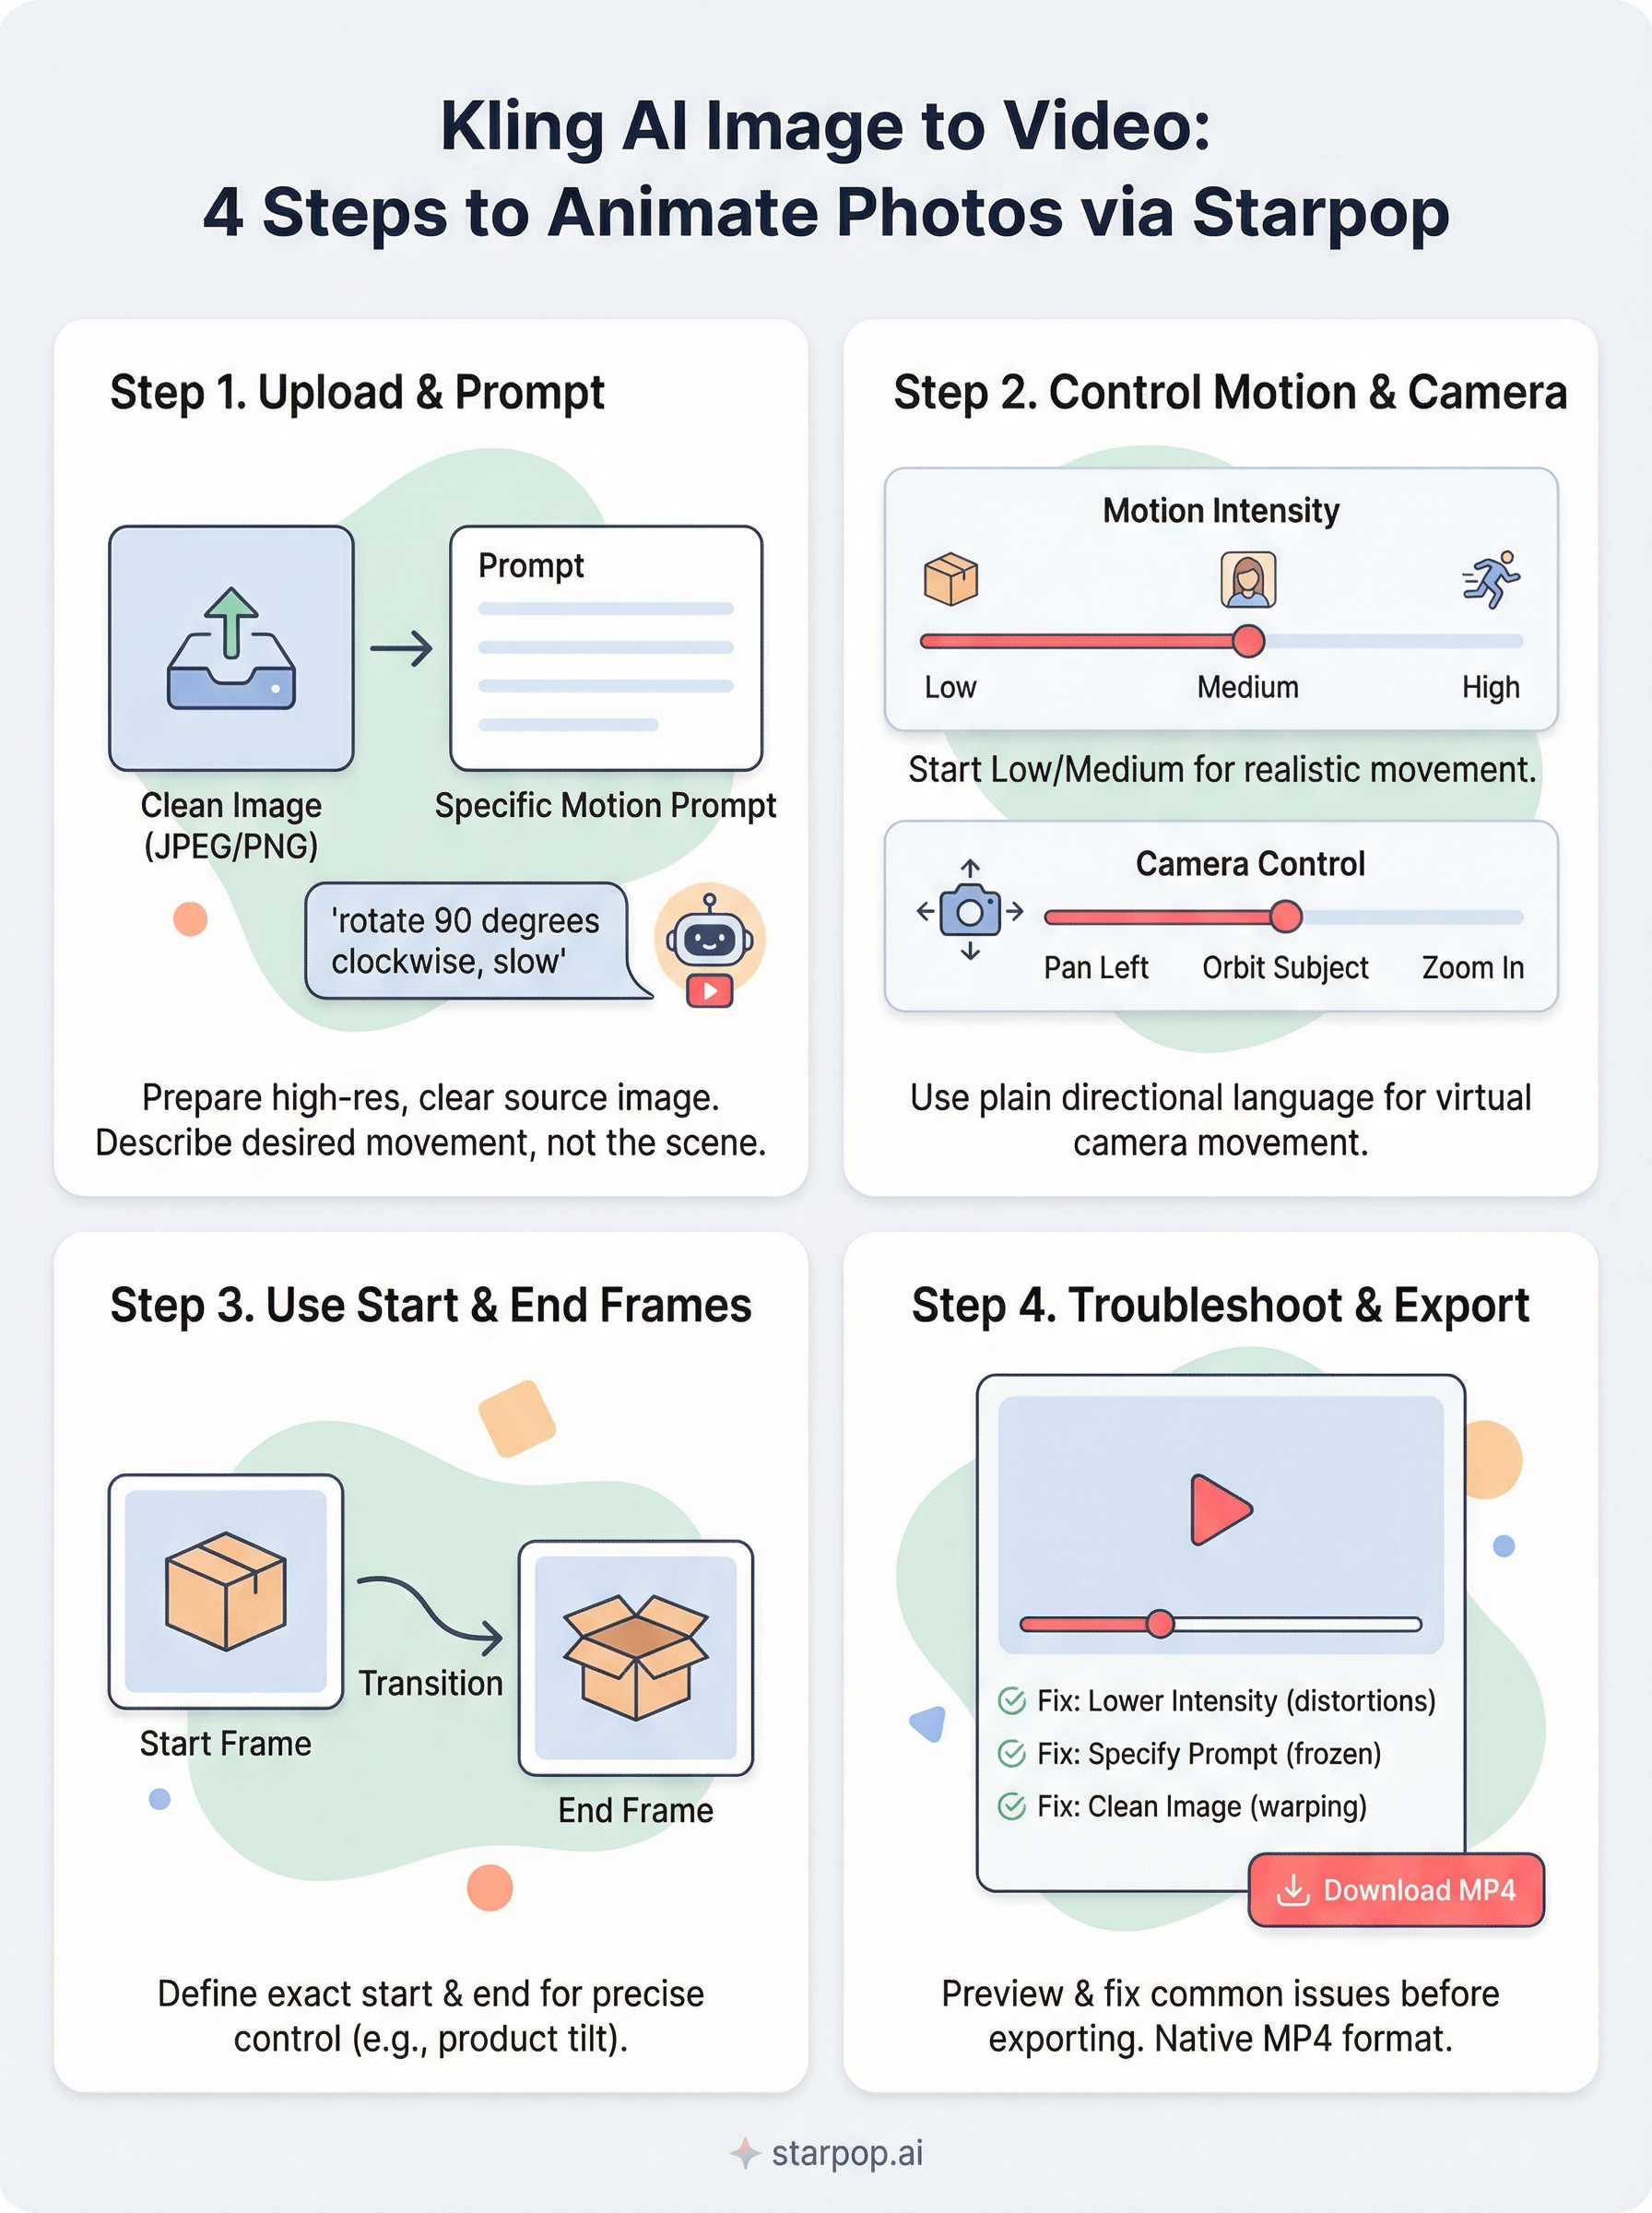
Step 1. Make your first Kling image-to-video
Open Starpop's dashboard and select Kling from the video model options. From there, choose the image-to-video generation mode to begin your first clip.
Upload your image and write your prompt
Upload your prepared source image using the file picker on the left panel. Once it loads, you'll see a prompt field below the preview. This is where your text description drives the motion. Keep your prompt short and specific: describe the movement you want to see, not the overall scene or product details.

The most effective prompts describe motion in physical terms: "gentle wind blowing hair," "product rotating slowly left," or "camera slowly zooming in on the label."
Here are prompt structures that consistently produce clean results:
| Goal | Prompt example |
|---|---|
| Product spin | "product rotating 90 degrees clockwise, slow and smooth" |
| Lifestyle motion | "woman smiling, hair moving gently in the breeze" |
| Subtle animation | "steam rising from coffee cup, soft movement" |
After writing your prompt, set your output duration (5 or 10 seconds) and click generate. Your first kling ai image to video clip typically renders within two minutes. Once it finishes, preview it directly in the dashboard before downloading or moving it into your next production step.
Step 2. Control motion and camera
Kling gives you direct control over two separate variables: how much your subject moves and how the virtual camera behaves. Getting these settings right before you generate will cut wasted credits and produce outputs that are actually usable in ads.
Motion intensity settings
The motion intensity slider controls how aggressively Kling animates your subject. Low settings produce gentle, realistic movement that works well for product shots and portraits. High settings add dramatic motion but increase the risk of distortion along edges and fine details, especially in images with complex backgrounds.
Start at low or medium intensity for your first generation, then push higher only if the output feels too static.
Use this as your starting reference:
| Subject type | Recommended intensity |
|---|---|
| Product on flat surface | Low |
| Lifestyle portrait | Medium |
| Action or outdoor scene | Medium to High |
Camera movement controls
Camera motion prompts let you define how the virtual camera moves through the scene. Add these directly to your text prompt using plain directional language. Kling responds well to terms like "slow push in," "pan left," or "orbit around subject," and applies matching behavior to your kling ai image to video output.
Keep camera motion and subject motion in separate phrases within your prompt to prevent the model from blending the two instructions into something unintended.
Step 3. Use start and end frames
The start and end frame feature gives you a level of control that a text prompt alone can't match. Instead of letting Kling decide where the motion begins and ends, you supply two separate images that define the exact first and last frame of your clip.
What start and end frames do
When you give Kling a starting image and an ending image, the model fills in every frame between them with smooth, coherent motion. This makes your kling ai image to video outputs far more predictable than using a single source image with a text prompt alone. Use this feature when a product needs to shift position or a subject needs to transition between two clearly defined states.
This control works best when your start and end images share similar lighting, background, and subject framing.
How to set them up
In Starpop's Kling panel, select "Start & End Frame" mode from the generation options. Upload your first image in the start slot and your second in the end slot, then add a short prompt describing the transition between them. Use these pairings as a starting point:
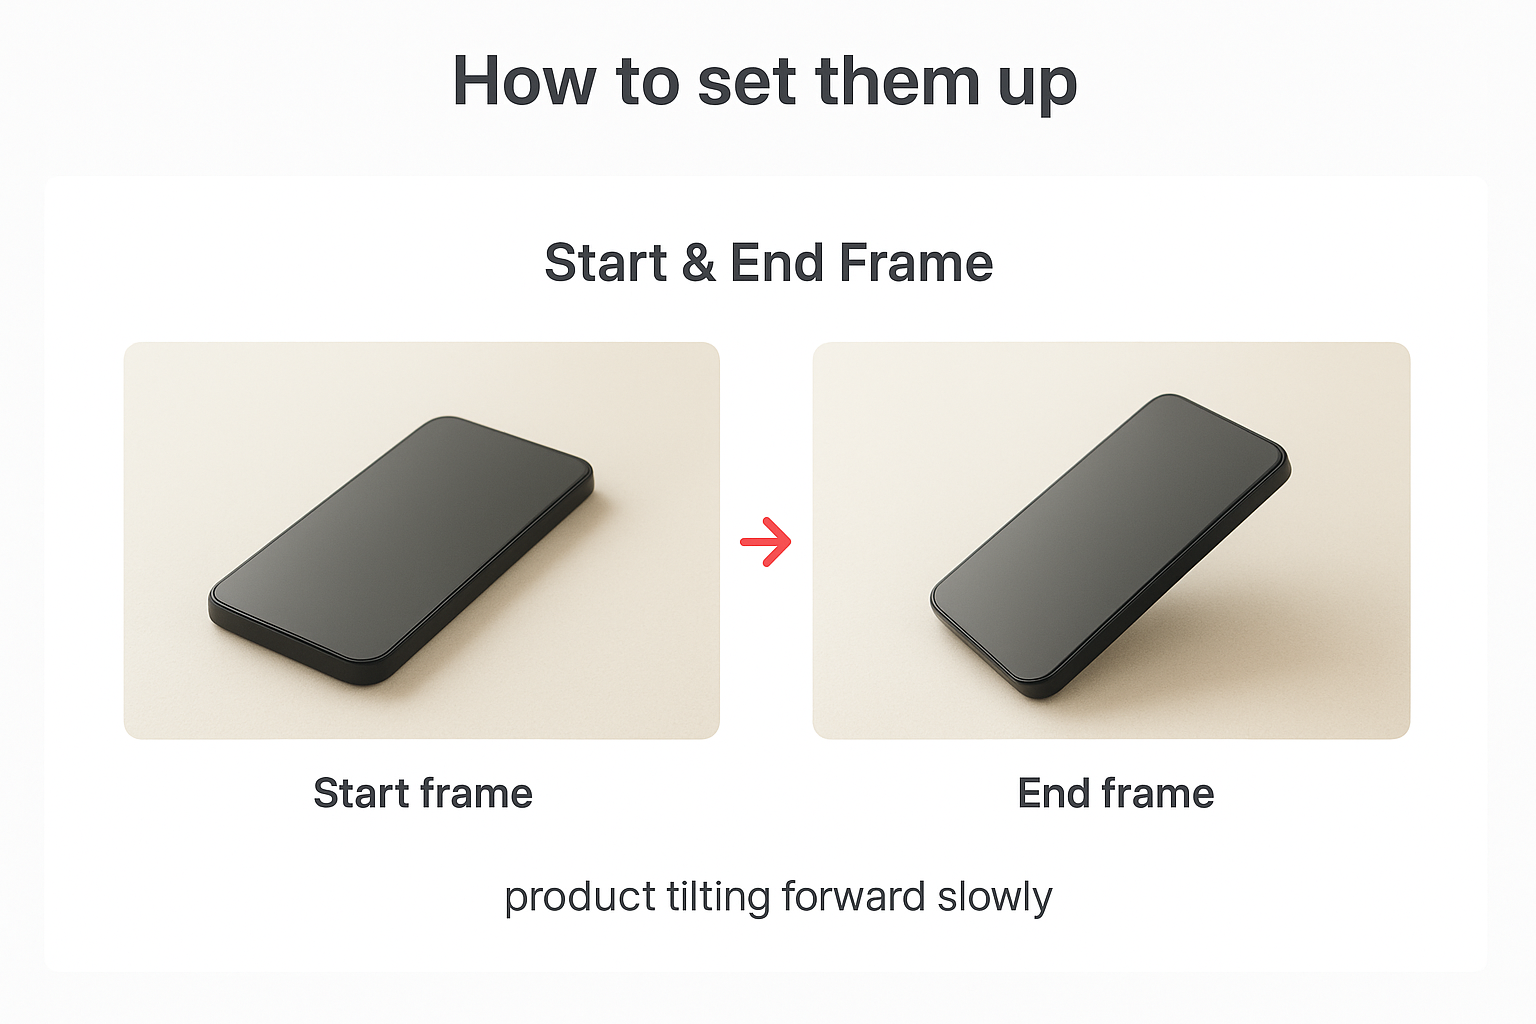
| Start frame | End frame | Prompt |
|---|---|---|
| Product flat on surface | Product tilted at 45 degrees | "product tilting forward slowly" |
| Model facing forward | Model facing left | "subject turning head to the left" |
Step 4. Troubleshoot and export
Most kling ai image to video generations come out clean, but a handful of issues appear often enough that knowing the fix in advance will save you time. Before you download anything, run a quick review of your output in the Starpop preview player.
Common issues and how to fix them
When something looks off, the cause is almost always in your source image or prompt, not the model itself. Check this table before re-running a generation:
| Problem | Likely cause | Fix |
|---|---|---|
| Distorted edges or limbs | Motion intensity too high | Lower intensity to medium or low |
| Frozen subject | Prompt too vague | Add a specific physical motion description |
| Background warping | Cluttered or low-res image | Use a cleaner, higher-resolution source photo |
| Unintended camera drift | Mixed camera and subject prompts | Separate into two distinct prompt phrases |
If an output still fails after adjusting your inputs, switching to a newer Kling model version inside Starpop usually resolves it.
Exporting your final clip
Once your clip looks right, click Download in the preview panel. Starpop exports your file as an MP4, which works natively across every major ad platform including Meta, TikTok, and Google Ads. No format conversion needed before uploading.
Next steps
You now have everything you need to run your first kling ai image to video generation from start to finish. The workflow is straightforward: prepare a clean source image, write a specific motion prompt, adjust your intensity settings, and use start and end frames when you need precise control over the output.
From here, the fastest way to improve your results is volume. Run three or four variations of the same clip using different intensity levels and prompt structures, then compare them side by side. You'll quickly develop a sense for what inputs produce consistent, usable outputs versus what wastes credits.
When you're ready to scale beyond single clips, batch processing lets you generate up to 20 assets at once across video, image, and audio. Starpop gives you access to Kling alongside every other major AI video model in one place, with no tab-switching required. Start creating AI videos with Starpop and put your first animated ad live today.