Contents
0%CapCut has become one of the go-to editing apps for creators and marketers alike, and its AI features keep expanding. The CapCut AI video generator lets you turn text prompts, scripts, and even URLs into ready-to-publish videos, no timeline editing required. Whether you're creating TikTok ads, product demos, or social content, it's a genuinely useful shortcut for getting from idea to finished video fast.
But here's the thing: CapCut's AI tools have real limitations, especially when you need hyper-realistic avatars, voice cloning, or the kind of scroll-stopping UGC-style ads that actually convert. That's where platforms like Starpop come in, giving you access to multiple frontier AI models (Sora, Veo, Kling, ElevenLabs) through a single interface built specifically for performance marketing content. So while CapCut is a solid starting point, it's worth knowing where it shines and where you'll hit a ceiling.
This guide walks you through exactly how to use CapCut's AI video generator step by step, from text-to-video and script-to-video workflows to its AI avatar features. You'll also learn what's available for free, what sits behind a paywall, and when you might need a more specialized tool to get the results your campaigns demand.
What CapCut AI video generator can do
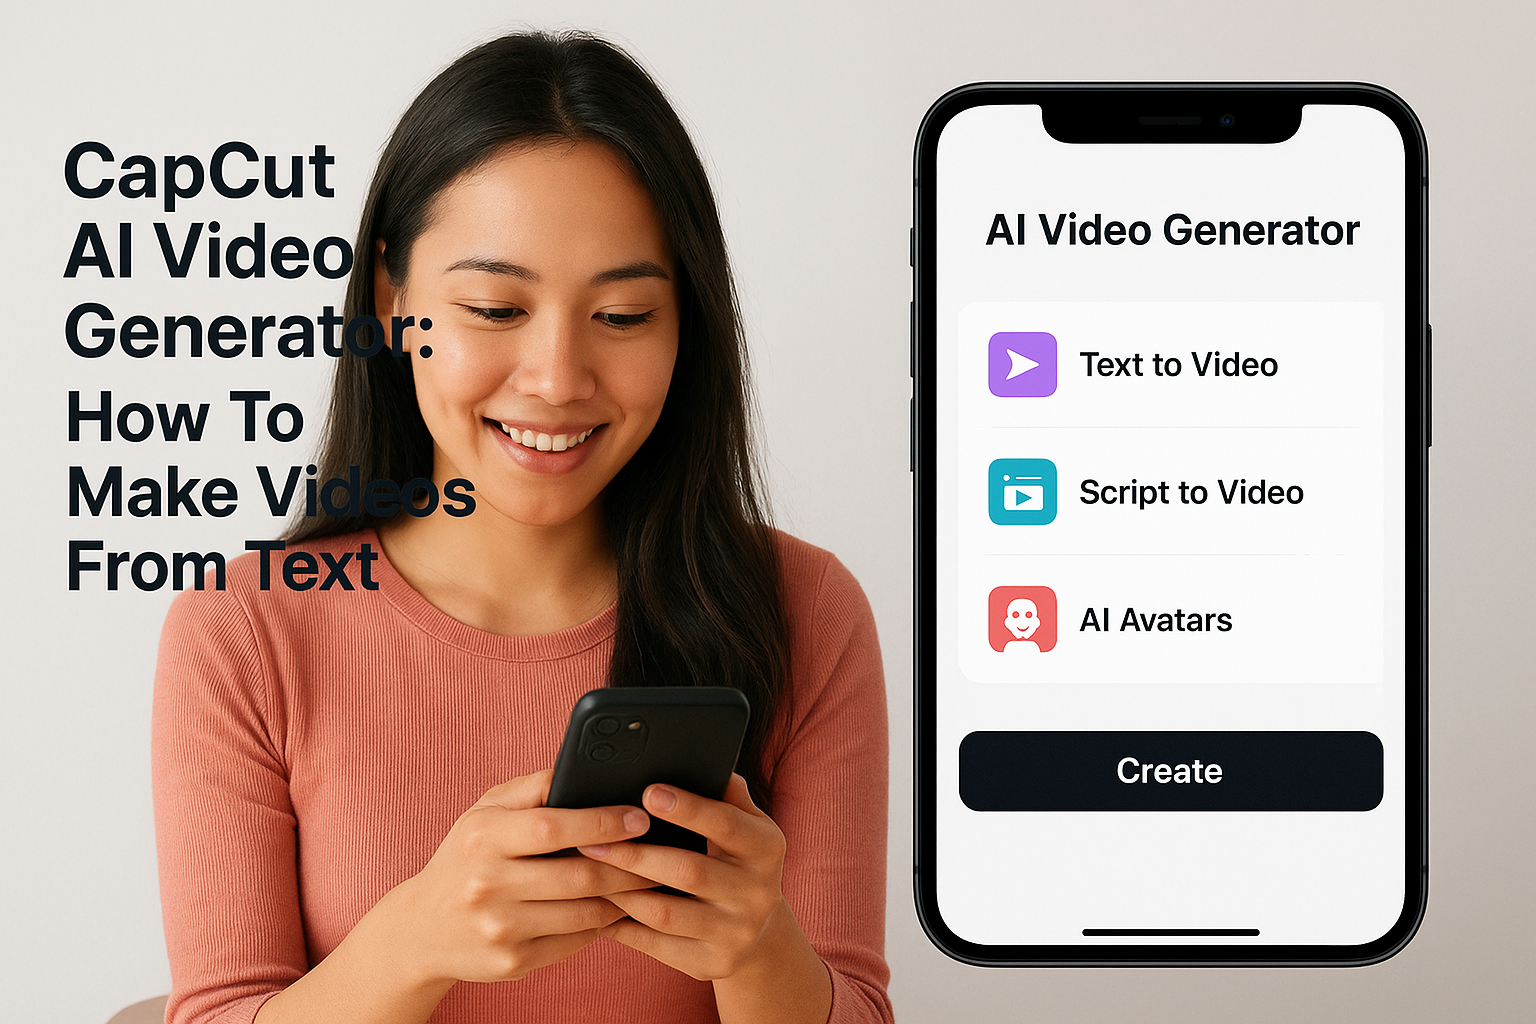
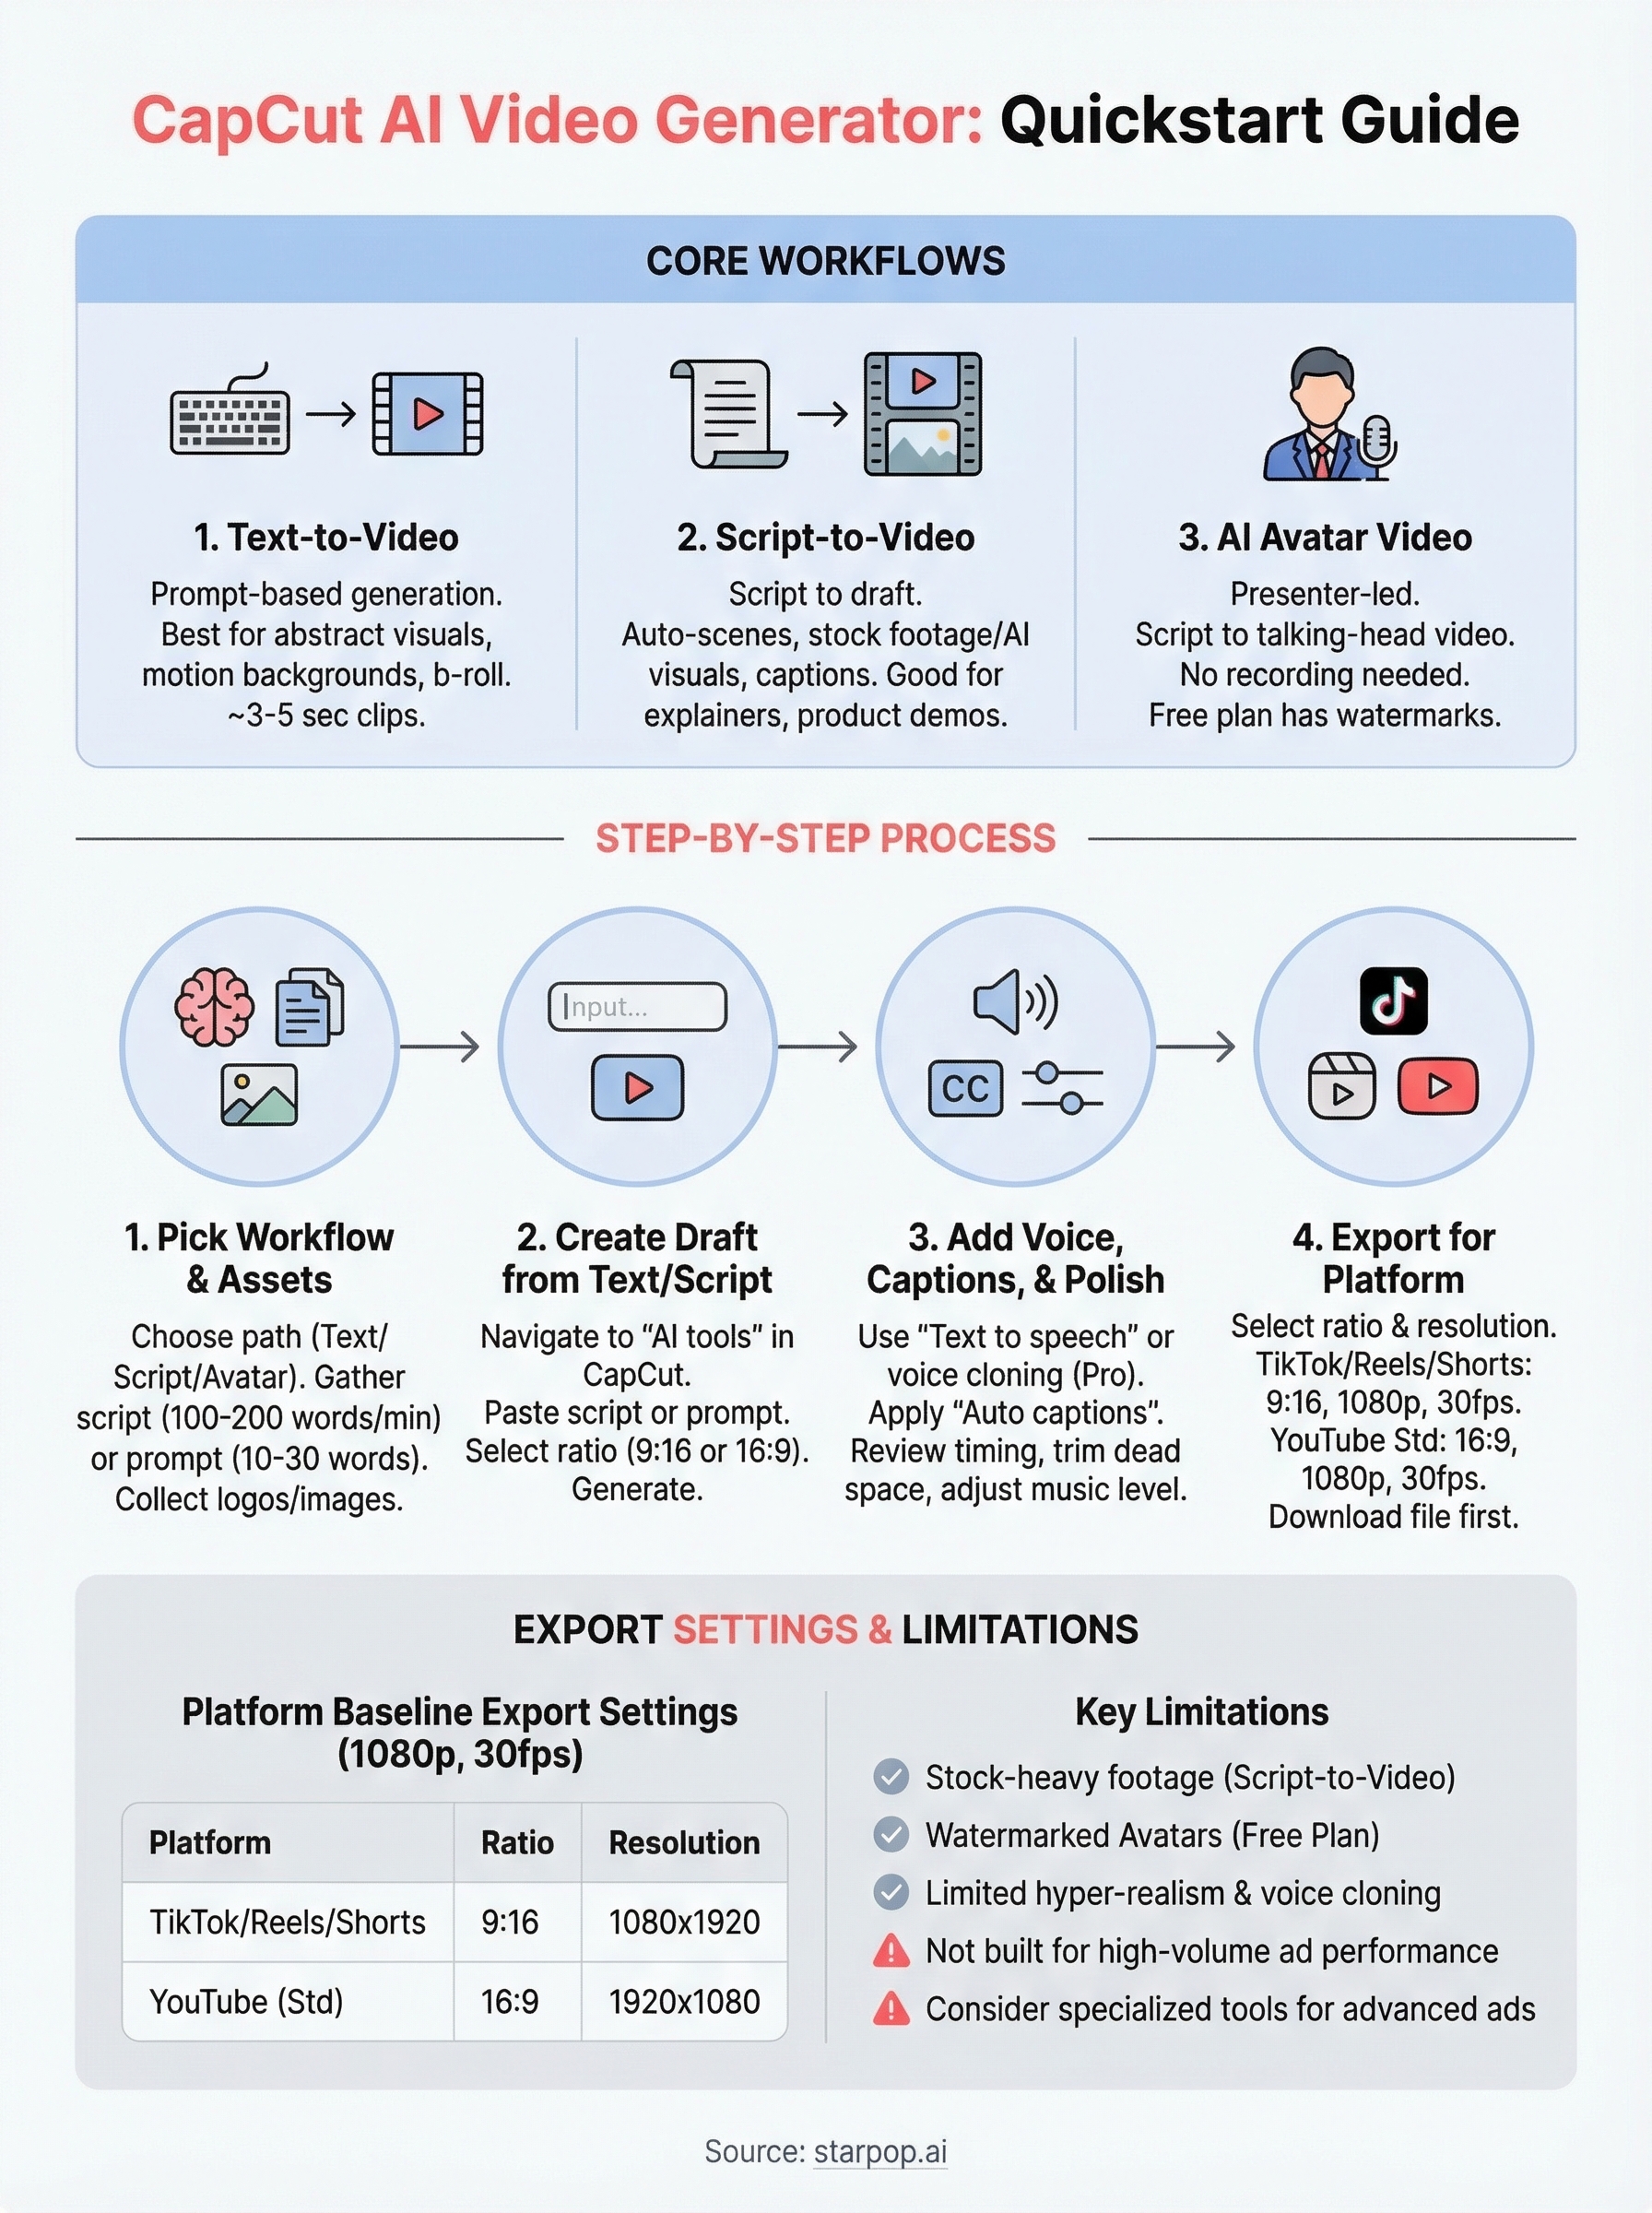
The CapCut AI video generator bundles several distinct tools under one roof, and knowing what each one does saves you a lot of trial and error. At its core, CapCut gives you three main AI video paths: text-to-video, script-to-video with AI avatars, and video enhancement using AI-powered effects. Each path serves a different use case, so picking the right one before you start makes the whole process faster and less frustrating.
Text-to-video and script-to-video
Text-to-video lets you type a prompt and receive a short AI-generated clip, typically 3 to 5 seconds of footage built directly from your description. It works best for abstract visuals, motion backgrounds, or b-roll style content. Script-to-video goes further: you paste in a full script, CapCut breaks it into scenes, selects stock footage or AI visuals for each segment, adds captions automatically, and produces a complete draft video. This workflow is what most creators use for quick social explainers, product walkthroughs, and short-form ad concepts.
Script-to-video is the fastest path from a written idea to a shareable draft, but the footage it pulls comes from stock libraries rather than fully custom AI generation.
AI avatars and voice cloning
CapCut also gives you access to AI avatars, which are pre-built digital presenters that read your script on screen. You pick an avatar, paste your script, and CapCut generates a talking-head video without any recording equipment needed. The free plan includes a limited avatar library with watermarked exports, while CapCut Pro unlocks a broader presenter selection and removes the watermark from your final files. Voice cloning, which lets you generate narration in your own voice, requires a Pro subscription and a short voice sample recording to set up.
Step 1. Pick a workflow and gather assets
Before you open CapCut, decide which workflow matches your goal. The capcut ai video generator offers three distinct paths, and choosing the wrong one upfront means rebuilding your project from scratch. Spending two minutes on this decision saves you from wasted generation credits and half-finished drafts.
Your workflow choice determines what assets you need to collect before you hit generate.
Choose your workflow
Script-to-video works best when you have a written message to deliver, like a product pitch or a how-to explainer. Text-to-video suits short visual clips where you want AI to interpret a creative prompt and generate footage. If you need a presenter on screen, pick the avatar workflow and confirm you have a Pro plan ready, since the free tier watermarks avatar exports.
Gather your assets before you start
Depending on your workflow, collect the following before opening CapCut:
- Script-to-video: a written script (aim for 100 to 200 words per minute of finished video)
- Text-to-video: a descriptive prompt of 10 to 30 words covering subject, style, and motion
- Avatar video: your script plus any brand logos or product images for the background
Having everything ready before you generate cuts revision time significantly and keeps your output consistent across multiple drafts.
Step 2. Create a draft from text or a script
Open CapCut on desktop or mobile and navigate to the AI tools section from the main dashboard. The exact label varies slightly between app versions, but you're looking for "AI video" or "Script to video" in the creation menu. Once you're in the right tool, the capcut ai video generator gives you a clear input field to paste your content and kick off your first draft.
Using the script-to-video path
Paste your script into the input field and select your video ratio (9:16 for TikTok and Reels, 16:9 for YouTube). CapCut automatically splits your script into scenes and matches stock footage to each segment. Review the scene breakdown before you generate, since swapping footage at this stage is faster than editing after the video renders.

Keeping each scene in your script to one clear idea produces cleaner scene splits and better footage matches.
Using the text-to-video path
Type a descriptive prompt covering subject, setting, and motion, then hit generate. CapCut returns a short clip, usually 3 to 5 seconds, that you can extend or loop inside the editor. Use this prompt structure to keep your results consistent:
[subject] + [action] + [setting] + [camera move] + [lighting style]
For example: "a person unboxing a skincare product on a white marble table, slow zoom, warm lighting."
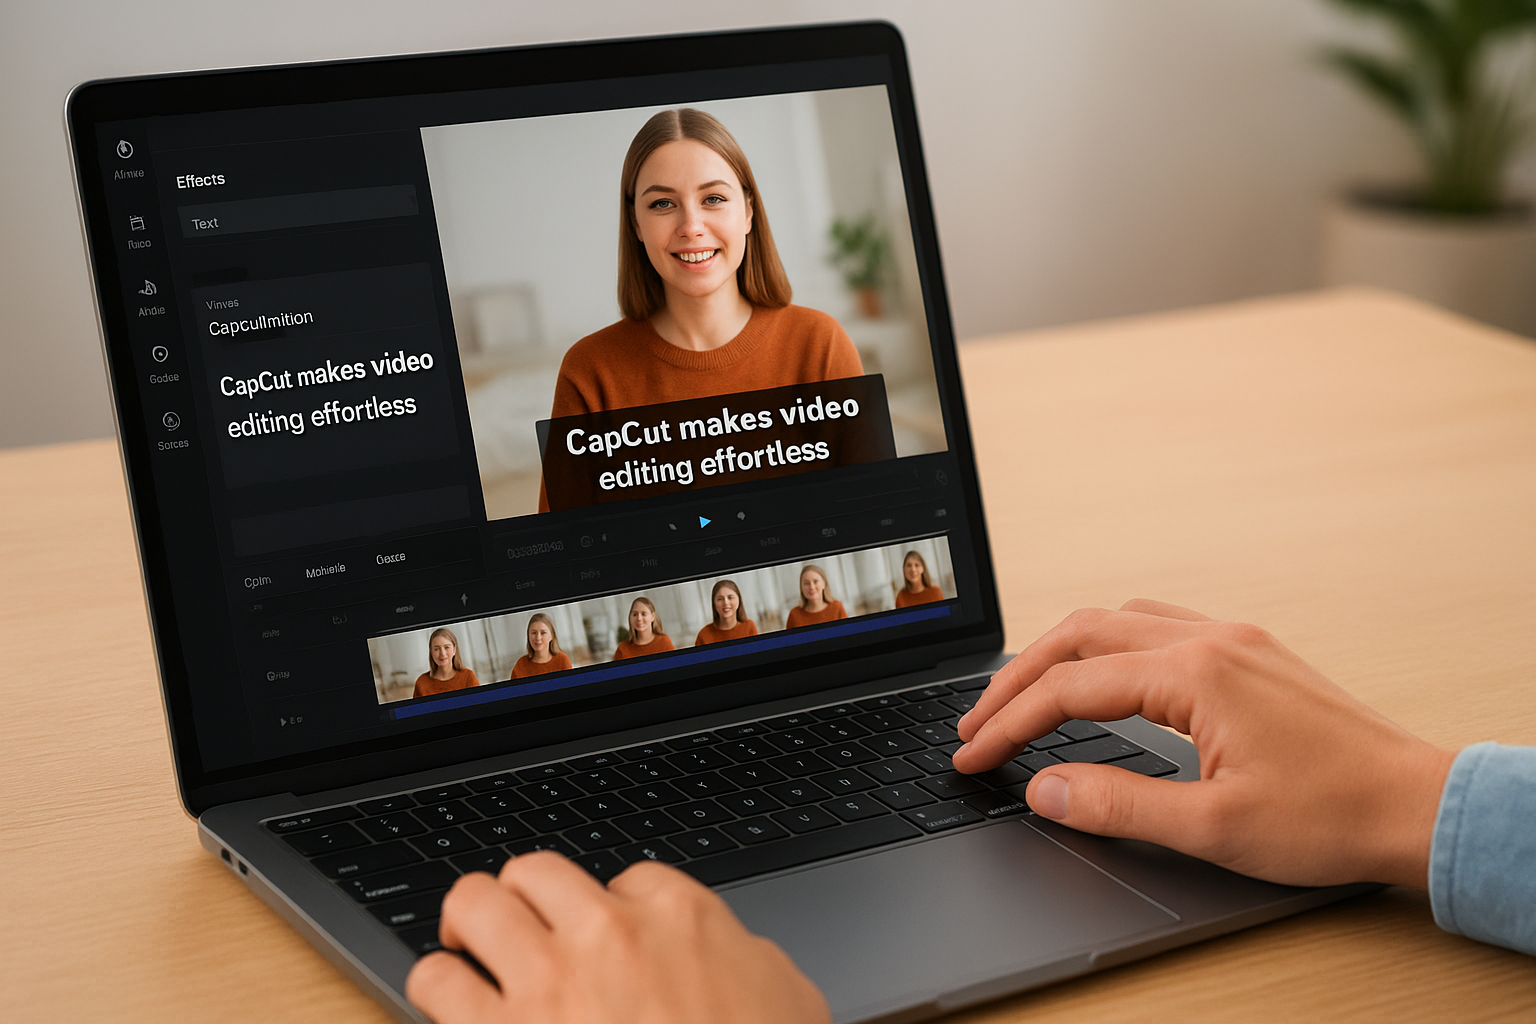
Step 3. Add voice, captions, and polish
Once your draft video is generated, the capcut ai video generator editor opens automatically so you can layer in audio and text. This stage takes your rough draft from unfinished to ready-to-publish, and most of the work happens in three focused steps.
Add narration or avatar voice
Select "Text to speech" from the audio panel and paste your script or narration copy into the input field. CapCut gives you a range of AI voices across accents and tones. Pick one, preview it, and adjust the reading speed before committing, since a speed that's too fast loses viewers within the first three seconds.
If you need a voice that sounds like you specifically, CapCut Pro's voice cloning feature lets you upload a short recording to generate a matched AI narrator.
Auto-captions and final polish
Click "Auto captions" in the text panel and CapCut transcribes your audio, then places captions directly on the timeline. Review each caption segment for timing errors or misheard words before you export. After captions are confirmed, check your transitions between scenes, trim any dead space at the start or end, and make sure your background music level sits noticeably below your narration in the final mix.
Step 4. Export for TikTok, Reels, and YouTube
Your video is polished and ready, so now you need to get it out of the capcut ai video generator in the right format for each platform. CapCut's export settings are straightforward, but picking the wrong resolution or aspect ratio means your video gets cropped or compressed by the platform before a single viewer sees it.
Match your export settings to each platform
Each platform has a preferred format, and exporting once for all three is not a reliable approach. Use the following settings as your baseline before you hit export:
| Platform | Ratio | Resolution | Frame Rate |
|---|---|---|---|
| TikTok | 9:16 | 1080 x 1920 | 30fps |
| Instagram Reels | 9:16 | 1080 x 1920 | 30fps |
| YouTube Shorts | 9:16 | 1080 x 1920 | 30fps |
| YouTube (standard) | 16:9 | 1920 x 1080 | 30fps |
Exporting at 1080p is the minimum standard; anything lower risks visible quality loss once the platform re-compresses your file.
Set your export quality to the highest available option in CapCut, then save the file to your camera roll or desktop before uploading. Uploading directly from within CapCut to TikTok or Instagram is possible, but downloading first gives you a local backup and more control over your caption, thumbnail, and posting schedule.
Next steps
You now have a complete workflow for using the capcut ai video generator, from picking the right path and writing your script to exporting at the correct specs for each platform. The tool is genuinely solid for getting quick social drafts out the door, especially when you're working with a tight turnaround and need something publishable fast.
Where CapCut starts to show its limits is in high-volume ad production. When you need hyper-realistic UGC-style ads, voice cloning that sounds indistinguishable from a real person, or the ability to batch generate 20 assets at once across multiple AI models, you'll need a platform built for performance marketing rather than general editing.
Starpop gives you access to Sora, Veo, Kling, and ElevenLabs through a single dashboard, with tools built specifically for creating scroll-stopping ads at scale. If you're serious about your ad creative, it's worth exploring what a dedicated platform can do.