Contents
0%Product mockups sell the vision before a customer ever touches your product. Whether you're launching a new SKU or refreshing ad creative for an existing line, Canva product mockups give you a fast, accessible way to place your designs into realistic scenes without a photo shoot. It's one of the quickest paths from raw product image to polished ad asset.
But here's the thing most guides skip: a static mockup is only the first step. High-converting ads need motion, context, and variety, which means your mockup workflow should feed directly into a larger creative pipeline. That's where knowing the right techniques inside Canva (and knowing when to level up beyond it) makes a real difference in ad performance.
This guide walks you through creating professional product mockups in Canva from scratch, covering templates, the AI mockup generator, and practical formatting tips for paid social. We'll also show you how platforms like Starpop can pick up where Canva leaves off, turning your static mockups into scroll-stopping video ads, UGC-style content, and localized creative across 100+ languages, all without hiring actors or editors. If you're running e-commerce ads at any scale, this is the workflow worth learning.
What Canva product mockups are and why they convert
A Canva product mockup is a pre-built design template that places your product artwork, logo, or packaging into a realistic scene, such as a hand holding a phone case, a coffee mug on a wooden desk, or an apparel item on a lifestyle background. You upload your design, Canva fits it to the scene, and you get a professional-looking image without arranging a physical photo shoot. That alone cuts significant time and production cost from your creative workflow.
What a product mockup actually does
At its core, a mockup removes the gap between a flat design file and a believable product image. Instead of asking customers to imagine what your product looks like in real life, you show them. Canva's template library and its AI mockup generator both let you map your artwork onto 3D surfaces, adjust the lighting context, and frame your product within lifestyle settings that match your brand positioning.
Here's what a standard Canva product mockup workflow covers:
- Template selection: Choose from apparel, packaging, devices, print, or lifestyle scenes
- Design upload: Drop in your logo, label, or artwork file
- Smart fit: Canva warps and adjusts your design to match the surface contours
- Export: Download the finished asset as a PNG or JPG for immediate use in ads
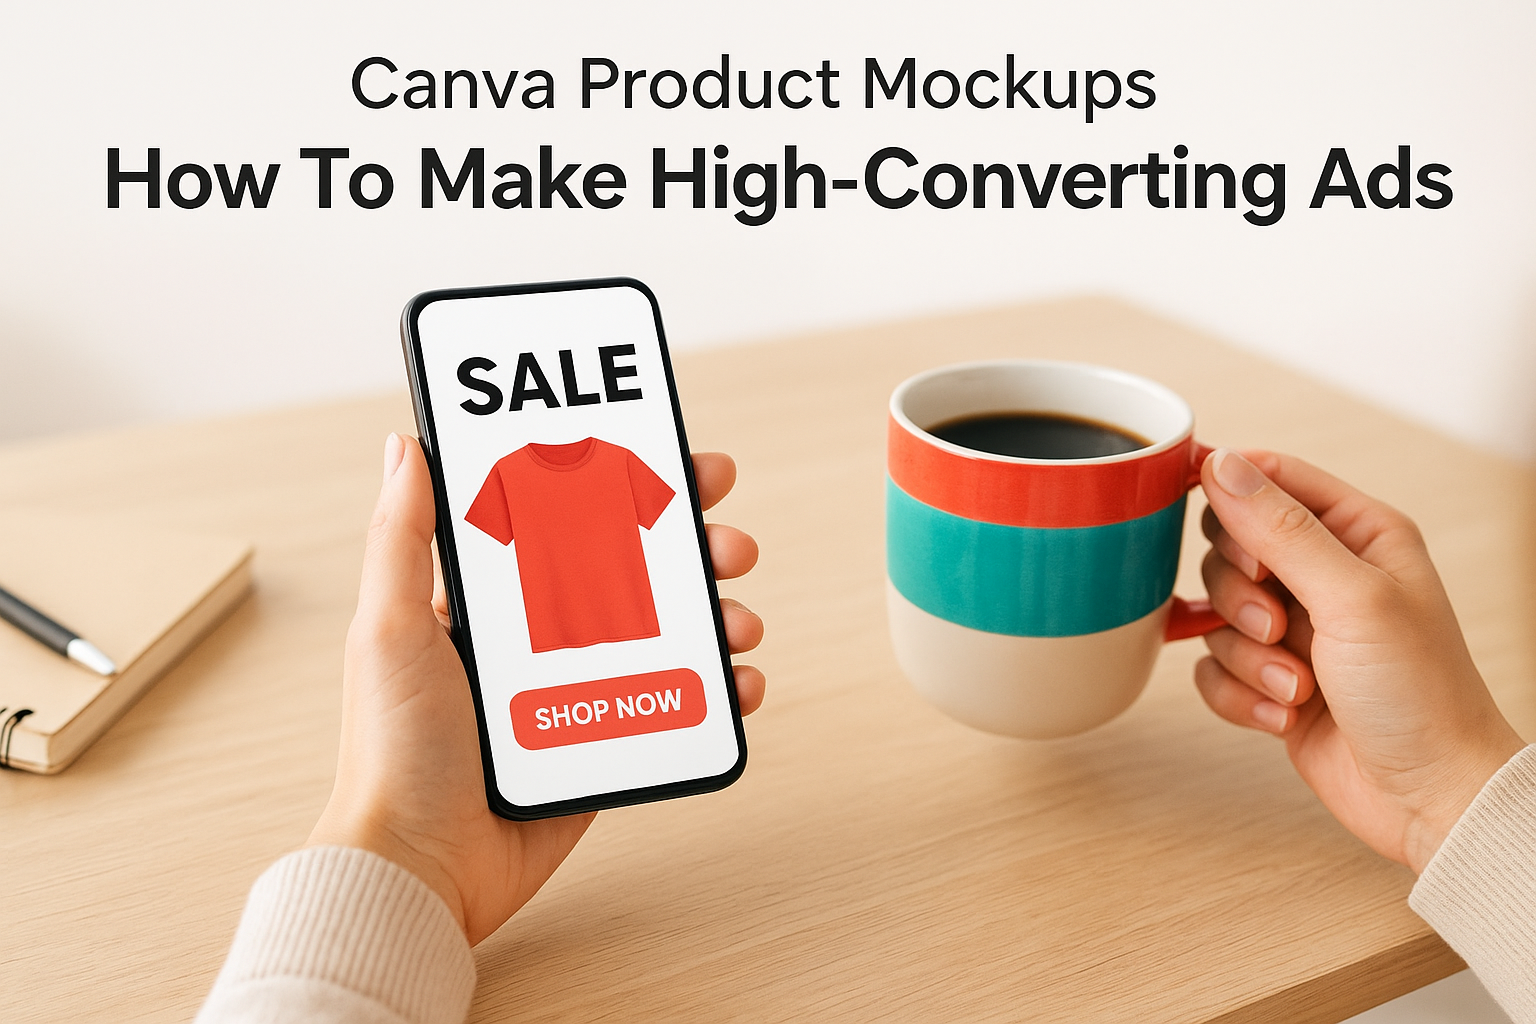
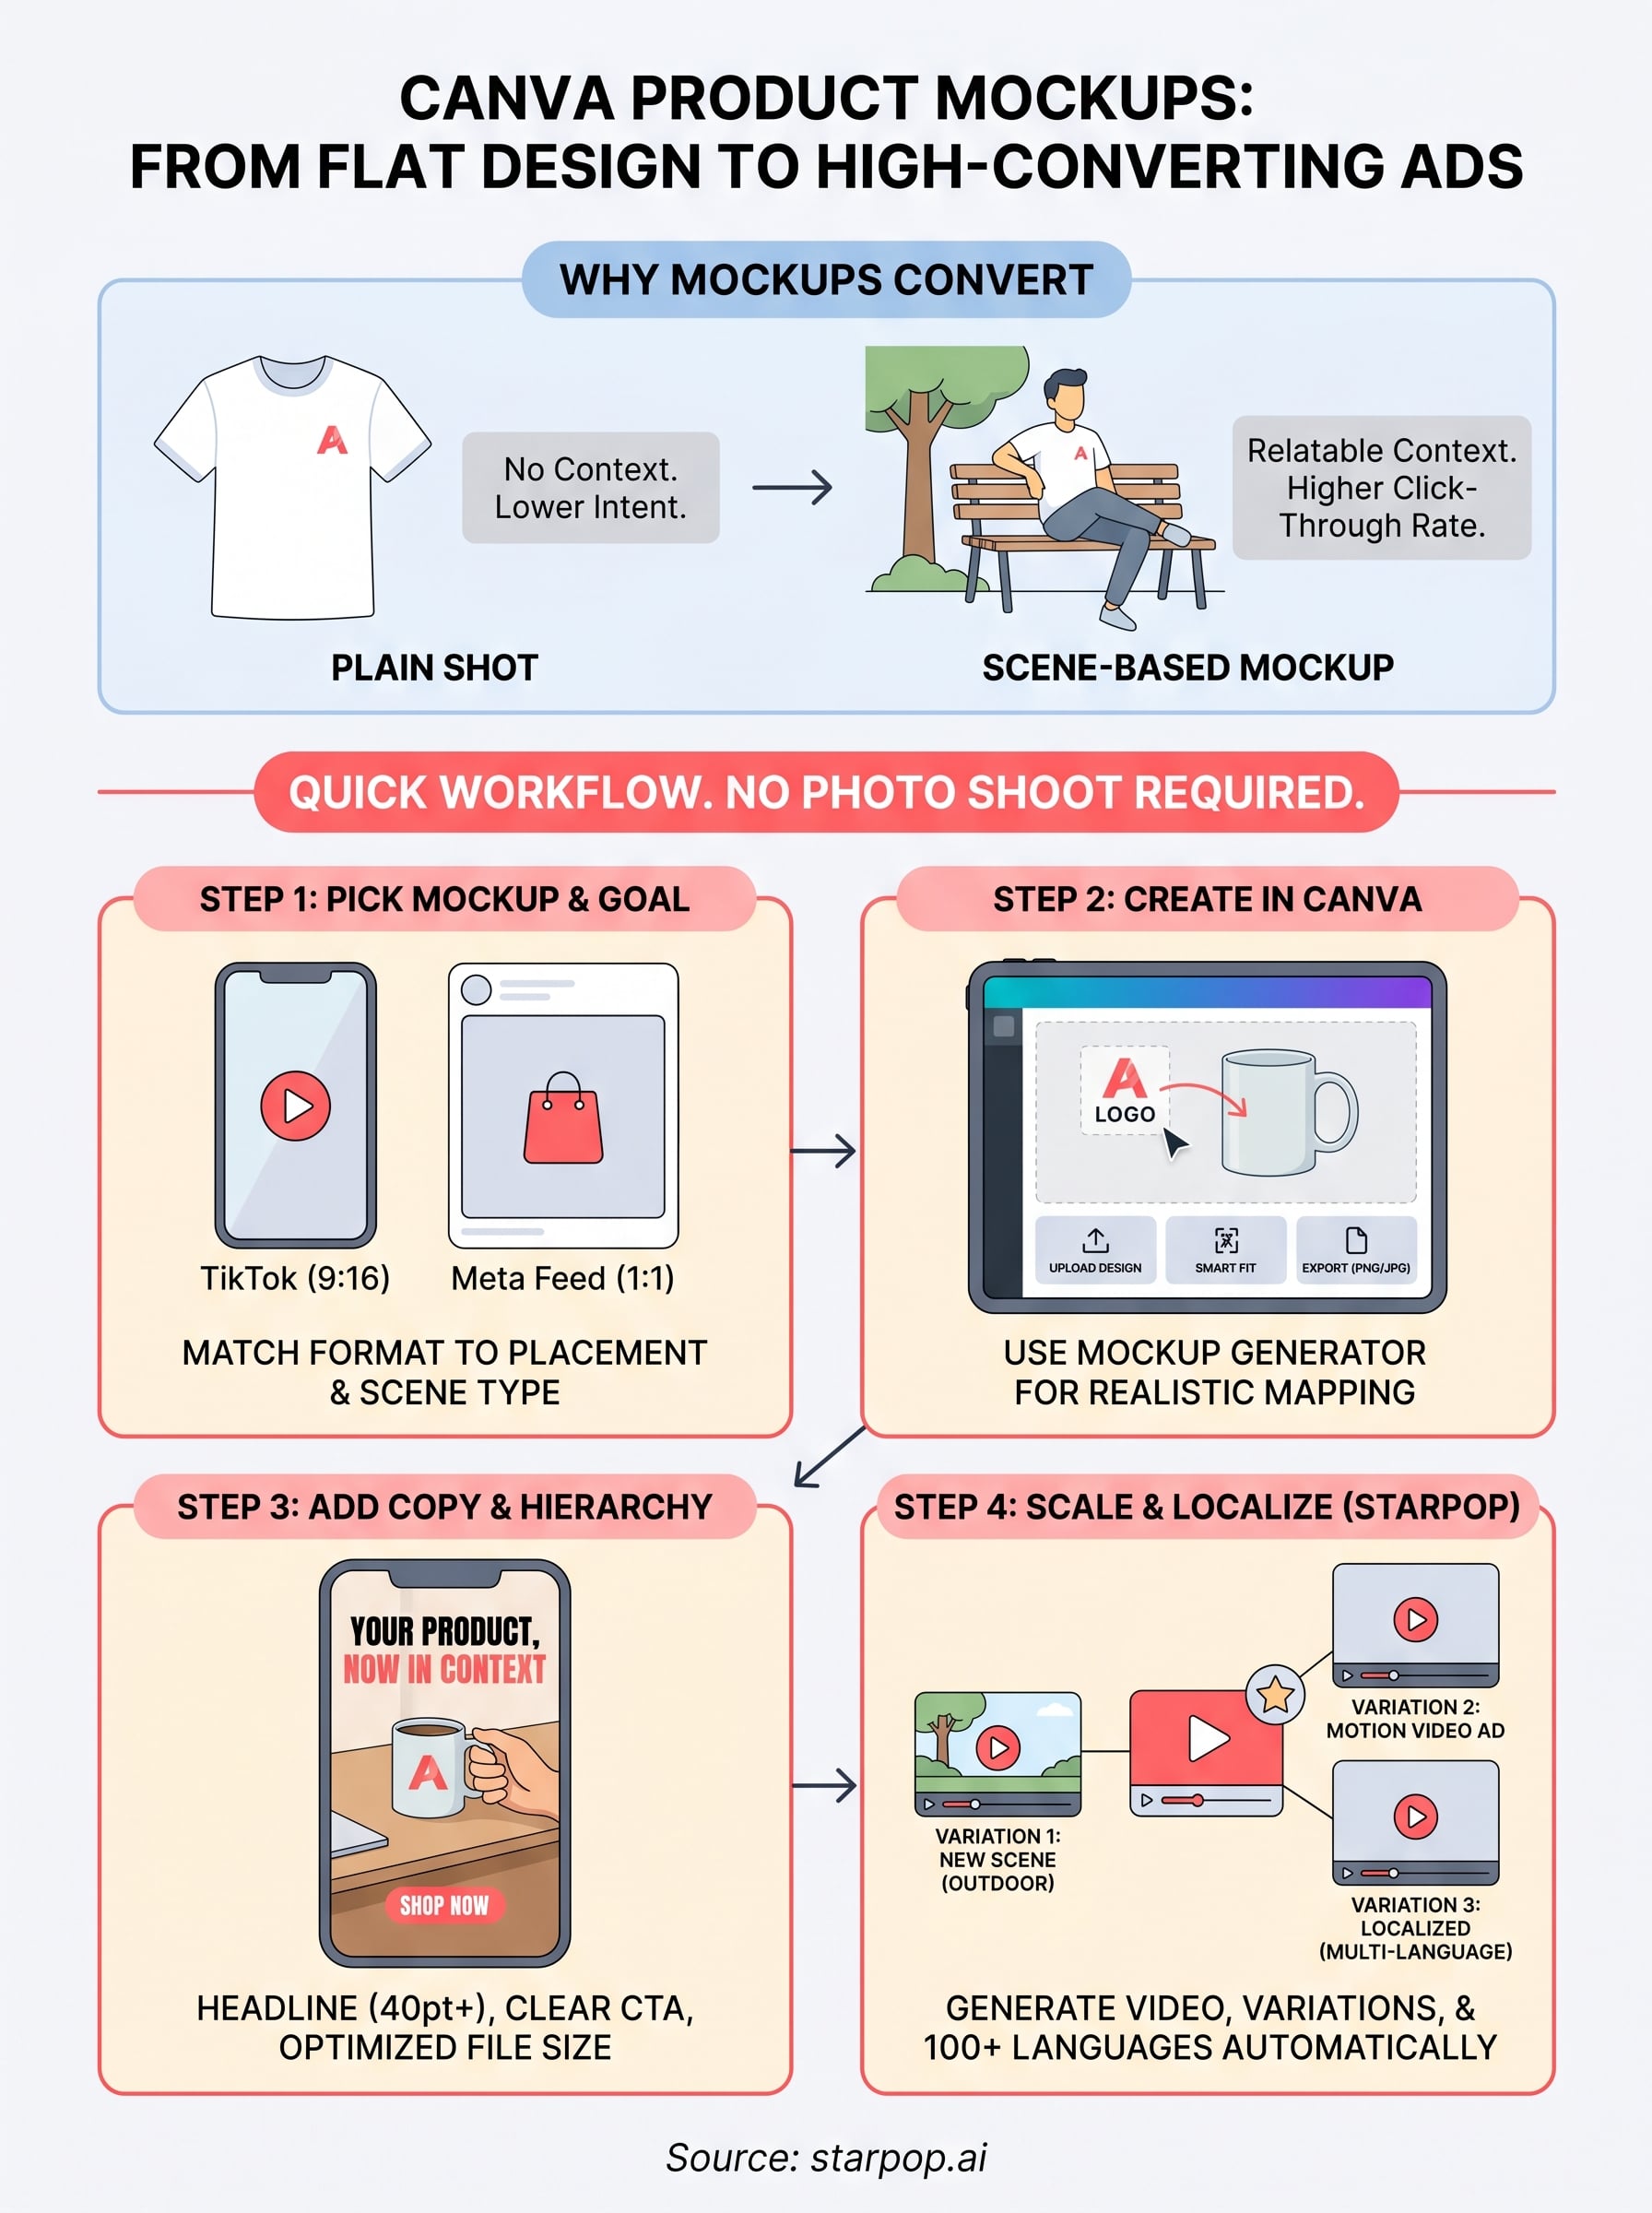
Why mockups outperform plain product shots in ads
Plain product photos on white backgrounds work well for product listing pages, but paid social ads need context. A mockup places your product inside a situation your target customer actually recognizes: a gym bag by a locker, a skincare bottle on a marble shelf, a t-shirt worn in a natural outdoor setting. That context builds immediate relevance and purchase intent faster than a studio cutout ever could.
Ads that show products in use consistently generate higher click-through rates than isolated product shots because they answer the customer's unspoken question: "What does this look like in my life?"
Conversion-focused advertising consistently shows that scene-based creative outperforms flat imagery for cold traffic, which is exactly where most e-commerce brands spend their ad budgets. When you use canva product mockups to build those scenes quickly and affordably, you lower your cost per creative asset while maintaining the visual quality that paid platforms like Meta and TikTok reward with cheaper distribution.
Step 1. Pick the right mockup for the ad goal
The mockup type you choose determines whether your ad performs or gets ignored. Before you open Canva, you need to match your mockup format to the specific platform, placement, and conversion goal you're targeting. A mockup built for a Meta feed post looks different from one designed for TikTok or a Google Display banner.
Match the mockup format to your ad placement
Different ad placements have different aspect ratio requirements and visual expectations. Picking the wrong format wastes your design time and forces awkward cropping when you export. Use this table to start in the right place:
| Ad Placement | Recommended Format | Aspect Ratio |
|---|---|---|
| Meta Feed (image) | Lifestyle scene, square | 1:1 |
| Meta Stories / Reels | Full-bleed vertical scene | 9:16 |
| TikTok in-feed ad | Vertical, motion-ready still | 9:16 |
| Google Display | Horizontal product flat-lay | 1.91:1 |
| Pinterest Pin | Vertical lifestyle or product | 2:3 |
Choose the right scene type for your product category
Not every product fits every scene. Canva product mockups work best when the scene context matches what your customer actually does with the product. A supplement brand benefits from a clean countertop or gym setting; a phone case brand needs a hand-held device mockup.
Picking a scene that mirrors your customer's daily environment is the fastest way to increase ad relevance before you spend a dollar on media.
Use these guidelines to narrow your selection:
- Apparel and accessories: Body-worn or flat-lay lifestyle scenes
- Packaging and consumables: Shelf, countertop, or hand-held scenes
- Digital products and apps: Device mockups (phone, tablet, laptop)
- Home goods: Room or desk lifestyle scenes
Step 2. Create your mockup in Canva
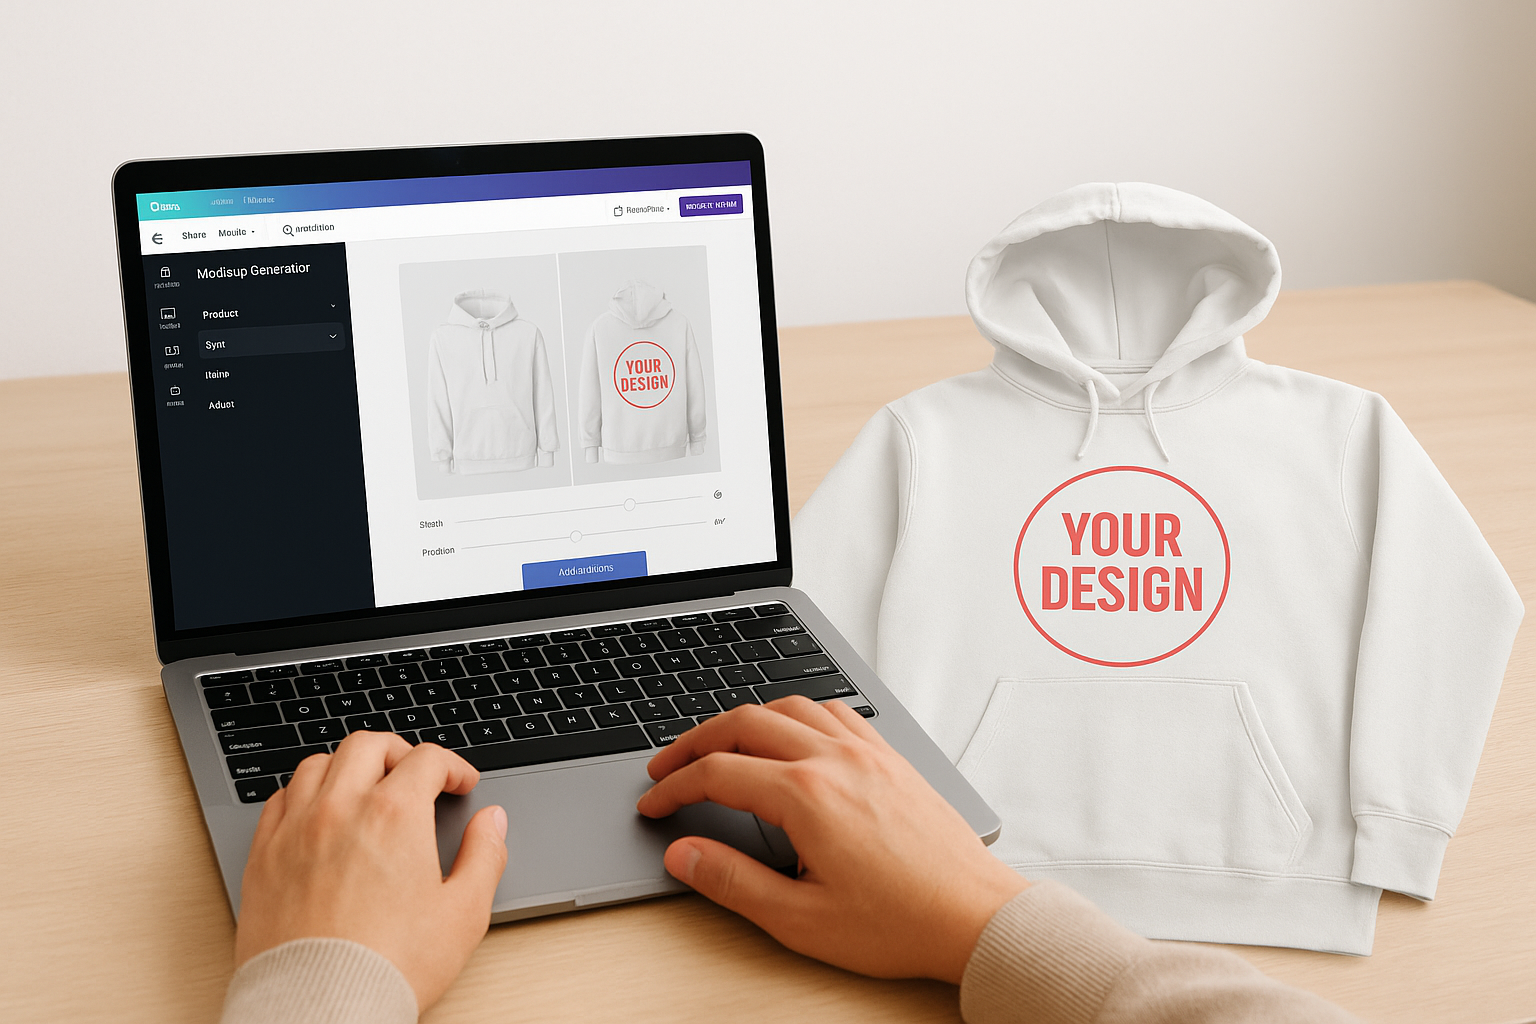
With your mockup format and scene type selected, you're ready to build. Open Canva, search "mockups" in the template search bar, or navigate directly to the Mockup Generator under the "Apps" menu in the left sidebar. Both paths work; the generator gives you more control over how your design maps onto a product surface.
The Mockup Generator is the fastest route when you already have a finished logo or label file ready to upload.
Place your design using the Mockup Generator
Select the Mockup Generator from the Apps panel, then browse by product category. Click a mockup style, and Canva opens a two-panel view where you drop your design file directly onto the product surface. The tool automatically adjusts perspective and shading. If the fit looks off, use the position and scale sliders to fine-tune how your artwork sits on the surface. Here is a quick reference for the key controls:
- Scale slider: Resizes your design on the product surface
- Position controls: Moves the design horizontally or vertically
- Opacity toggle: Adjusts how your design blends with the surface texture
- Replace design: Swaps your artwork without resetting the scene
Export your finished mockup correctly
Once your canva product mockups look right in the preview, click "Add to design" to pull the rendered mockup into your canvas. From there, resize the canvas to match the target ad placement you identified in Step 1. Set your export format to PNG for transparent-background assets or JPG for full-scene lifestyle images. Use Canva's "Download" menu, select your file type, and choose the highest available resolution before you save. Keeping files at full resolution preserves your options when you repurpose the asset across multiple placements later.
Step 3. Turn mockups into ad-ready creative
Your mockup image is a starting point, not a finished ad. Before you push any asset to a paid platform, you need to add copy, structure a clear visual hierarchy, and export files that meet each platform's technical specs. Skipping this step is the most common reason good-looking mockups generate disappointing click-through rates.
Add copy and visual hierarchy
Open your mockup canvas in Canva and layer your headline text directly over or beneath the product scene, keeping it large enough to read on a small phone screen. A good rule of thumb is to keep your primary headline at 40pt or above for vertical placements. Position your call-to-action text at the bottom third of the frame where the eye naturally lands after scanning the product.

Your ad has roughly two seconds to communicate the offer, so your headline and product should be visible without any scrolling or zooming.
Use Canva's text spacing and contrast tools to make sure your copy doesn't compete with the product for attention. White or light-colored text over slightly darkened backgrounds works reliably across most ad formats.
Prepare your file for the ad platform
Once your copy is placed, export separate files for each placement rather than cropping one image after the fact. Different platforms enforce strict file size limits that affect delivery, so check the current requirements before you export your canva product mockups. Use this checklist before downloading:
- PNG for ads with transparent overlays or text-heavy designs
- JPG for full-scene lifestyle images under 1MB
- Max file size: 30MB for Meta, 500KB for Google Display
- Color mode: RGB only, not CMYK
Step 4. Scale variations, video, and localization
Once your first mockup ad is export-ready, the next move is to multiply it. Running a single creative drains ad budgets fast because audiences fatigue quickly on repeated visuals. Building a set of variations from your base canva product mockups gives you the testing volume you need to find your top performer without starting from scratch each time.
Build a variation set from one base mockup
Canva's "Resize" feature lets you duplicate your design and adapt it to multiple placements in seconds. From there, swap the background scene, change the copy angle, or test a different product color to produce distinct variants. Here's a fast variation framework to follow:
- Scene swap: Same product, different lifestyle background (indoor vs. outdoor)
- Copy test: Same image, two different headlines (benefit-focused vs. urgency-focused)
- Format shift: Square version resized to vertical for Stories placements
Bring in video and global reach with Starpop
Static mockups only go so far. Video ads consistently outperform image-only creative on TikTok and Meta Reels, and that's where Starpop extends what you've built in Canva. You can upload your finished mockup image directly into Starpop and animate it into a talking-head UGC ad, a cinematic product reveal, or a motion-controlled scene without touching a separate video editor.
Starpop's batch processing lets you generate up to 20 video and image assets at once, which compresses your testing timeline from days to hours.
Localization is equally straightforward: Starpop's voice cloning and lip-sync tools let you adapt the same video creative for over 100 languages, so one strong-performing ad concept can reach multiple markets without a reshoot or additional production cost.
Next steps
You now have a complete workflow: pick your mockup format, build it in Canva, layer in copy and proper file specs, then scale into variations and video. Canva product mockups give you a fast, low-cost entry point into professional-looking ad creative, and the steps in this guide are designed to get you from blank canvas to export-ready asset without wasted effort.
The biggest gains come after your first mockup is live. Test your variation set early, read the performance data, and cut what underperforms within the first 48 to 72 hours of a campaign. When you find a winning concept, that is the right moment to invest in video, motion, and localized versions to extend its reach.
If you want to skip the back-and-forth between separate tools for video and localization, try Starpop's AI creative platform and turn your best static mockups into high-converting video ads in minutes.