Contents
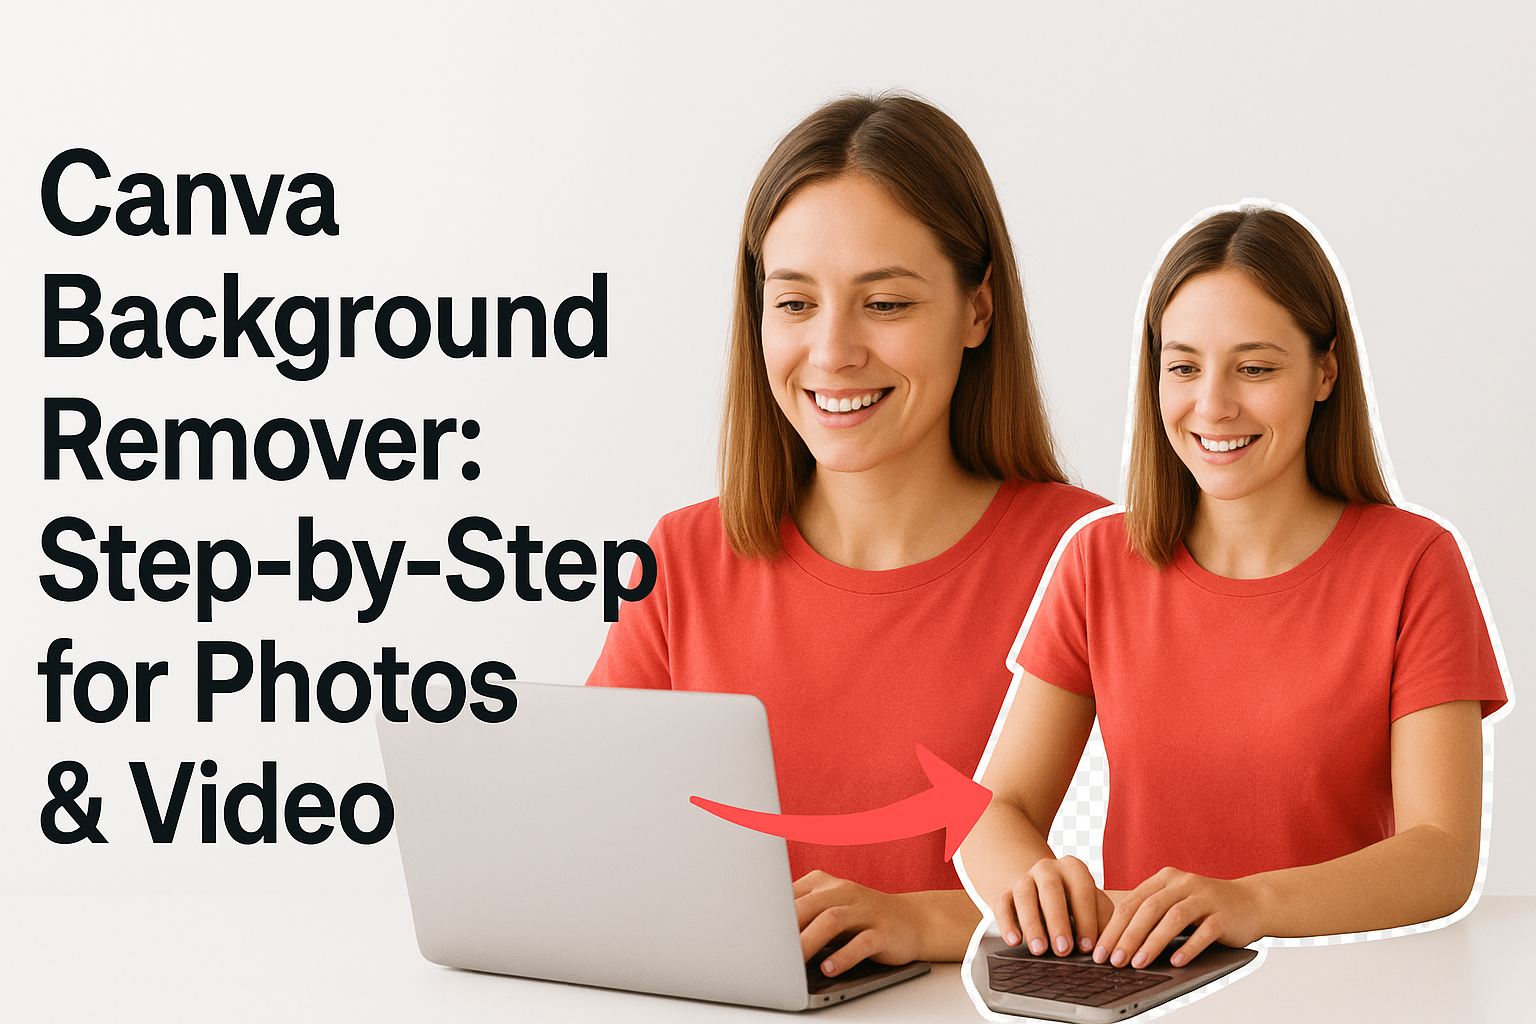
0%Canva's background remover lets you strip the background from a photo or video clip in a couple of clicks, no Photoshop skills required. If you're building ads, product listings, or social posts, the Canva background remover is one of the fastest ways to get a clean cutout without manual masking.
But the tool works differently depending on whether you're on a free or paid plan, and the steps change based on what you're editing, a photo, a video, a logo, or a signature. Some users hit the "upgrade" wall without realizing there are workarounds, while others miss settings that sharpen the final result. This guide walks through exactly how to remove backgrounds in Canva for each asset type, covers what's free vs. what requires Pro, and flags the common mistakes that lead to rough edges or lost detail.
At Starpop, we build AI-powered tools that help marketers produce ready-to-run creative assets, from UGC-style videos to product images, without stitching together a dozen apps. Background removal is one small piece of the content production puzzle, and understanding how Canva handles it helps you decide when a dedicated tool is enough and when you need a full AI content pipeline to scale. Let's get into it.
What Canva background remover is and what you need
The Canva background remover is a one-click AI tool built directly into Canva's editor. It detects the subject in your image or video clip and strips everything else, replacing the background with a transparent layer. You can then drop in a solid color, a new scene, or leave it clear for sticker-style graphics. The tool lives inside the Edit Image panel in the desktop editor and the mobile app, and it works on uploaded photos, video clips, and graphic elements like logos.
The background remover processes your asset on Canva's servers, so a stable internet connection is required and results can vary depending on how clearly defined your subject edges are.
Free vs. Pro: what you actually get
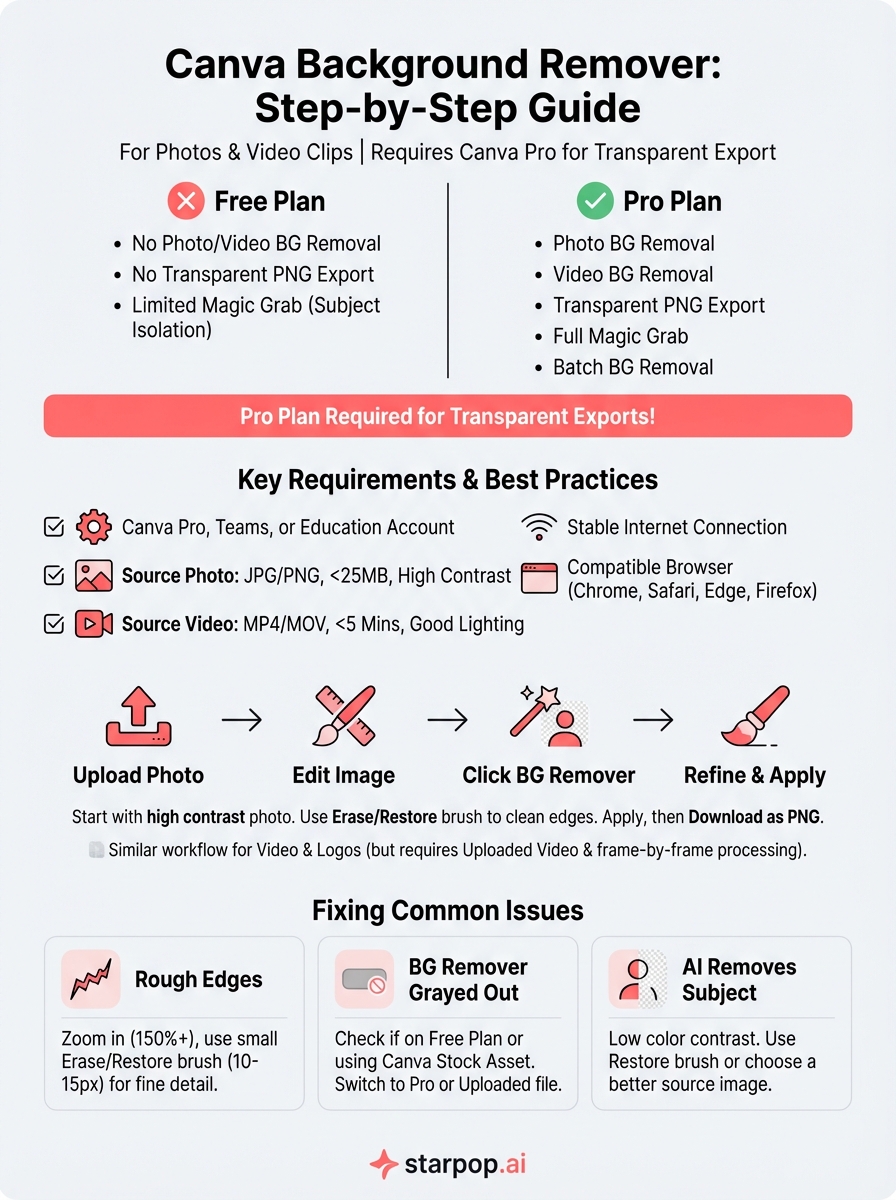
Canva offers background removal as a Pro-only feature, meaning you need an active Canva Pro, Teams, or Education subscription to use it on photos and videos. Free plan users can see the button in the interface but hit an upgrade prompt the moment they click it. There is one partial workaround: Canva's free Magic Grab tool sometimes isolates a subject without full background removal, but it doesn't produce a clean transparent PNG export. For regular transparent cutouts, a Pro subscription is the practical route.
| Feature | Free Plan | Pro Plan |
|---|---|---|
| Background removal on photos | No | Yes |
| Background removal on videos | No | Yes |
| Transparent PNG export | No | Yes |
| Magic Grab (subject isolation) | Limited | Full |
| Batch background removal | No | Yes |
What you need before you start
Before you open the editor, get a few things in order so the process runs smoothly. You need a Canva Pro account (or an active free trial), and your source file should meet Canva's format requirements. Photos work best as JPG or PNG files under 25 MB, and video clips should be MP4 or MOV and under five minutes. Longer clips or heavily compressed files tend to produce slower processing and less accurate cutouts.
- A Canva Pro, Teams, or Education account
- Source image: JPG or PNG, under 25 MB
- Source video: MP4 or MOV, under 5 minutes, filmed in good lighting
- A stable internet connection
- Chrome, Firefox, Edge, or Safari (latest version) for desktop
For the best results on photos, use images with high contrast between the subject and the background. Busy or gradient backgrounds confuse the AI and force you to do manual touch-ups using the Erase and Restore brush, which adds time to a process that should take seconds.
Step 1. Remove a photo background on desktop and mobile
Removing a photo background in Canva takes under a minute once you know where to look. The Canva background remover sits inside the image editing panel, and the steps are the same whether you uploaded the image directly or placed it on a design canvas. Start with a high-contrast photo to get the cleanest result without any manual cleanup afterward.
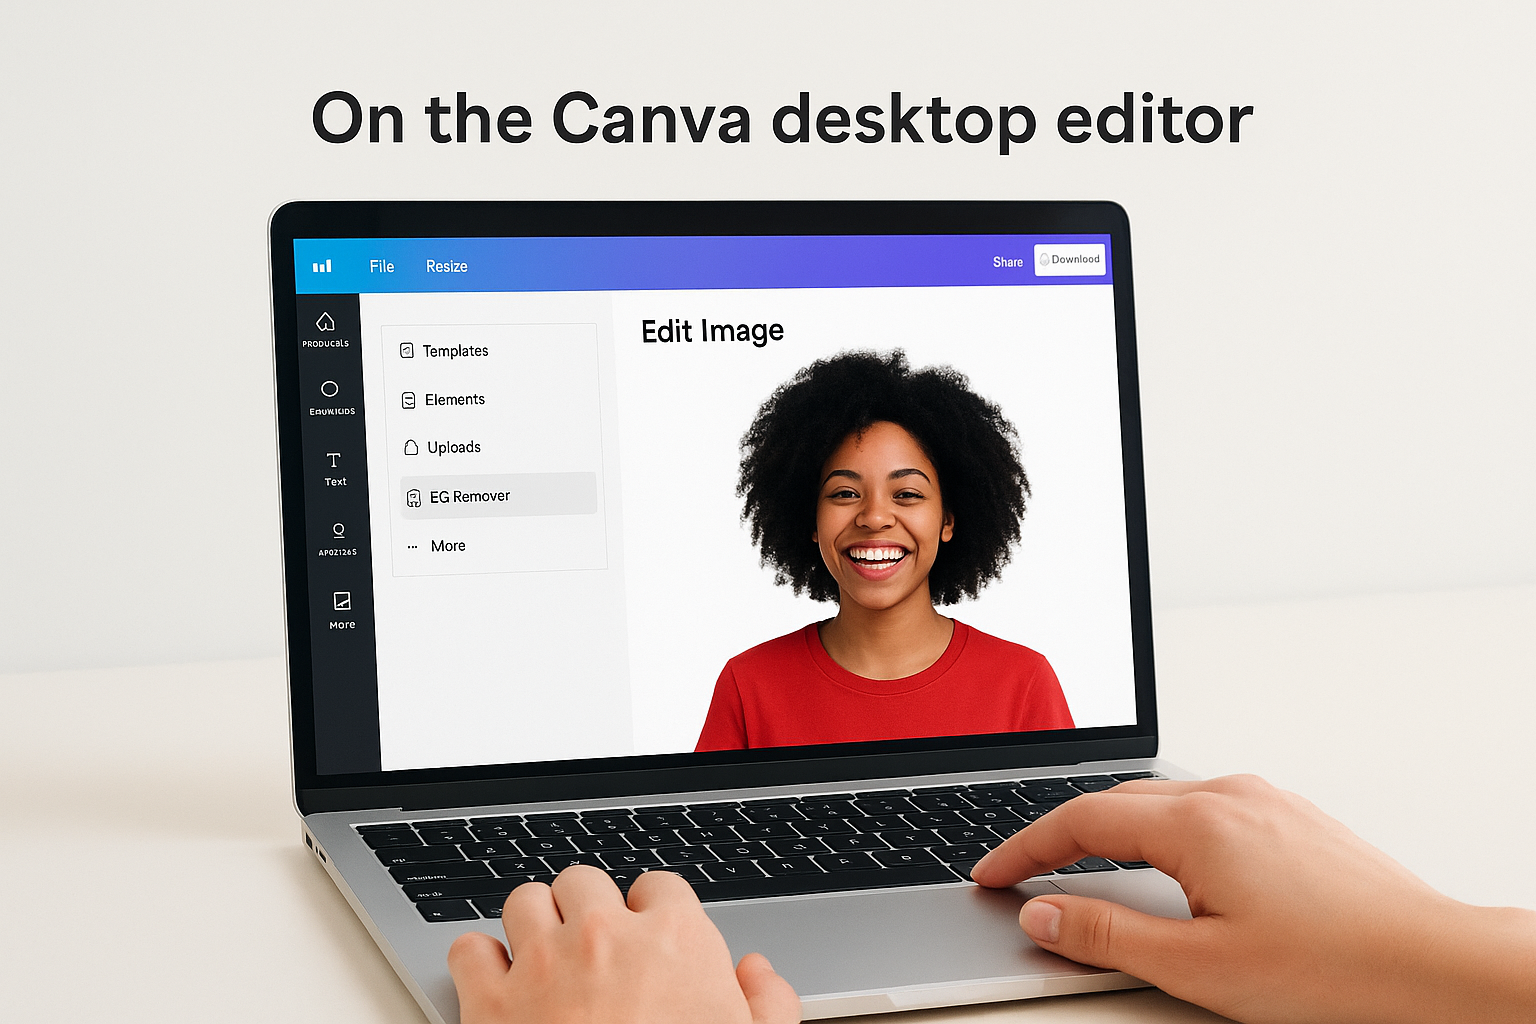
On the Canva desktop editor
Open your design, click the image you want to edit, then select Edit Image in the top toolbar. In the left panel, click BG Remover under the Effects section. Canva processes the image automatically and strips the background within a few seconds.
After the initial removal, use the Erase and Restore brush to clean up edges the AI missed, especially around hair, fur, or fine details along the subject's outline.
Follow these steps from start to finish:
- Open Canva and start or open a design
- Upload your photo or click an existing image on the canvas
- Click Edit Image in the top toolbar
- Select BG Remover from the left panel
- Wait for the AI to process the image
- Use Erase / Restore to refine any rough edges
- Click Apply to confirm the removal
- Download as PNG to preserve the transparent layer
On the Canva mobile app
The mobile process uses a different layout but follows the same logic. Tap your image to select it, then tap the Effects button in the bottom toolbar. Scroll through the options and tap Background Remover. Canva processes the image on its servers, so give it a few seconds even on a fast connection. Once the background disappears, tap Apply, then Download and select PNG to keep the transparent layer intact in your exported file.
Step 2. Remove a video background in Canva
Video background removal works through the same BG Remover tool, but it applies frame-by-frame processing rather than a single image pass. This makes it slower and more resource-intensive, and Canva limits it to short clips under five minutes. The subject in your video needs to stay relatively centered and well-lit throughout the clip. Shaky footage or fast movement often leaves ghosting artifacts around the edges that require manual cleanup.
What Canva supports for video background removal
The Canva background remover for video handles MP4 and MOV files uploaded directly to your account. It does not work on embedded stock videos or clips sourced from Canva's own library. You need to upload your own footage for the tool to activate. Once processed, the transparent video layer can sit on top of a solid color, a gradient, or a custom scene you build inside the editor.
Keep your video clips under two minutes if you want faster processing and cleaner edges. Longer clips increase processing time and the chance of tracking errors on moving subjects.
Steps to remove a video background
Select your uploaded video clip on the canvas, then open the editing panel and look for the BG Remover option under the Edit Video tab. From there, follow these steps in order:
- Click the video clip on the canvas to select it
- Click Edit Video in the top toolbar
- Select BG Remover in the left panel
- Wait for Canva to process each frame (30 seconds to several minutes depending on clip length)
- Review the result and use Erase / Restore to fix missed areas around the subject's edges
- Click Apply to confirm
- Export as MP4 with the background replaced, or layer the clip over a new scene inside the editor
Step 3. Make logos and signatures transparent
Logos and signatures follow the same BG Remover workflow as photos, but they come with one extra consideration: most logo files have a white or solid-color box around the graphic rather than a photographed background. The Canva background remover handles these flat-color backgrounds quickly and accurately, often producing a cleaner result than it does on complex photos. Once transparent, your logo or signature can sit on top of any design without the white box bleeding through.
Preparing your logo or signature file
Before you run the background remover on a logo, check your file format. PNG files work best because they already support transparency, and Canva preserves that layer when you export. If your logo is a JPG, Canva can still process it, but the output needs to be downloaded as a PNG to retain the transparent background. Avoid uploading a low-resolution version of your logo since the AI edge detection struggles with compressed or pixelated outlines, especially on thin letterforms.
If your original logo file is a vector (SVG or AI format), open it in a vector editor first and export a high-resolution PNG before uploading to Canva.
Steps to make a logo or signature transparent
Select the uploaded logo or signature image on your canvas and follow the same removal path you used for photos. Here are the exact steps:
- Click the logo or signature image on the canvas
- Select Edit Image in the top toolbar
- Click BG Remover in the left panel
- Let Canva process the flat background (usually under five seconds)
- Use the Restore brush to recover any thin strokes the AI accidentally removed
- Click Apply
- Download as PNG to keep the transparent layer intact
Step 4. Fix common Canva background remover issues
Even with a clean source file, the Canva background remover doesn't always produce a perfect result on the first pass. Most problems fall into three categories: rough edges around the subject, the tool being unavailable or grayed out, and the AI accidentally removing part of your subject. Each has a direct fix.
Rough or jagged edges after removal
Rough edges usually mean the AI had trouble reading the transition between your subject and the background. This happens most often with hair, fur, transparent objects, or subjects shot on cluttered backgrounds. The fix is to use the Erase and Restore brush at a reduced size (try 10 to 15 pixels) and trace along the problem area. Zoom in to at least 150% before you start so you can see the edge clearly.
Painting in small strokes rather than sweeping across the whole edge gives you far more control and prevents you from accidentally removing areas you want to keep.
- Zoom in to 150% or higher before using the brush
- Set brush size to 10-15 pixels for fine edge work
- Use Restore to bring back detail the AI removed
- Use Erase to remove background patches the AI missed
- Click Apply only after you're satisfied with the full outline
BG Remover is grayed out or not available
If the BG Remover button appears grayed out, your account is likely on the free plan, or you're trying to apply it to a Canva stock asset rather than an uploaded file. Canva restricts background removal to uploaded content on paid accounts. Switch to an uploaded file and confirm your subscription is active in your account settings.
AI removes part of your subject
When the tool cuts into your subject, your background and subject share similar colors. Re-shoot or source an image with stronger contrast between the two, or use the Restore brush to manually paint back the removed area before applying.
Next steps
You now have a complete picture of how the Canva background remover works across photos, videos, logos, and signatures, along with the fixes for the most common problems. The key takeaways are straightforward: Pro is required for transparent exports, high-contrast source files produce the cleanest results, and the Erase/Restore brush handles whatever the AI misses on the first pass.
Background removal is one step in a broader content production workflow. If you're building ads or social content at scale, you'll quickly find that cutting backgrounds one clip at a time slows you down. Starpop's AI platform goes further by letting you generate hyper-realistic marketing videos and product images from scratch, complete with voice, animation, and lip-sync, all in a single workspace. Rather than patching together separate tools for each step, you can run the full creative pipeline in one place. Start building faster with Starpop and see what a complete AI content workflow looks like.