Contents
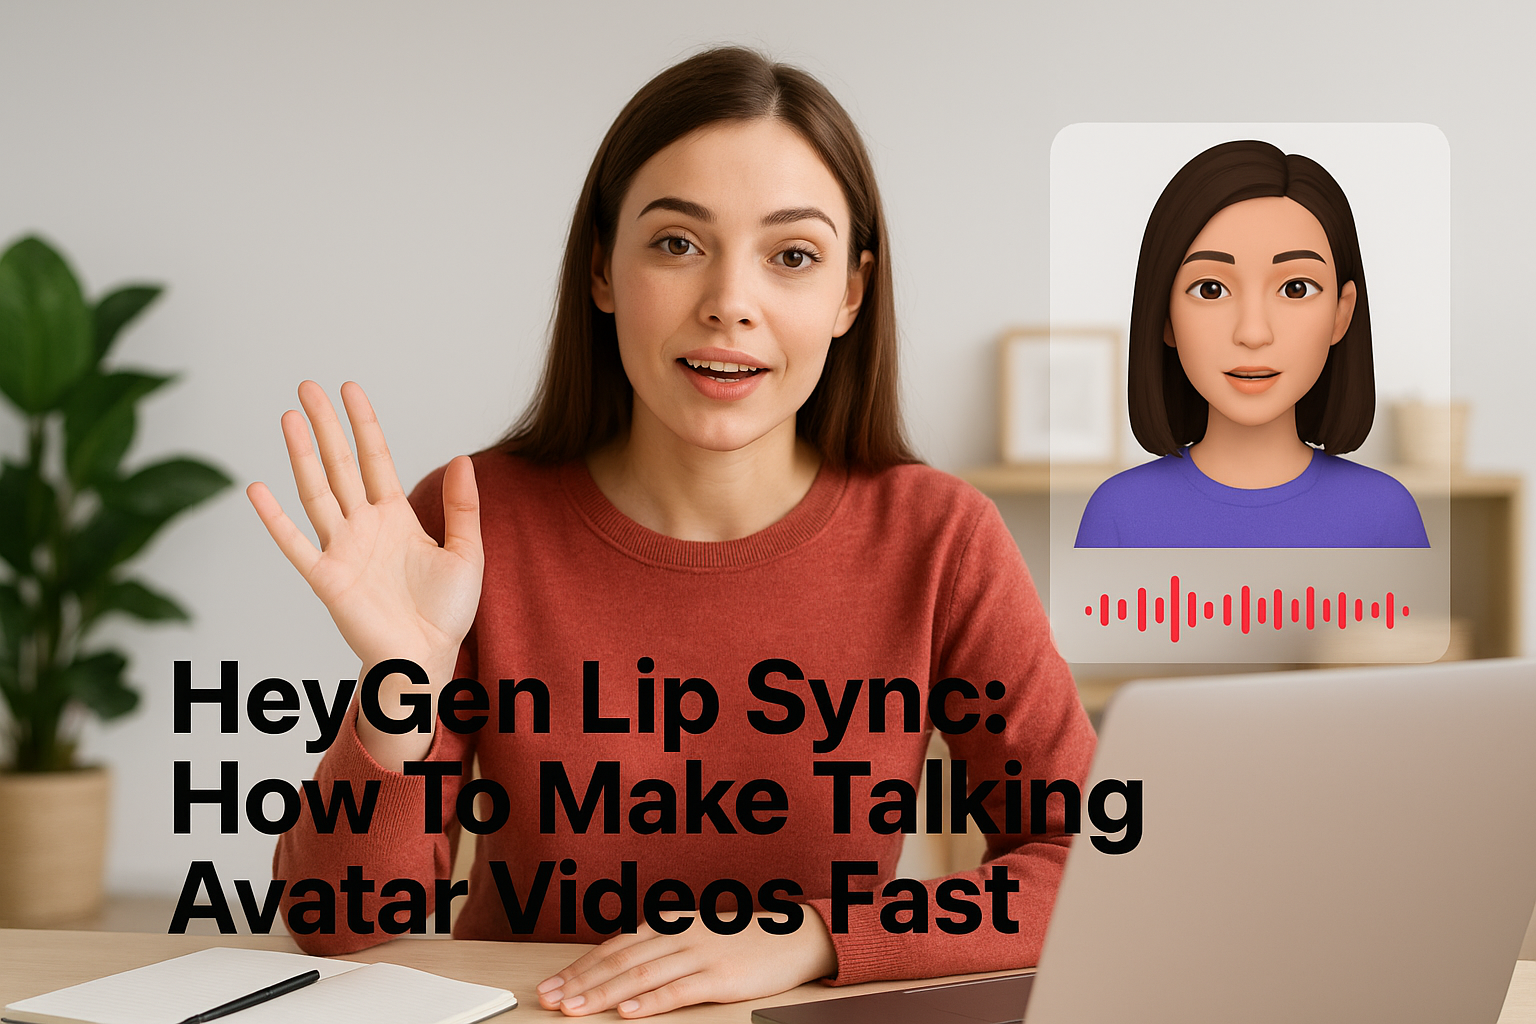
0%HeyGen lip sync lets you generate talking avatar videos where an AI-driven character speaks any script you feed it, mouth movements matched to audio with surprising accuracy. It's become a go-to for marketers who need quick video localization, product explainers, or social content without booking a studio or hiring talent.
But how does it actually work in practice? And what should you know before committing time and budget to it? This guide walks you through the full process: setting up your first project, choosing the right avatar, syncing audio, and exporting a finished video. We'll also cover where HeyGen shines, where it falls short, and how the results compare to alternatives.
If you're exploring AI lip sync for ads or social content at scale, it's worth knowing that platforms like Starpop bundle studio-grade lip syncing with video generation, voice cloning, and 100+ language support in a single workspace, no tool-hopping required. We'll touch on that comparison later. For now, let's get into how HeyGen's lip sync works step by step.
What HeyGen lip sync does and when to use it
HeyGen lip sync works by mapping audio waveforms to a pre-built or custom avatar's facial movements, generating a video where the mouth, jaw, and sometimes neck motion align with whatever audio you supply. You feed it a text script or audio file, pick an avatar, and the system renders a finished video. No camera, no lighting setup, no talent scheduling required.
How the technology works
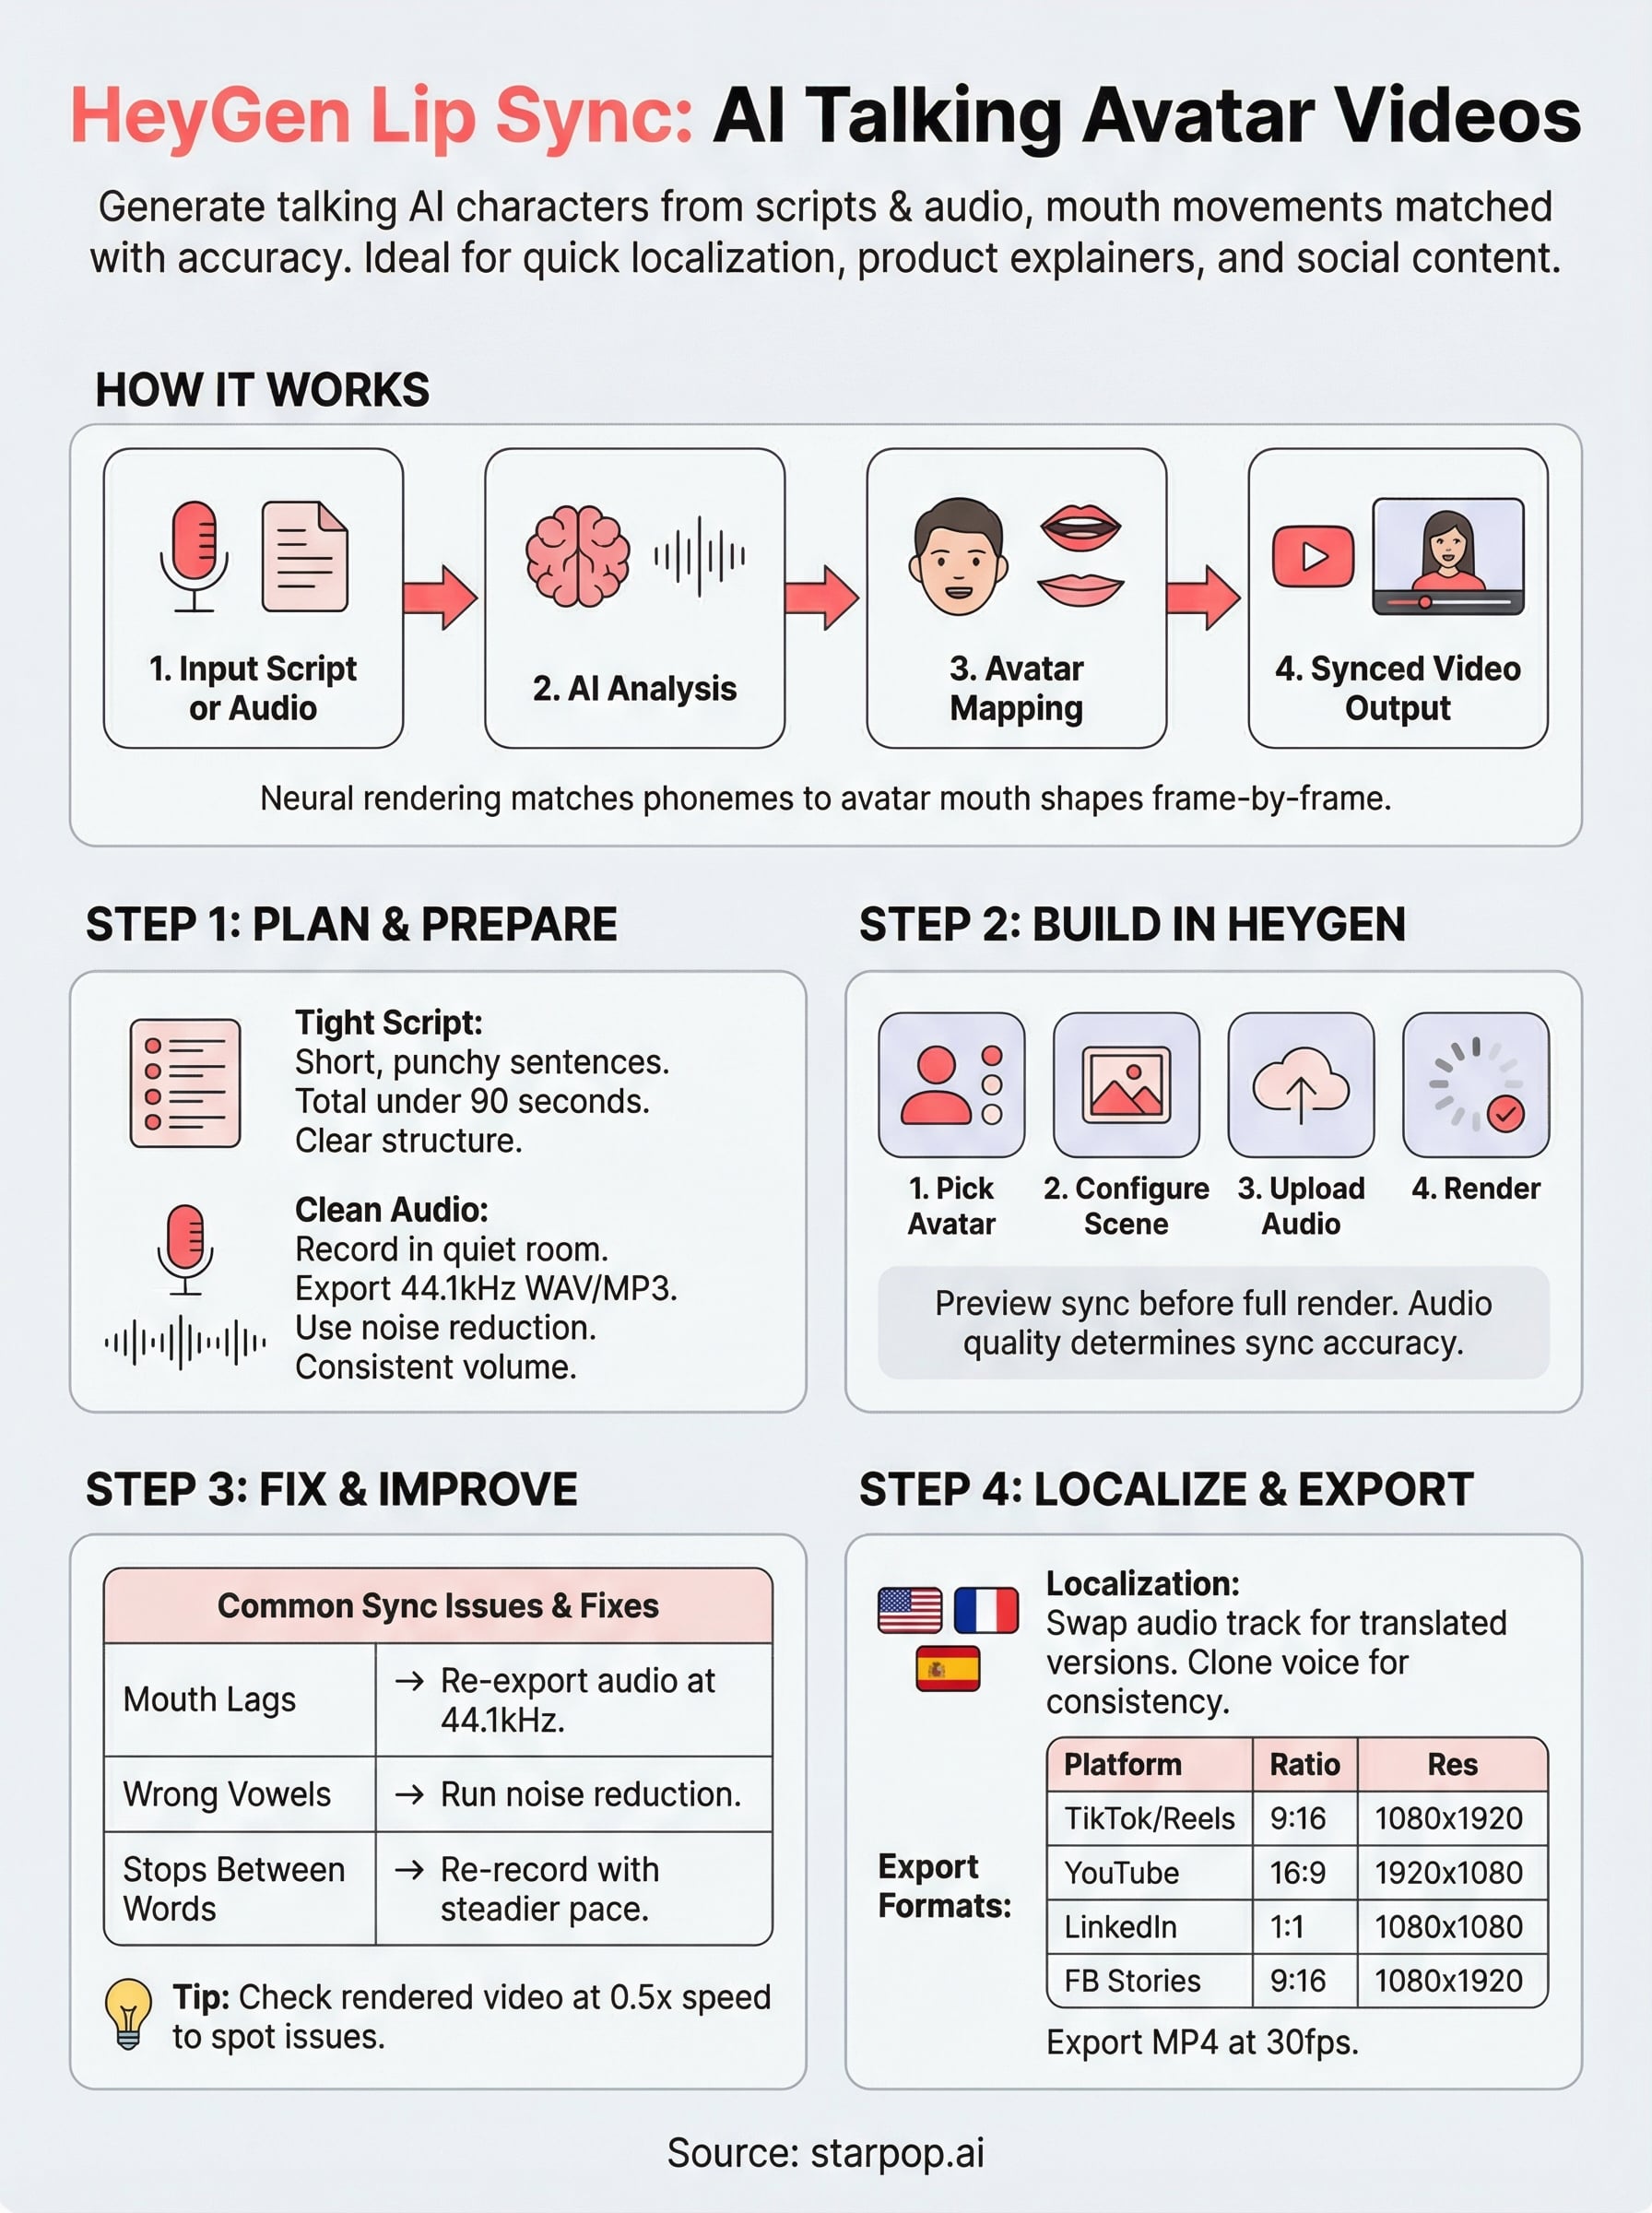
The platform uses a neural rendering approach to analyze phonemes in your audio and match them to corresponding mouth shapes on the avatar model. You can upload your own voice recording, type a script and let HeyGen's text-to-speech engine handle narration, or clone a voice you've already approved. The result is a frame-by-frame sync that works reasonably well for standard speech cadences, though fast or heavily accented speech can still trip it up.
Lip sync accuracy drops noticeably when audio contains overlapping sounds, background noise, or delivery that deviates far from a standard speech pace, so clean audio is the single biggest factor in output quality.
When to use it and when to skip it
HeyGen makes the most sense when you need high volumes of video content on a tight budget, particularly for explainers, product walkthroughs, onboarding videos, or localized ads where you're dubbing a script into a second language. If you're producing 10 versions of the same product video in different languages, rendering each one through an avatar pipeline is far faster than re-recording with a human speaker every time.
Skip it when your content requires emotional nuance or complex physical performance that a static avatar simply cannot replicate. Testimonial-style UGC ads, for example, rely heavily on authentic facial expressions and natural body language. For those formats, a platform built specifically around realistic UGC ad generation will serve you better than a general-purpose avatar tool.
Step 1. Plan your script, audio, and video
Before you touch HeyGen lip sync, the work you do on your script and audio determines whether your output looks polished or robotic. Most sync problems trace back to input quality, not the tool itself, so spending 20 minutes on preparation saves hours of re-renders later.
Write a tight script first
Your script length and sentence structure directly affect how natural the avatar looks. Short, punchy sentences give the model clear pauses to work with, while long run-on sentences create ambiguous breath points that the engine often misreads. Use this template as your starting structure:
[Hook - 1 sentence, under 15 words]
[Problem statement - 2 sentences max]
[Solution or product intro - 2-3 sentences]
[Call to action - 1 sentence, direct]
Keep your total script under 90 seconds for most ad formats; longer videos compound sync drift and lose viewer attention faster.
Prepare your audio before uploading
Audio quality is the single biggest variable in your final output. Record in a quiet room, use a condenser microphone if possible, and export at 44.1kHz WAV or MP3 with no background music layered in. HeyGen needs a clean, isolated voice track to map phonemes accurately to each frame.
Run the file through a noise reduction tool before uploading, and listen carefully for clipping or inconsistent volume levels that will cause mouth movements to stutter or lag behind the words.
Step 2. Build your talking avatar video in HeyGen
Once your audio is clean and your script is locked, you're ready to open HeyGen and start building. The interface moves fast once you know the order of operations: pick your avatar, configure the scene, upload your audio, and let the renderer do its job.
Choose and configure your avatar
HeyGen gives you two paths: use a stock avatar from their library or upload a custom avatar built from a video recording of a real person, including yourself. Stock avatars render faster and skip the approval queue, which matters if you're working against a deadline. Custom avatars take longer to process but produce more brand-consistent results.
![]()
Select your avatar first, then set the background and scene dimensions before you touch the audio settings. Changing the layout after you've synced audio forces a full re-render, which wastes credits and time.
Upload audio and trigger the render
With your avatar locked in, upload your clean voice recording directly to the audio panel. HeyGen lip sync analyzes the file and generates a preview in the timeline. Scrub through the first five seconds to confirm that mouth movements align with your opening words before you commit to a full render.
If the preview sync looks off by even half a second, re-export your audio at a higher bitrate and re-upload before triggering the full render.
Once the preview clears, click render and let the system process your finished video.
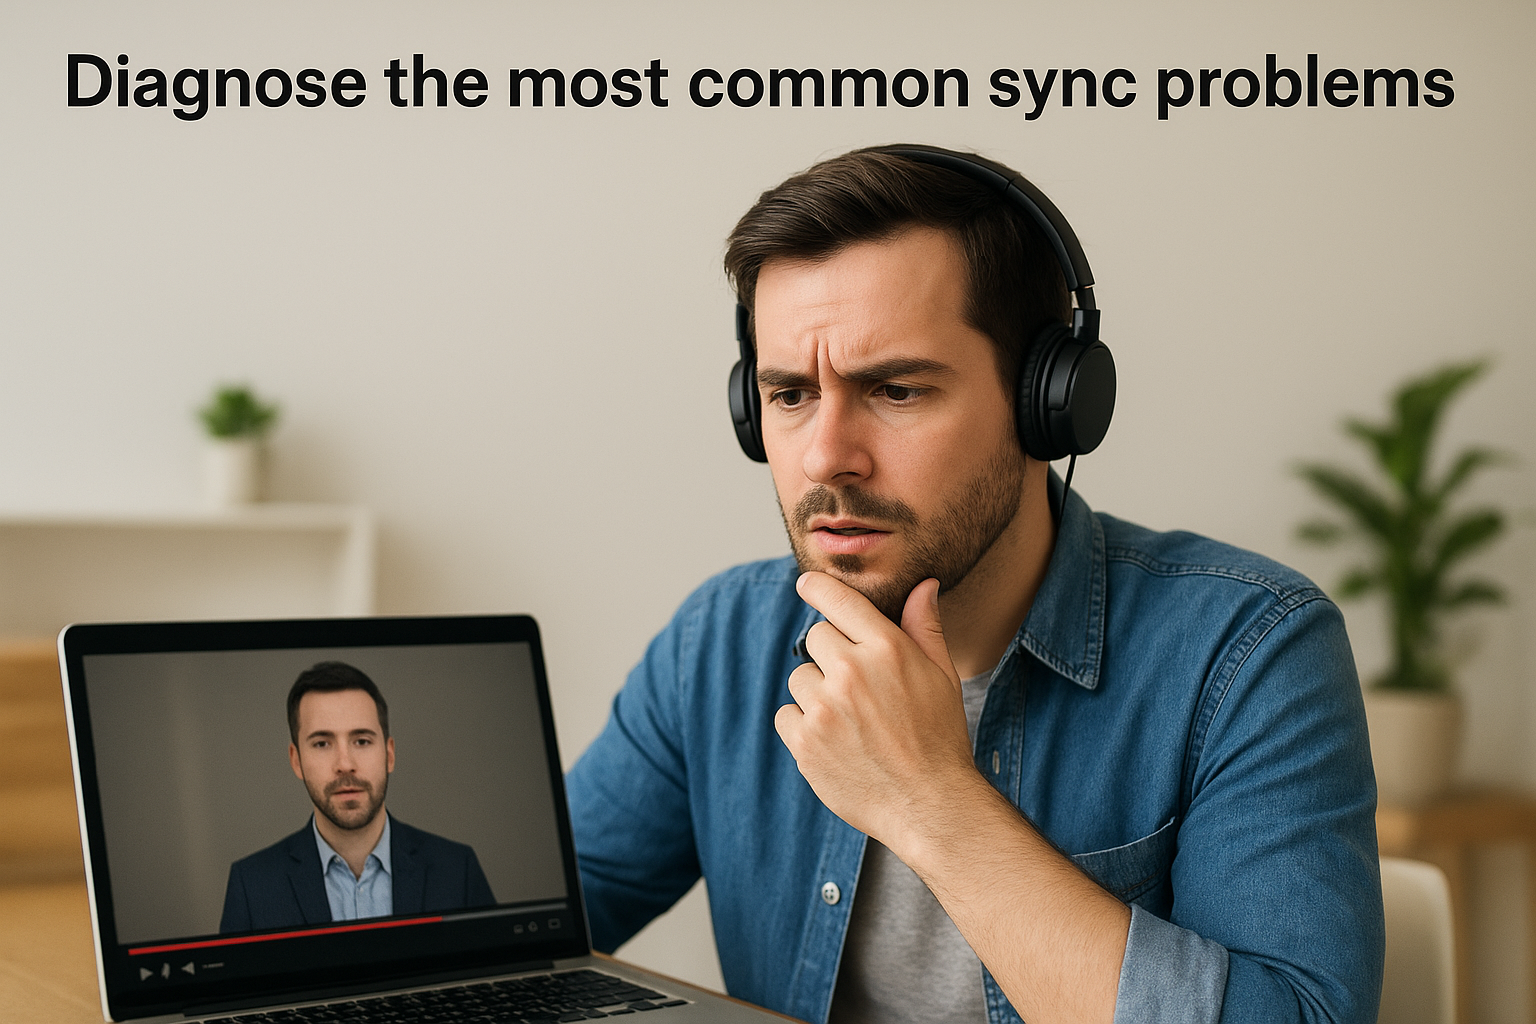
Step 3. Fix lip sync issues and improve realism
Even with clean audio, your first render from HeyGen lip sync will rarely be perfect. Mouth lag, stiff jaw movement, and mismatched vowel shapes are all fixable once you know what to look for and where to make the adjustment.
Diagnose the most common sync problems
Play your rendered video at 0.5x speed in any video player and watch the avatar's mouth against the audio. Most sync issues fall into three categories, each with a distinct fix:
| Problem | Likely Cause | Fix |
|---|---|---|
| Mouth lags behind audio | Low bitrate audio file | Re-export at 44.1kHz WAV and re-upload |
| Vowel shapes look wrong | Background noise in recording | Run audio through noise reduction, then re-render |
| Movement stops between words | Unnatural pauses in script delivery | Re-record with a steadier, connected cadence |
Watching your output at half speed before sharing it with anyone is the fastest quality check you can run.
Adjust delivery and phrasing to improve realism
Your voice recording style affects realism more than any setting inside the platform. Speak at a steady mid-pace, avoid dramatic pauses between words, and keep pitch variation moderate. Avatars struggle most with theatrical delivery because the neural model is trained on conversational speech patterns.
If a specific line keeps rendering poorly, rewrite it rather than re-recording it repeatedly. Shorter sentences with open vowel sounds almost always sync cleaner than complex phrases packed with consonant clusters.
Step 4. Localize, format, and export for each channel
Once your synced video passes the half-speed quality check, you're ready to push it through localization and format it for wherever it will actually run. This step is where HeyGen lip sync delivers its clearest ROI, because duplicating a finished video into a new language takes minutes, not days.
Swap the audio track for each target language
To localize, return to your project and replace the audio file with a translated voice recording in your target language. Keep the same avatar and scene settings unchanged. If you're using HeyGen's voice cloning feature, clone the original speaker's voice and generate the translated script in that cloned voice for a consistent brand sound across markets.
Running each language version through the same half-speed review before export catches sync drift early, before you've spent credits on multiple final renders.
Match your export settings to each platform
Aspect ratio and resolution vary significantly across channels, and exporting a single master file rarely fits every destination cleanly. Use this reference to set your export specs before you finalize:
| Platform | Aspect Ratio | Recommended Resolution |
|---|---|---|
| TikTok / Reels | 9:16 | 1080 x 1920 |
| YouTube | 16:9 | 1920 x 1080 |
| LinkedIn feed | 1:1 | 1080 x 1080 |
| Facebook Stories | 9:16 | 1080 x 1920 |
Export each version as MP4 at a minimum of 30fps to keep mouth movements sharp across compressed feeds.
Wrap up and keep creating
HeyGen lip sync gives you a practical path to talking avatar videos without the production overhead. You've seen how clean audio and tight scripting drive your final output quality, how to diagnose and fix the most common sync problems, and how to export correctly formatted versions for every platform where your content will run.
The biggest performance gains come from treating localization as a structured workflow, not an afterthought. Once your base video passes the quality check, duplicating it across languages takes minutes, and each new language version reaches an audience you'd otherwise miss entirely.
If you need studio-grade lip syncing bundled with video generation, voice cloning, and batch processing under one subscription, Starpop's AI content creation platform puts all of that in a single workspace. You skip the tool-hopping and spend more time on the creative work that actually drives results.