Contents
0%A static product photo can only do so much. Once you learn how to animate a photo with AI, that same image becomes a scroll-stopping video asset ready for ads, social posts, or landing pages, and you don't need motion graphics experience to pull it off. The tools available right now make this surprisingly straightforward, even if you've never touched video editing software.
This guide walks you through the exact steps to turn any still image into a smooth, realistic animation using free online AI tools. We'll cover what works, what doesn't, and how to get results that actually look professional. You'll also see how platforms like Starpop fit into this workflow, our image-to-video pipeline lets you generate a photo, animate it, add a voiceover, and export a finished asset without switching between five different apps.
Whether you need a quick animated product shot or a full UGC-style video built from a single image, you're in the right place. Let's get into it.
What you need before you animate a photo
Before you start learning how to animate a photo with AI, a few quick decisions will save you a lot of wasted time and failed exports. Getting these basics right upfront means your first attempt is far more likely to produce a usable, shareable result rather than a blurry mess you have to redo from scratch.
The right source image
Your photo is the foundation of everything that follows. AI animation tools work best with high-resolution images (at least 1080px on the short side), and they struggle with blurry, heavily compressed, or heavily filtered photos. A clean, well-lit subject with a clear foreground gives the AI enough detail to generate realistic motion without artifacts or distortion.
Avoid using screenshots or images that have been resized multiple times, as each compression pass removes the detail the AI needs to create smooth motion.
Formats to have ready:
- JPG or PNG - both work across most tools
- Square or 16:9 ratio - matches standard ad and social formats
- Uncluttered background - simpler backgrounds produce cleaner animations
Your intended output format
Decide where your animated photo will live before you open any tool. The output platform determines the aspect ratio and file format you should target from the start. A vertical 9:16 clip built for TikTok or Instagram Reels will need different settings than a 16:9 asset designed for a YouTube ad or a website hero section.
Write down two things before you begin: the platform (TikTok, Instagram, a landing page, an email) and the target length. Most short-form ads run between 6 and 15 seconds. Having both locked in means you export once instead of redoing the entire process after the fact.
A tool that fits your workflow
Most beginner-friendly AI animation tools offer a free tier, so you don't need a paid subscription to get started. Look for platforms that accept direct image uploads and let you preview the animation before you commit to an export. Browser-based tools are the safest starting point because they require no software installation and work across any operating system.
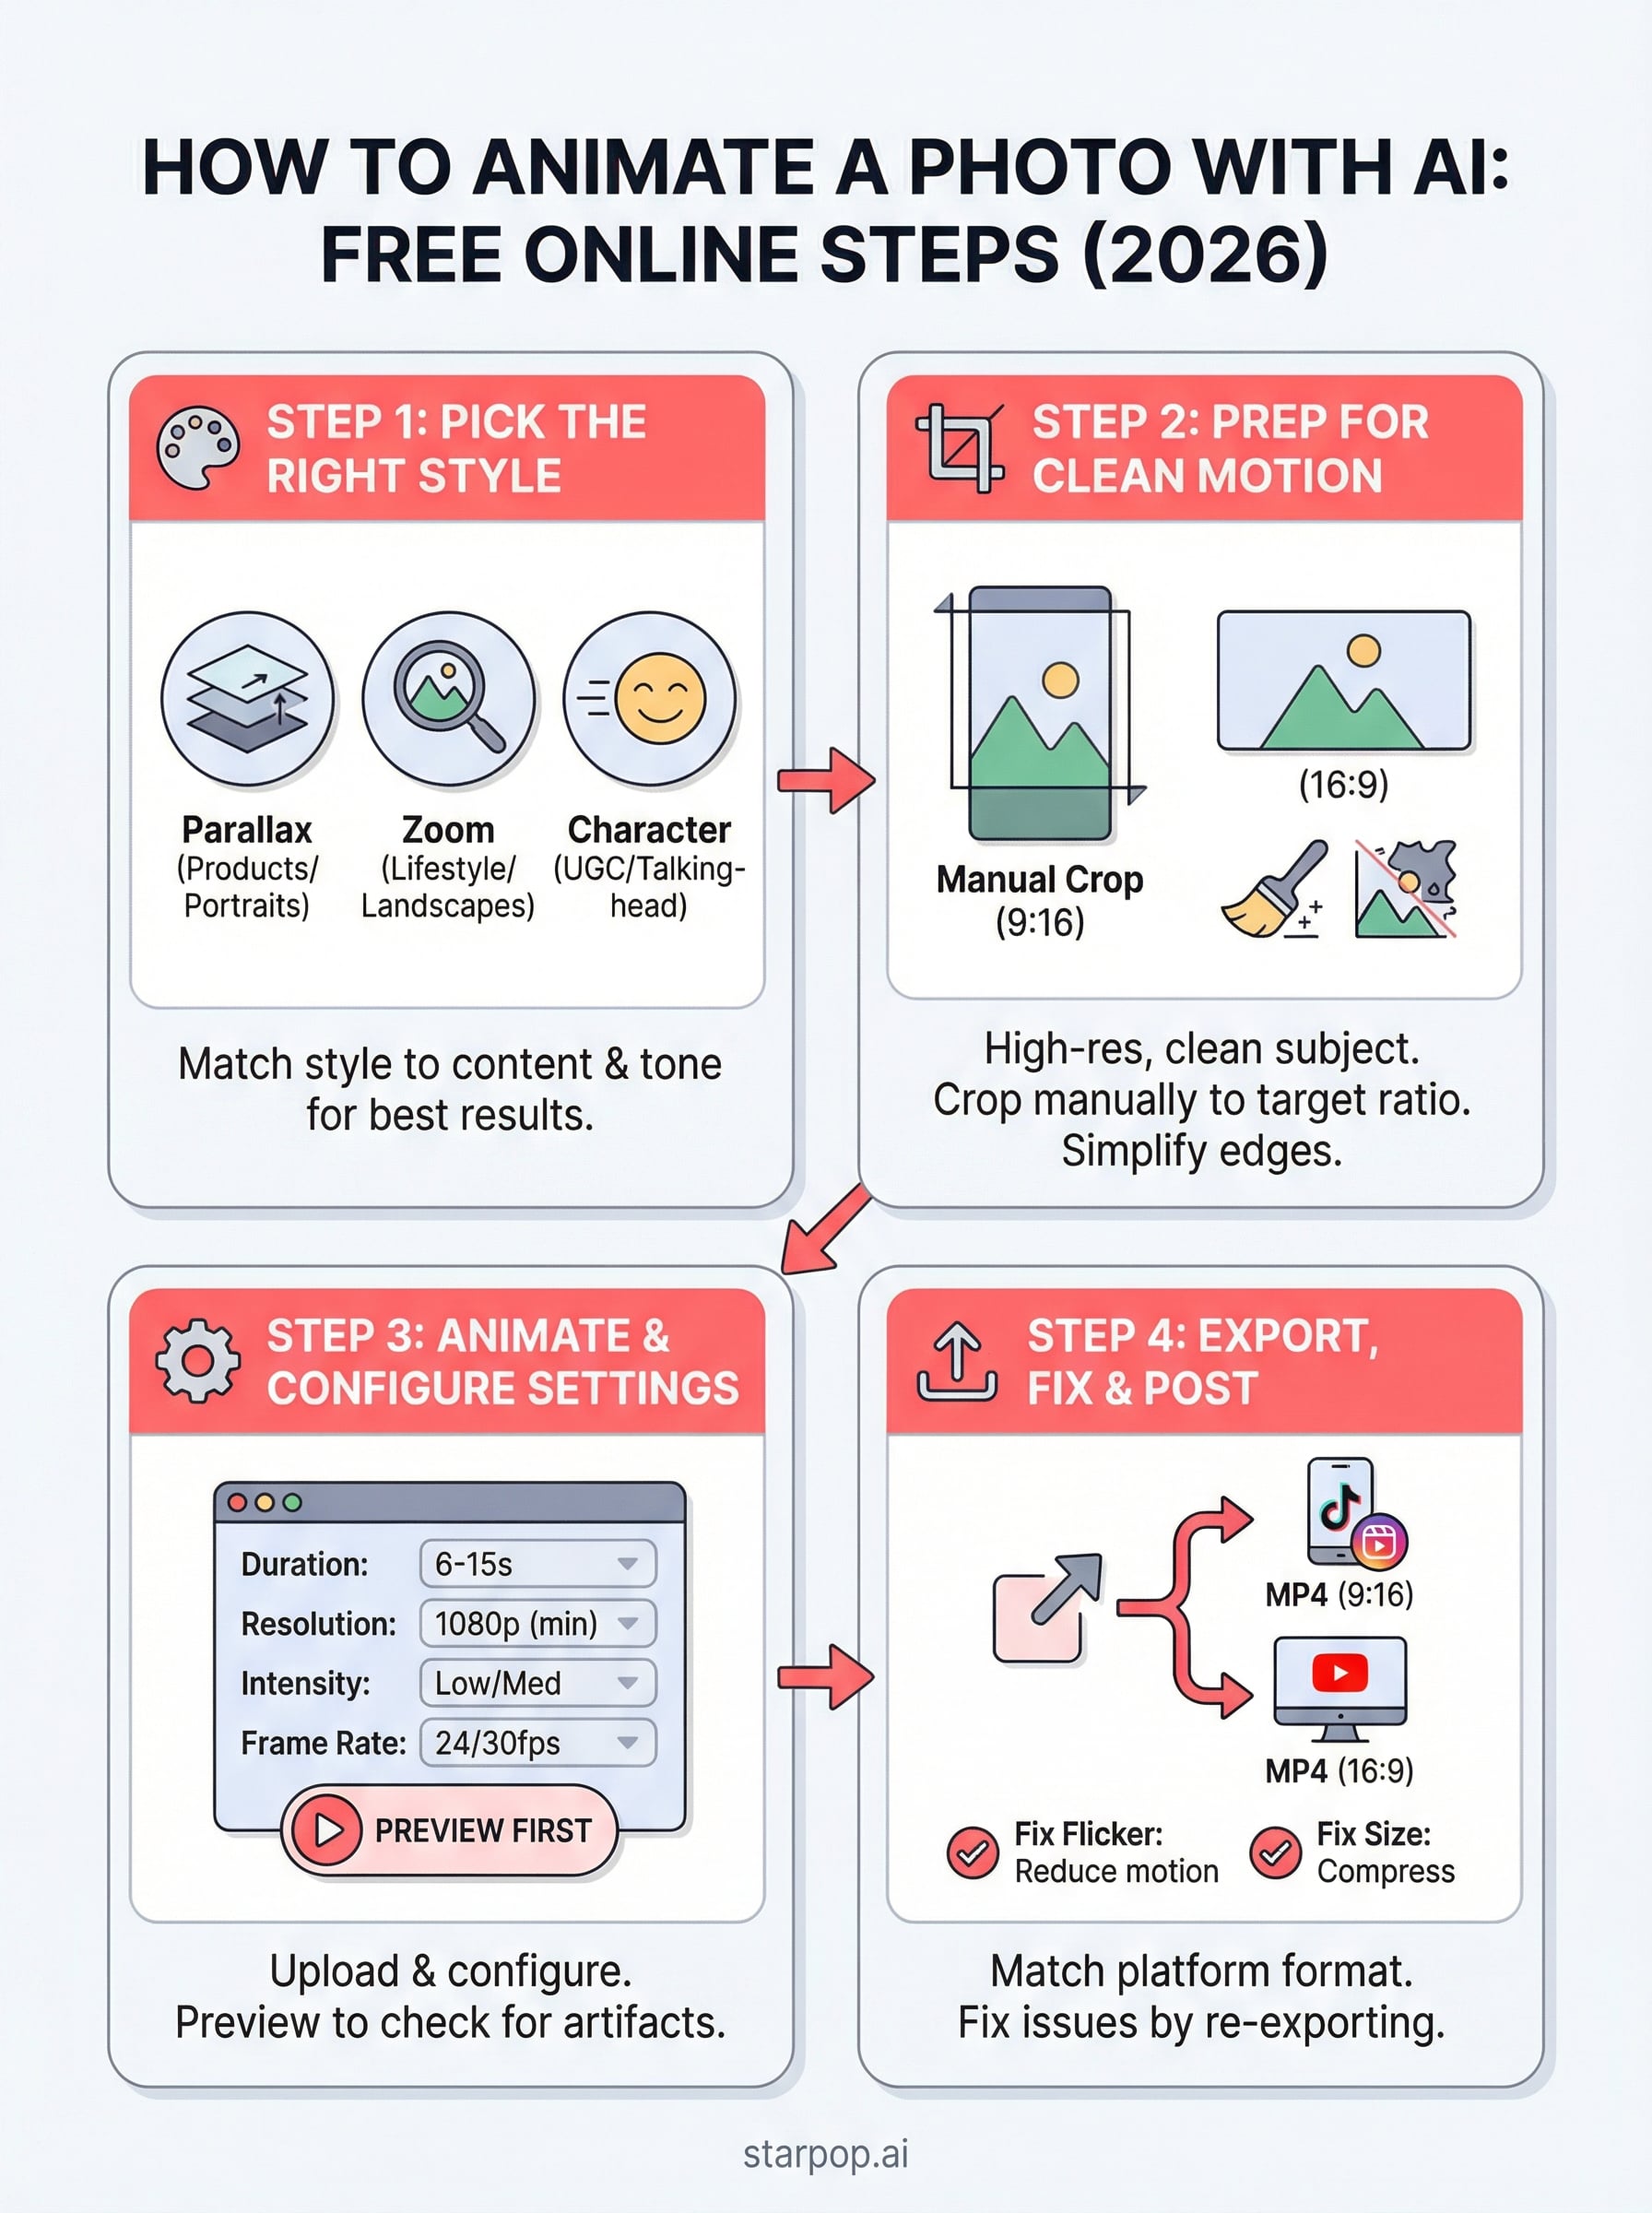
Step 1. Pick the right animation style
The animation style you choose shapes how realistic your final clip looks and how well it fits your platform. Before you open any tool, spend 60 seconds matching your intended style to your source photo. Wrong style choices are the most common reason a first attempt looks off or fails to export cleanly.
The animation style should match the emotional tone of your ad or post, not just what looks impressive in a preview.
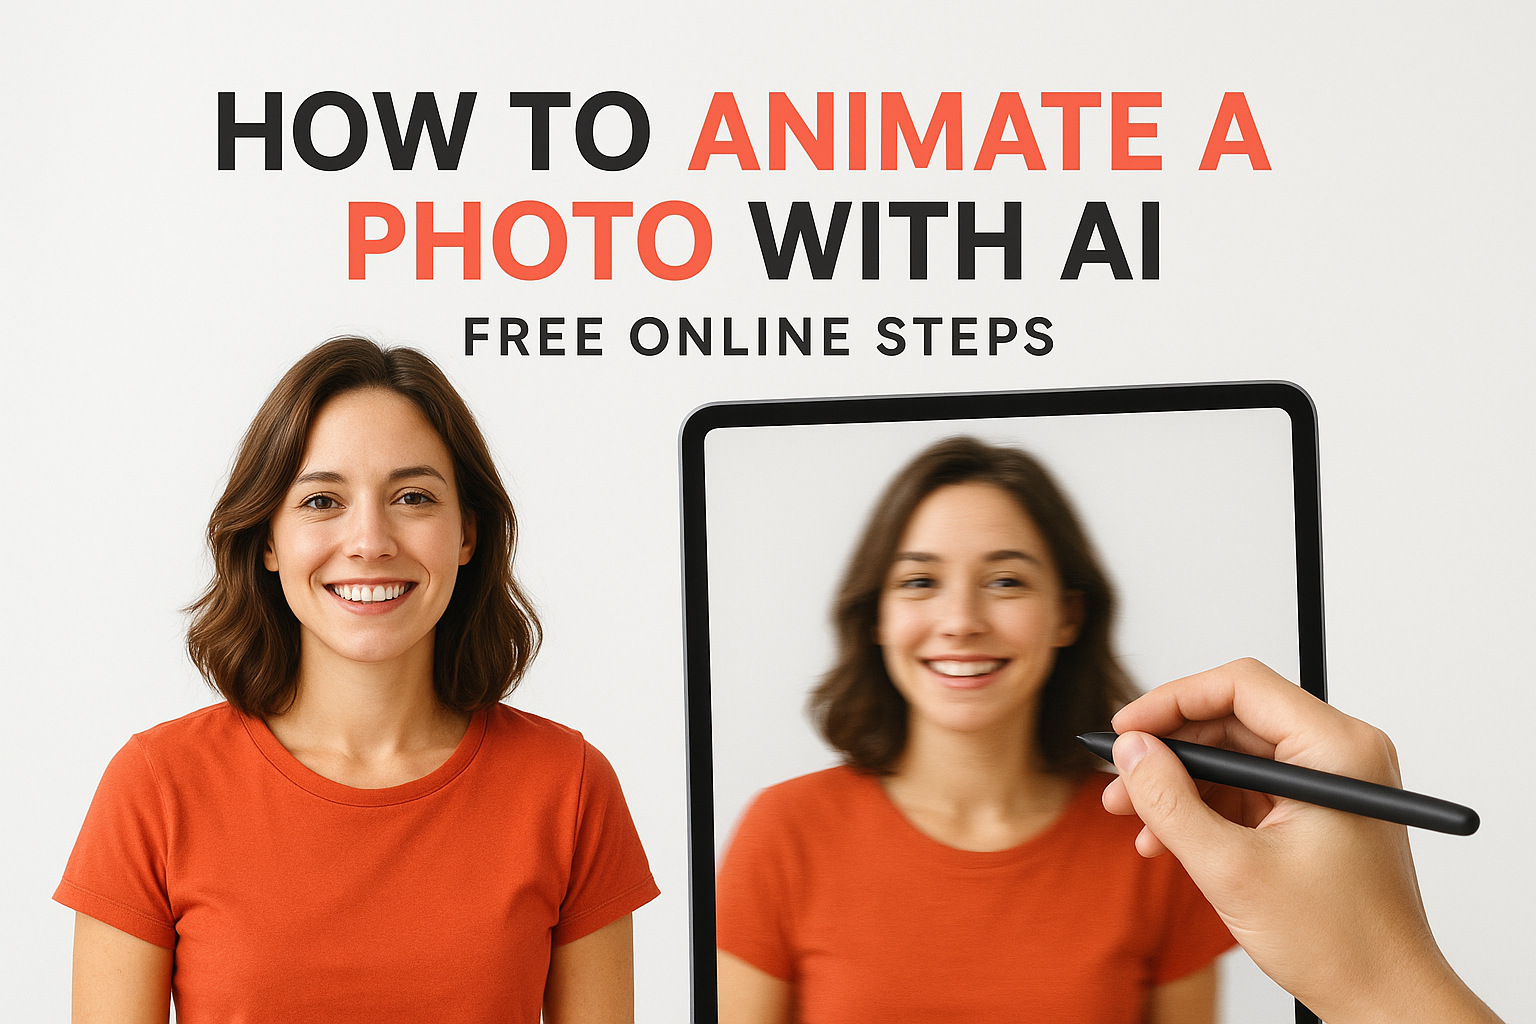
The three motion types to know
When you learn how to animate a photo with AI, the tool usually asks you to pick a motion type upfront. Understanding each option saves you from guessing, and choosing the right one means you get a usable result on the first export.
| Style | What it does | Best for |
|---|---|---|
| Parallax | Shifts foreground and background at different speeds | Product photos, portraits |
| Zoom / Ken Burns | Slowly pushes in or pulls out on the subject | Lifestyle images, landscapes |
| Character motion | Animates facial features or body movement | UGC-style ads, talking-head content |
Match your choice to your photo type. A portrait with a clear subject works well with character motion, while a flat product shot responds better to a slow zoom. Picking the wrong motion type generates artifacts the AI cannot fix automatically.
Step 2. Prep your photo for clean motion
Prepping your photo properly is the step most people skip, and it's why their animations come out choppy or distorted. A few minutes of prep work before you even open an AI tool will produce noticeably cleaner motion and save you from redoing the entire process after a failed export.
Crop and resize before you upload
Most AI animation tools process images at a fixed internal resolution. Uploading an image that already matches your target aspect ratio prevents the tool from auto-cropping in ways you didn't intend. Resize your photo to 1080x1920 for vertical content or 1920x1080 for horizontal, and do it manually before you upload.
Letting the AI tool handle resizing almost always results in unexpected cropping around your subject.
Clean up distracting edges
When you learn how to animate a photo with AI, you'll notice the edges of the frame move the most. Busy or cluttered edges create visible artifacts during motion. Use a free tool like Google Photos or any basic photo editor to simplify the border areas of your image. Removing a distracting background element at the edge takes under a minute and makes a visible difference in the final clip.
Step 3. Animate the photo with an AI tool
This is where your prepped image becomes a moving asset. When you learn how to animate a photo with AI, the actual generation step takes less than two minutes if your image and settings are correct. Getting your inputs right before you hit generate is what separates a clean result from an artifact-filled clip you can't use.
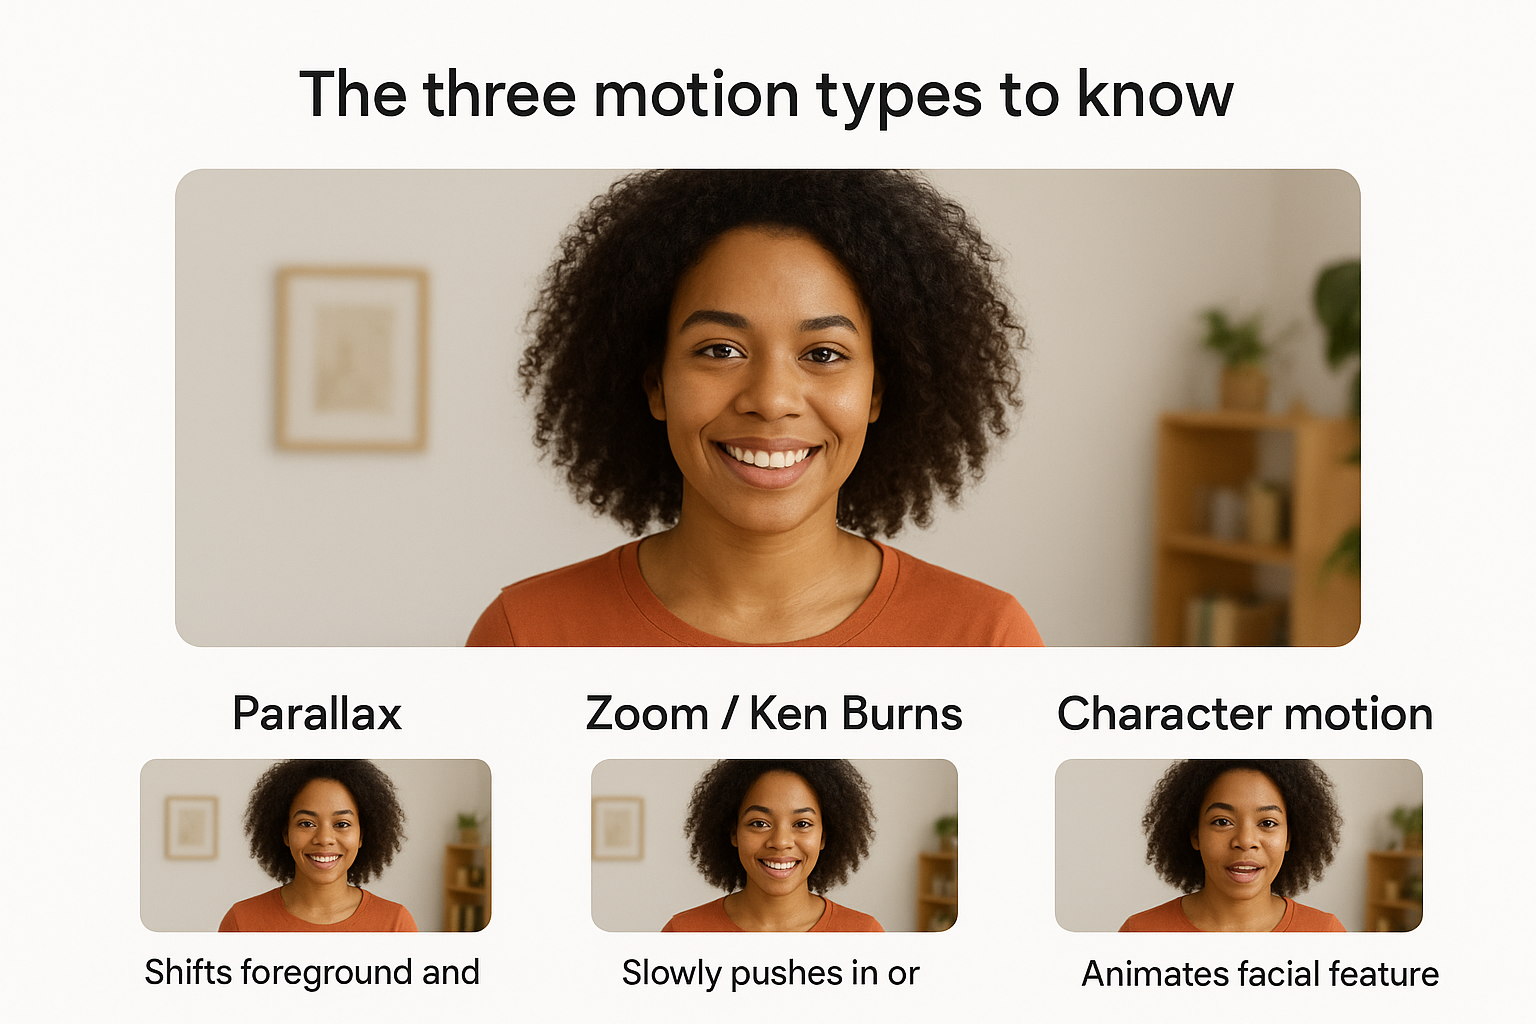
Upload and configure your settings
Open your AI tool and upload your resized photo. Once it loads, set your animation style (from Step 1), your clip duration, and your output resolution before you do anything else. Most tools display these as simple dropdowns. Use this configuration checklist to avoid missing a setting:
- Duration: 6 to 10 seconds for ads, up to 15 seconds for organic posts
- Resolution: 1080p minimum for professional use
- Motion intensity: Start at a low or medium setting, you can increase it on a second pass
- Frame rate: 24fps for cinematic feel, 30fps for social platforms
Always preview the animation inside the tool before exporting, most platforms let you scrub through a low-res preview at no credit cost.
Run the animation and review
Hit generate and watch the first few frames when the preview loads. Check for warping around your subject's edges or unnatural stretching in the background. If either issue appears, reduce motion intensity and regenerate before you move to export.
Step 4. Export, post, and avoid common issues
Once your preview looks clean, export settings determine whether your finished clip holds up on the platform where you post it. The last thing you want after learning how to animate a photo with AI is a great-looking preview that exports as a low-quality file you can't use.
Choose the right export settings
Match your export format to your destination platform before you click the final export button. Use the table below as a quick reference.
| Platform | Format | Resolution | Max length |
|---|---|---|---|
| TikTok / Reels | MP4 (H.264) | 1080x1920 | 15 seconds |
| YouTube Ads | MP4 (H.264) | 1920x1080 | 15 seconds |
| Landing page | MP4 or WebM | 1920x1080 | 10 seconds |
Download the highest quality option your tool offers, you can always compress later, but you cannot recover lost quality.
Fix the three most common problems
Most export issues fall into a predictable pattern. Knowing what to look for before you post saves you from uploading a broken file.
- Flickering edges: Reduce motion intensity by one level and regenerate
- File too large to upload: Use Google's Squoosh to compress without visible quality loss
- Choppy playback: Re-export at 30fps instead of 24fps
Quick recap and next step
You now have a complete, repeatable process for how to animate a photo with AI from source image to finished export. Start with a high-resolution, clean photo, pick an animation style that matches your subject, prep the image before you upload, configure your settings carefully, and export in the format your platform requires. Following those steps in order is what separates a polished result from a wasted afternoon of failed attempts.
The four-step process works with most free online tools, but it gets significantly faster when your image generation, animation, voiceover, and export all live in one place. Switching between multiple apps adds friction and introduces quality loss at every transfer point. If you want to cut that friction and produce finished video ads from a single image in one workflow, try Starpop's image-to-video pipeline and see how quickly a single photo becomes a ready-to-post asset.