Contents
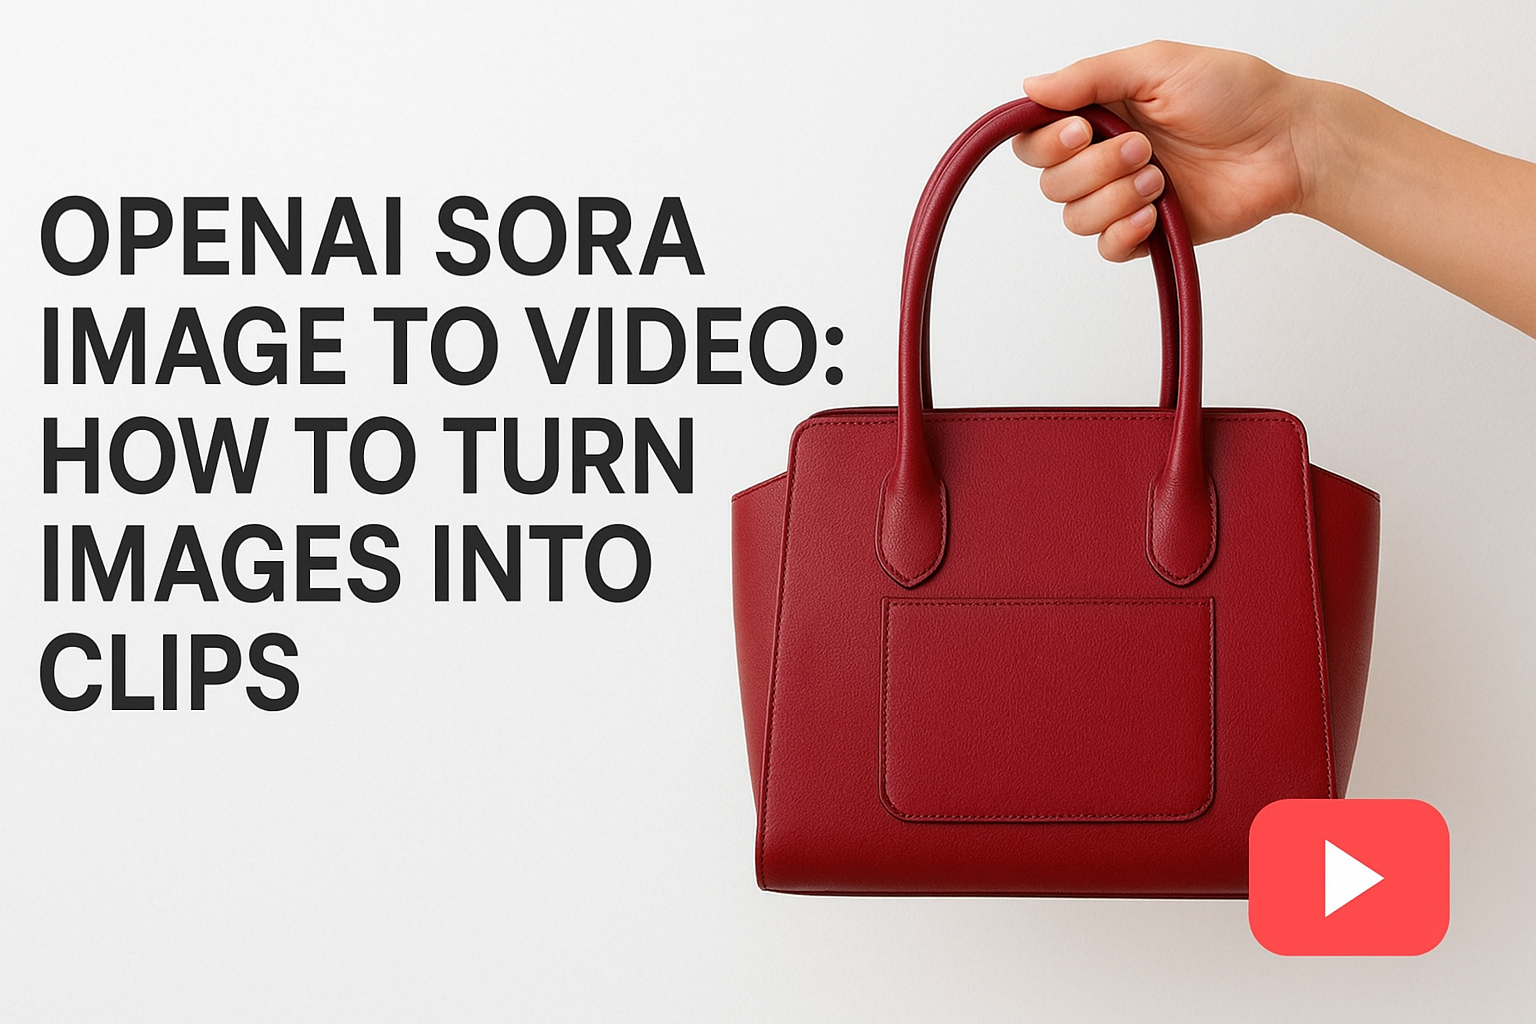
0%A single product photo can now become a full video ad, no filming, no editing timeline, no production crew. OpenAI Sora image to video is one of the most practical AI capabilities available right now, and it's changing how marketers and brand owners produce scroll-stopping content from assets they already have.
The process itself is straightforward, but getting quality results that actually work for ads and social content takes some know-how. Settings matter. Prompt structure matters. And the platform you use to access Sora can make a real difference in your output, which is exactly why we built Starpop to give you direct access to Sora alongside other frontier models like Kling, Veo, and ElevenLabs, all in one workspace designed for marketing content.
This guide walks you through everything: how Sora's image-to-video feature works, step-by-step instructions to turn your static images into clips, tips for getting better results, and how to fold this into a real content production workflow instead of treating it as a one-off experiment.
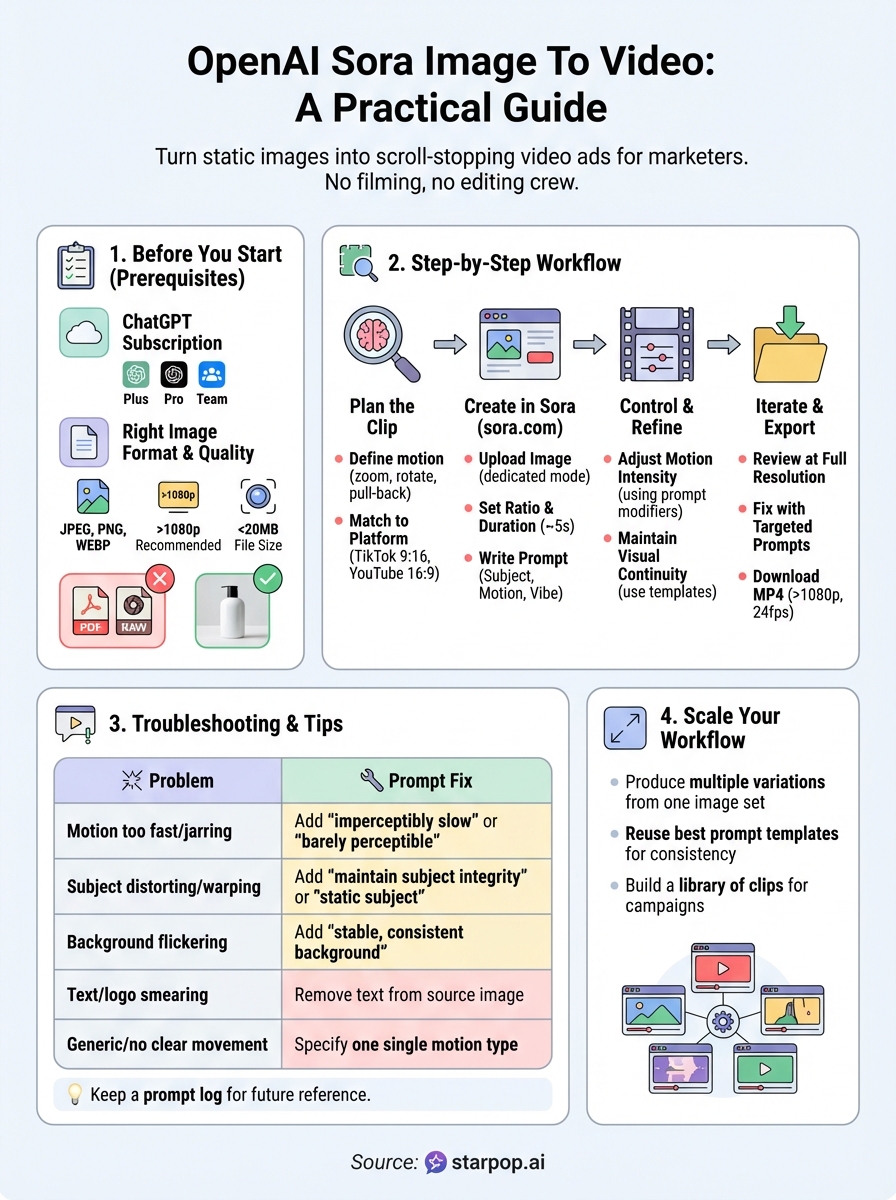
What you need before you start
Before you generate your first clip, take five minutes to confirm you have the right setup. Jumping straight into the OpenAI Sora image to video tool without the correct account type or a properly prepared source file is the fastest way to hit a wall. Getting these basics sorted upfront saves you from wasted credits, frustrating upload errors, and blurry outputs that are unusable in any real campaign.
A ChatGPT subscription that includes Sora access
Sora is not available on the free tier of ChatGPT. You need an active ChatGPT Plus, Pro, or Team subscription to use it. Once you're subscribed, go to sora.com and log in with your OpenAI account credentials. The Sora interface will load with a few generation modes, including a dedicated option for image-to-video, which is where you'll be working.
If you're on a Team plan, check that your workspace admin has enabled Sora access for your role before you spend time trying to troubleshoot a permissions issue.
Usage limits vary by plan. Plus subscribers receive a set number of priority generations per month, while Pro subscribers unlock higher generation caps and access to the highest available resolution and duration settings. If you plan to produce multiple variations of the same clip, audit your plan's limits first so you don't run out mid-project.
The right image format and quality
Sora accepts JPEG, PNG, and WEBP files for image-to-video uploads. It does not process PDFs, SVGs, or RAW camera formats, so convert those before you begin. Keep your file size under 20MB to avoid upload failures.
Your output quality is directly tied to your input quality. A low-resolution or heavily compressed image will produce a soft, inconsistent video, no matter how good your prompt is. Start with the highest resolution version of your image you have available. Aim for at least 1080p, and make sure the subject is sharp, well-lit, and in clear focus. Shots with a lot of digital noise, harsh shadows across the main subject, or motion blur from the original capture tend to give Sora less to work with and produce weaker results.
Use this checklist before you upload:
- Format: JPEG, PNG, or WEBP only
- Resolution: 1080p or higher recommended
- Subject clarity: one clear focal point without excessive clutter
- Lighting: even and well-lit, minimal harsh shadows
- File size: under 20MB
What Sora can and cannot animate
Understanding the tool's actual limits before you start helps you pick the right source images and write better prompts. Sora handles organic, physically plausible motion well. A product rotating slowly, a model's hair moving in a breeze, a camera pulling back from a scene, or fabric rippling in wind all tend to produce natural-looking results.
Where Sora produces inconsistent results: text or logos inside the image frequently warp, smear, or disappear during animation. Heavily detailed backgrounds with complex geometry can produce flickering or incoherent motion in areas far from the main subject. Extreme close-ups of faces sometimes result in unnatural micro-movements that look artificial.
For marketing content specifically, your best source images are product shots on clean backgrounds with room around the subject, lifestyle images with a single clear focal point, or scenes where the intended motion is simple and physically grounded. The more clearly Sora can identify what the subject is and where it exists in space, the better your output will be.
Step 1. Plan the clip you want from the image
Most failed OpenAI Sora image to video outputs aren't a tool problem, they're a planning problem. Jumping straight to the upload without knowing what motion you want, what the clip is for, or how long it needs to run leads to generic, unusable results. Spending two minutes thinking through the clip before you touch the interface gives you a tighter prompt and a far better output.
Define the motion before you write the prompt
Motion type is the single most important decision you make before generating. Sora responds well to specific, physically grounded instructions, not vague directions like "make it move," which produce random and often unnatural animation. Pick one primary motion and commit to it. Common motion types that perform well in marketing content include a slow zoom-in toward the subject, a subtle environmental movement like wind or fabric ripple, a camera pull-back that reveals more of the scene, or a gentle product rotation.
Committing to one motion type per clip almost always produces a cleaner, more usable output than layering multiple movements into a single prompt.
Use this reference list when you're deciding what motion fits your image:
- Camera moves: zoom in, zoom out, pan left or right, dolly back, crane up
- Subject moves: rotate, tilt, shift forward, hover in place
- Environmental moves: wind through hair or fabric, water ripple, smoke drift, light shimmer
- Combined option: slow zoom-in while the product rotates gently
Match your clip goal to the image you have
Before writing a single word of your prompt, confirm that your source image can actually support the motion you want. A flat product photo on a white background works well for a slow zoom or rotation, but it won't produce convincing environmental motion because there's nothing in the background to animate. A lifestyle shot with depth, natural texture, and a clear focal point gives Sora far more information to work with and typically produces stronger results.
Your intended platform also shapes what you plan for. A TikTok vertical ad needs different pacing and framing than a YouTube pre-roll or a paid Meta placement. Decide the aspect ratio, the rough duration (3 to 5 seconds covers most ad formats), and whether the clip needs to stand alone or feed into a longer cut. Locking those decisions before you generate keeps your output on brief and cuts down on rework.
Step 2. Create an image-to-video in Sora on sora.com
With your image prepared and your motion plan locked, you're ready to run the OpenAI Sora image to video process directly in the Sora interface. The steps below follow the current layout at sora.com, so your screen should match what's described here.
Upload your image and select the right mode
Open sora.com and log in with your OpenAI account credentials. On the main generation screen, look for the image upload icon on the left side of the prompt bar. Click it, then select your prepared file from your device. Sora will display a preview thumbnail once the upload completes. Confirm the image loaded correctly before you do anything else, a corrupted or partially uploaded file produces broken output and wastes a generation.
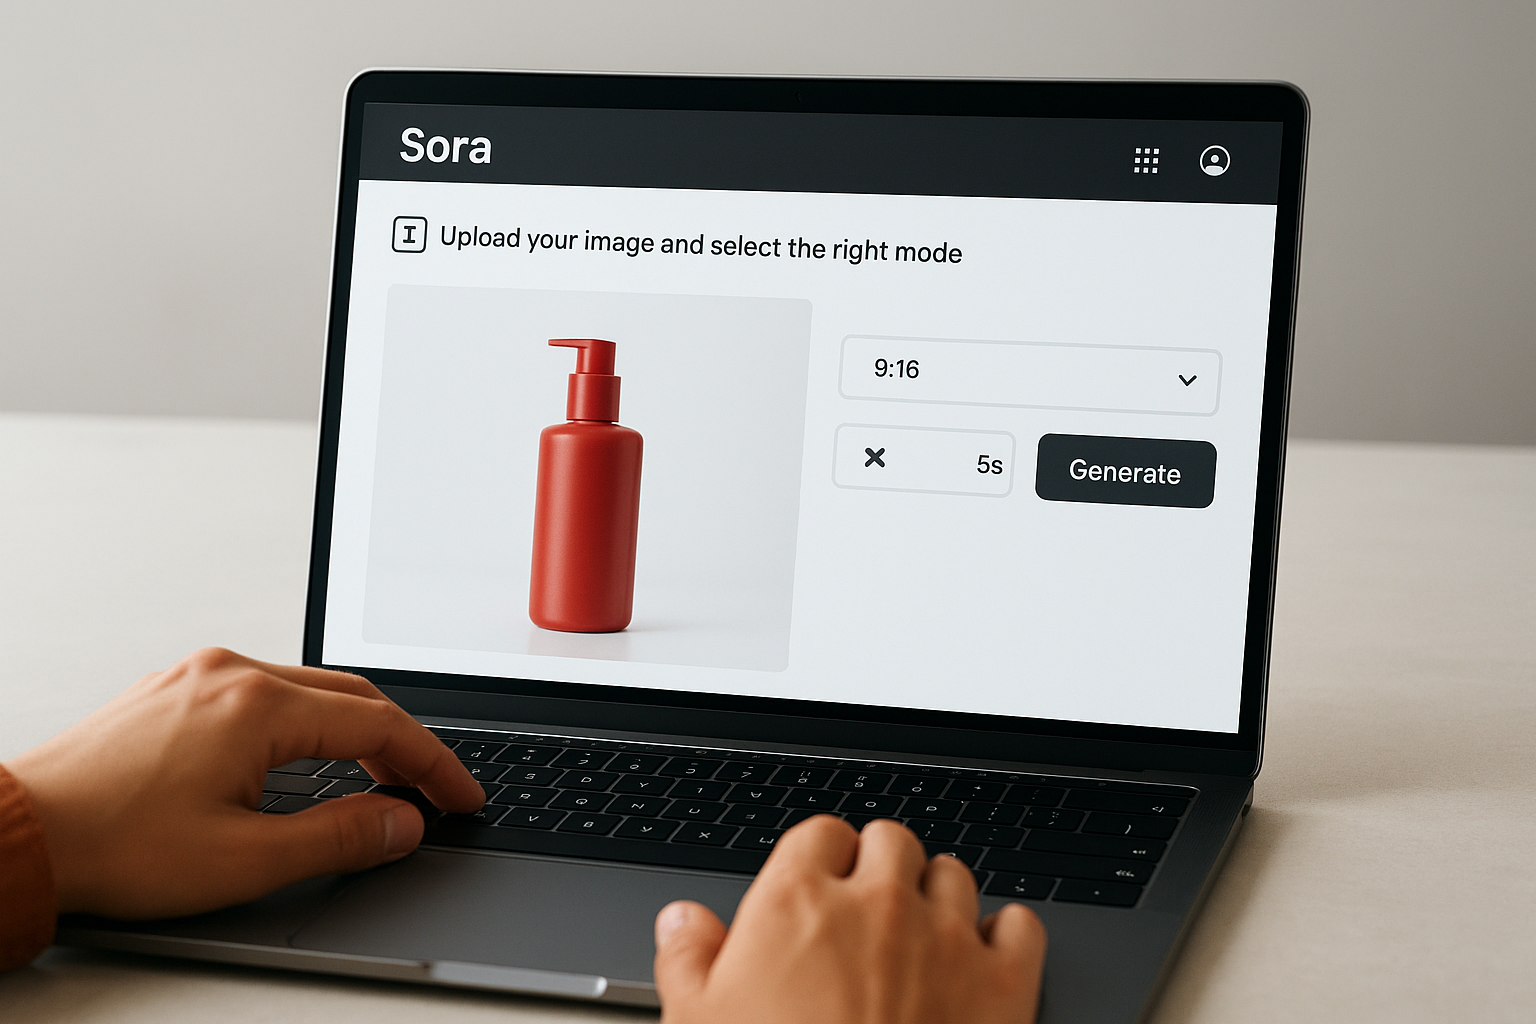
After uploading, locate the aspect ratio selector and set it to match your intended platform. Use 9:16 for TikTok or Instagram Reels, 1:1 for feed posts, and 16:9 for YouTube or horizontal placements. Set your duration next. For most ad formats, 5 seconds is the practical sweet spot: long enough to show motion clearly, short enough to keep file sizes manageable and pacing tight.
Locking aspect ratio and duration before you write your prompt prevents you from having to regenerate just because the framing was wrong.
Write a prompt that directs the animation
Your prompt tells Sora what to do with the image you uploaded. Keep it specific and concise, covering three things: what the main subject does, how the camera moves, and what the overall feel is. Vague prompts produce generic motion. Specific prompts give Sora a clear instruction set to follow.
Use this prompt structure as a starting template:
[Subject action] while [camera movement]. [Lighting or atmosphere detail]. Slow, smooth motion. [Aspect ratio and duration if needed].
Concrete example: "The skincare bottle rotates slowly clockwise while the camera zooms in slightly. Soft studio lighting, clean white background. Smooth, cinematic motion. 5 seconds."
Once your prompt is written and your image is confirmed, hit Generate. Sora will queue your request and return your clip within a few minutes depending on server load. Download the output immediately and review it at full resolution before moving on to any adjustments. Check for subject clarity, motion smoothness, and whether the clip edges cut cleanly without abrupt stops or visual glitches.
Step 3. Control motion, camera, style, and continuity
Getting a clip out of the OpenAI Sora image to video workflow is one thing; getting a clip that matches your brand's look and cuts cleanly into a sequence is another. Once your first output is returned, the real work is dialing in motion intensity, camera behavior, and visual consistency so your clip is actually usable at scale.
Adjust motion intensity and camera behavior
Sora gives you control over how fast and how far the animation moves, but that control comes entirely through your prompt language. There is no speed or intensity slider in the interface. Instead, you direct these qualities with descriptive modifiers layered directly into your prompt text.
Adding a single modifier like "imperceptibly slow" or "fast, dynamic push" changes the output dramatically, so treat these words as direct dials you turn up or down.
Use this reference table to match the motion feel you want with the right prompt language:
| Motion Feel | Prompt Modifier to Use |
|---|---|
| Very slow, subtle | "imperceptibly slow," "barely perceptible movement" |
| Smooth and cinematic | "slow, smooth motion," "gentle drift" |
| Energetic, fast-paced | "fast, dynamic," "quick push," "rapid zoom" |
| Stable camera, subject moves | "locked-off camera," "static camera angle" |
| Moving camera, static subject | "slow dolly forward," "smooth crane up" |
Maintain visual continuity across clips
If you are producing multiple clips from the same image or a series of related images, visual consistency is what makes the final sequence feel intentional rather than disjointed. Your prompt structure, lighting description, and motion type need to stay uniform across each generation so outputs share a recognizable look.
Build a prompt template you reuse for every clip in the set. Lock the lighting description, the motion style modifier, and the camera direction so each output shares the same baseline. Here is a working template:
[Subject action], [camera movement]. [Lighting description, e.g., soft diffused studio light].
[Atmosphere or mood, e.g., clean and minimal]. Slow, smooth motion.
[Duration] seconds, [aspect ratio].
Paste this into a plain text file and fill in only the subject-specific details each time. Keeping the fixed elements identical across every generation is the fastest practical way to build a batch of clips that feel like they belong together in one campaign.
Step 4. Iterate, troubleshoot, and export clean outputs
Your first output from the OpenAI Sora image to video process rarely needs zero changes. Most clips need one or two refinements before they're ready to use in a real campaign. Build iteration into your workflow as a standard step rather than a sign something went wrong, and you'll move through it faster and with less frustration.
Read the output before you regenerate
Watch your clip at full resolution before you change anything in your prompt. Play it through at least twice and identify the specific problem: is the motion too fast, is the subject distorting, is the background flickering? Pin down exactly what broke, because changing the wrong part of your prompt wastes a generation and sometimes introduces new issues.
One specific change per iteration is the fastest path to a clean output. Changing multiple prompt elements at once makes it impossible to know what actually fixed the problem.
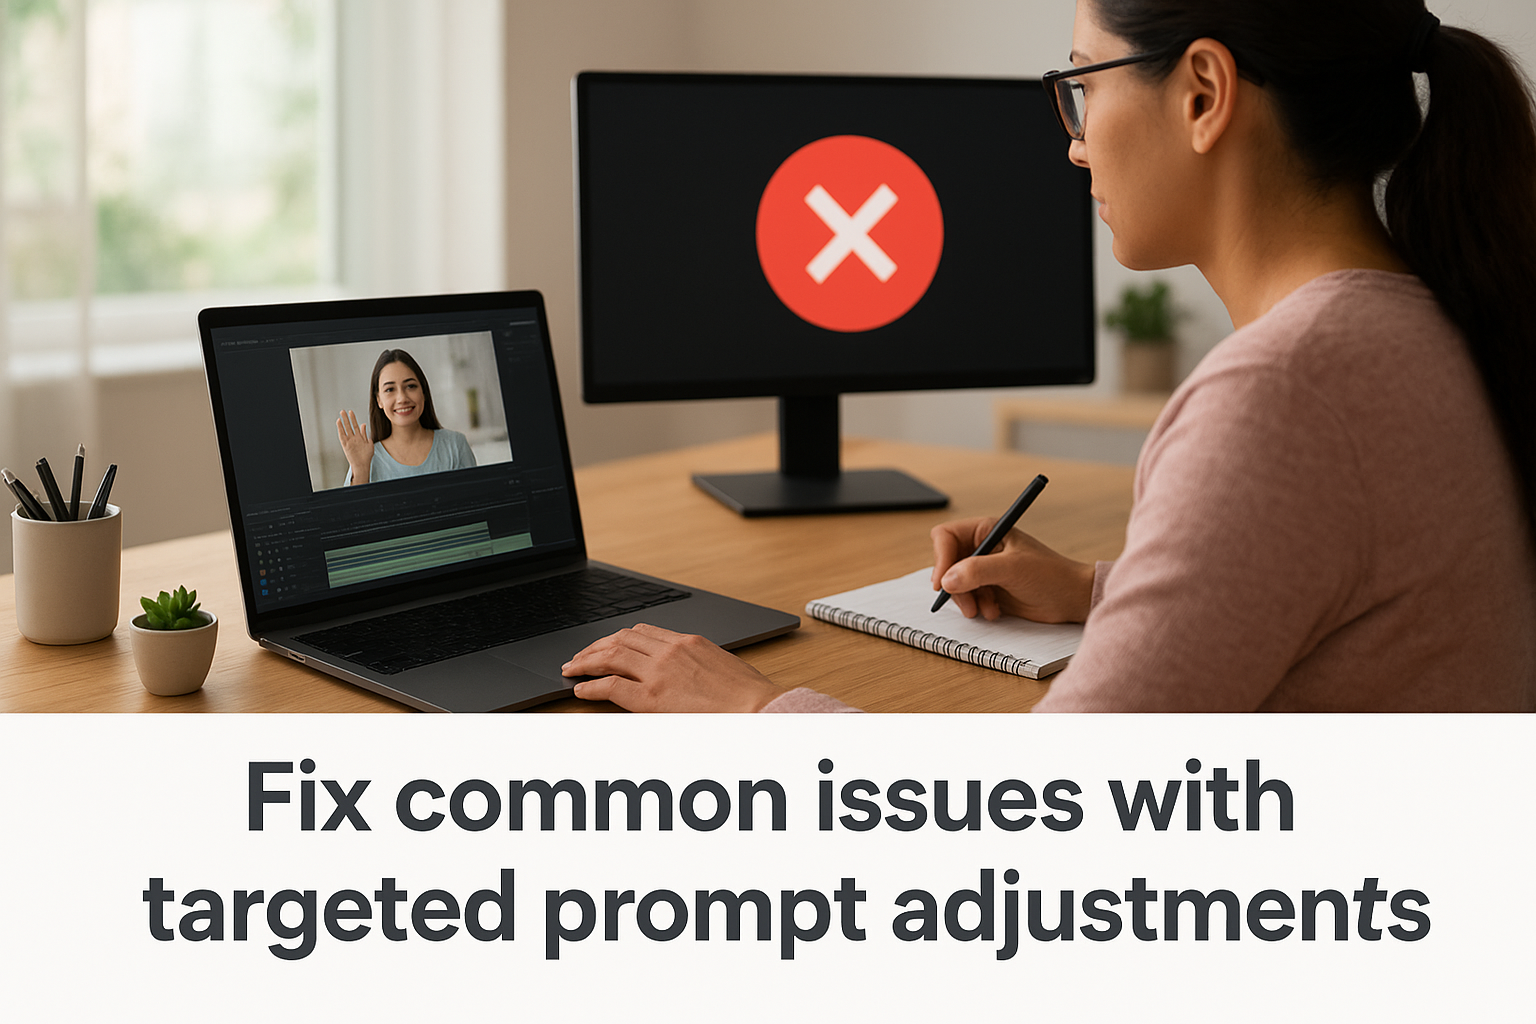
Fix common issues with targeted prompt adjustments
Once you know what the specific problem is, match it to a targeted fix. The table below maps the most common output issues to the prompt adjustments that resolve them:
| Problem | Prompt Fix |
|---|---|
| Motion is too fast or jarring | Add "imperceptibly slow" or "barely perceptible motion" |
| Subject is distorting or warping | Add "maintain subject integrity" or "subject stays static" |
| Background is flickering | Add "stable, consistent background" |
| Text or logo is smearing | Remove text from source image before uploading |
| Clip feels generic, no clear movement | Specify one single motion type explicitly |
| Output cuts off abruptly | Restate duration in prompt: "smooth 5-second clip" |
Keep a plain text log of every prompt you run alongside the result it produced. After three or four generations, patterns emerge that show you which modifiers work for your specific image type. That log becomes a personal reference that cuts your iteration time on every future project.
Export and prep your file for use
Once your clip passes review, click the download button in the Sora interface to pull the file as an MP4. Check the resolution and frame rate in your file properties before you do anything else. For most ad placements, aim for at least 1080p and 24fps as your baseline. If the clip needs trimming or a sound layer, bring it into your editing tool before distributing.
Next steps
You now have a complete workflow for turning static images into usable video clips with the OpenAI Sora image to video tool. Start with one image you already have, run through each step in order, and produce a real clip before you try to scale anything. Getting one clean, export-ready output under your belt is worth more than planning a dozen variations you haven't tested yet.
Once you have a reliable process, the next move is volume. Producing multiple ad variations from a single image set is where this workflow pays off inside real campaigns. Save your best-performing prompt templates and reuse them across different products or audiences to build a consistent library of clips fast. If you want one workspace that gives you access to Sora alongside Kling, Veo, ElevenLabs, and 225+ marketing templates without managing separate subscriptions, try Starpop's AI content creation platform. It's built for performance marketers who need to produce and test creative at speed.